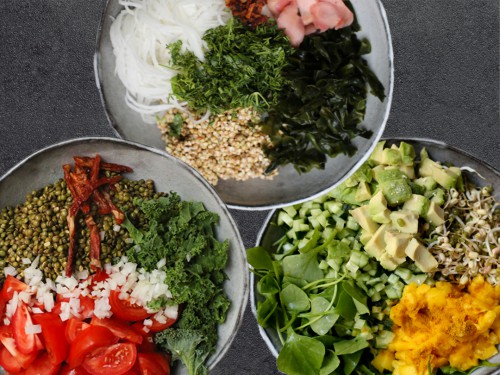
I'm in love with the raw vegan recipes. For me, it's the freshness of the ingredients and the ease of the food prep. And the recipes turn out so yummy (most of the time;), especially the desserts. Try some of my simple recipes here.
I'm passionate about eating the best food possible. I always buy organic and try to shop zero waste, in bulk and to support local farmers. For me, the people and the planet.
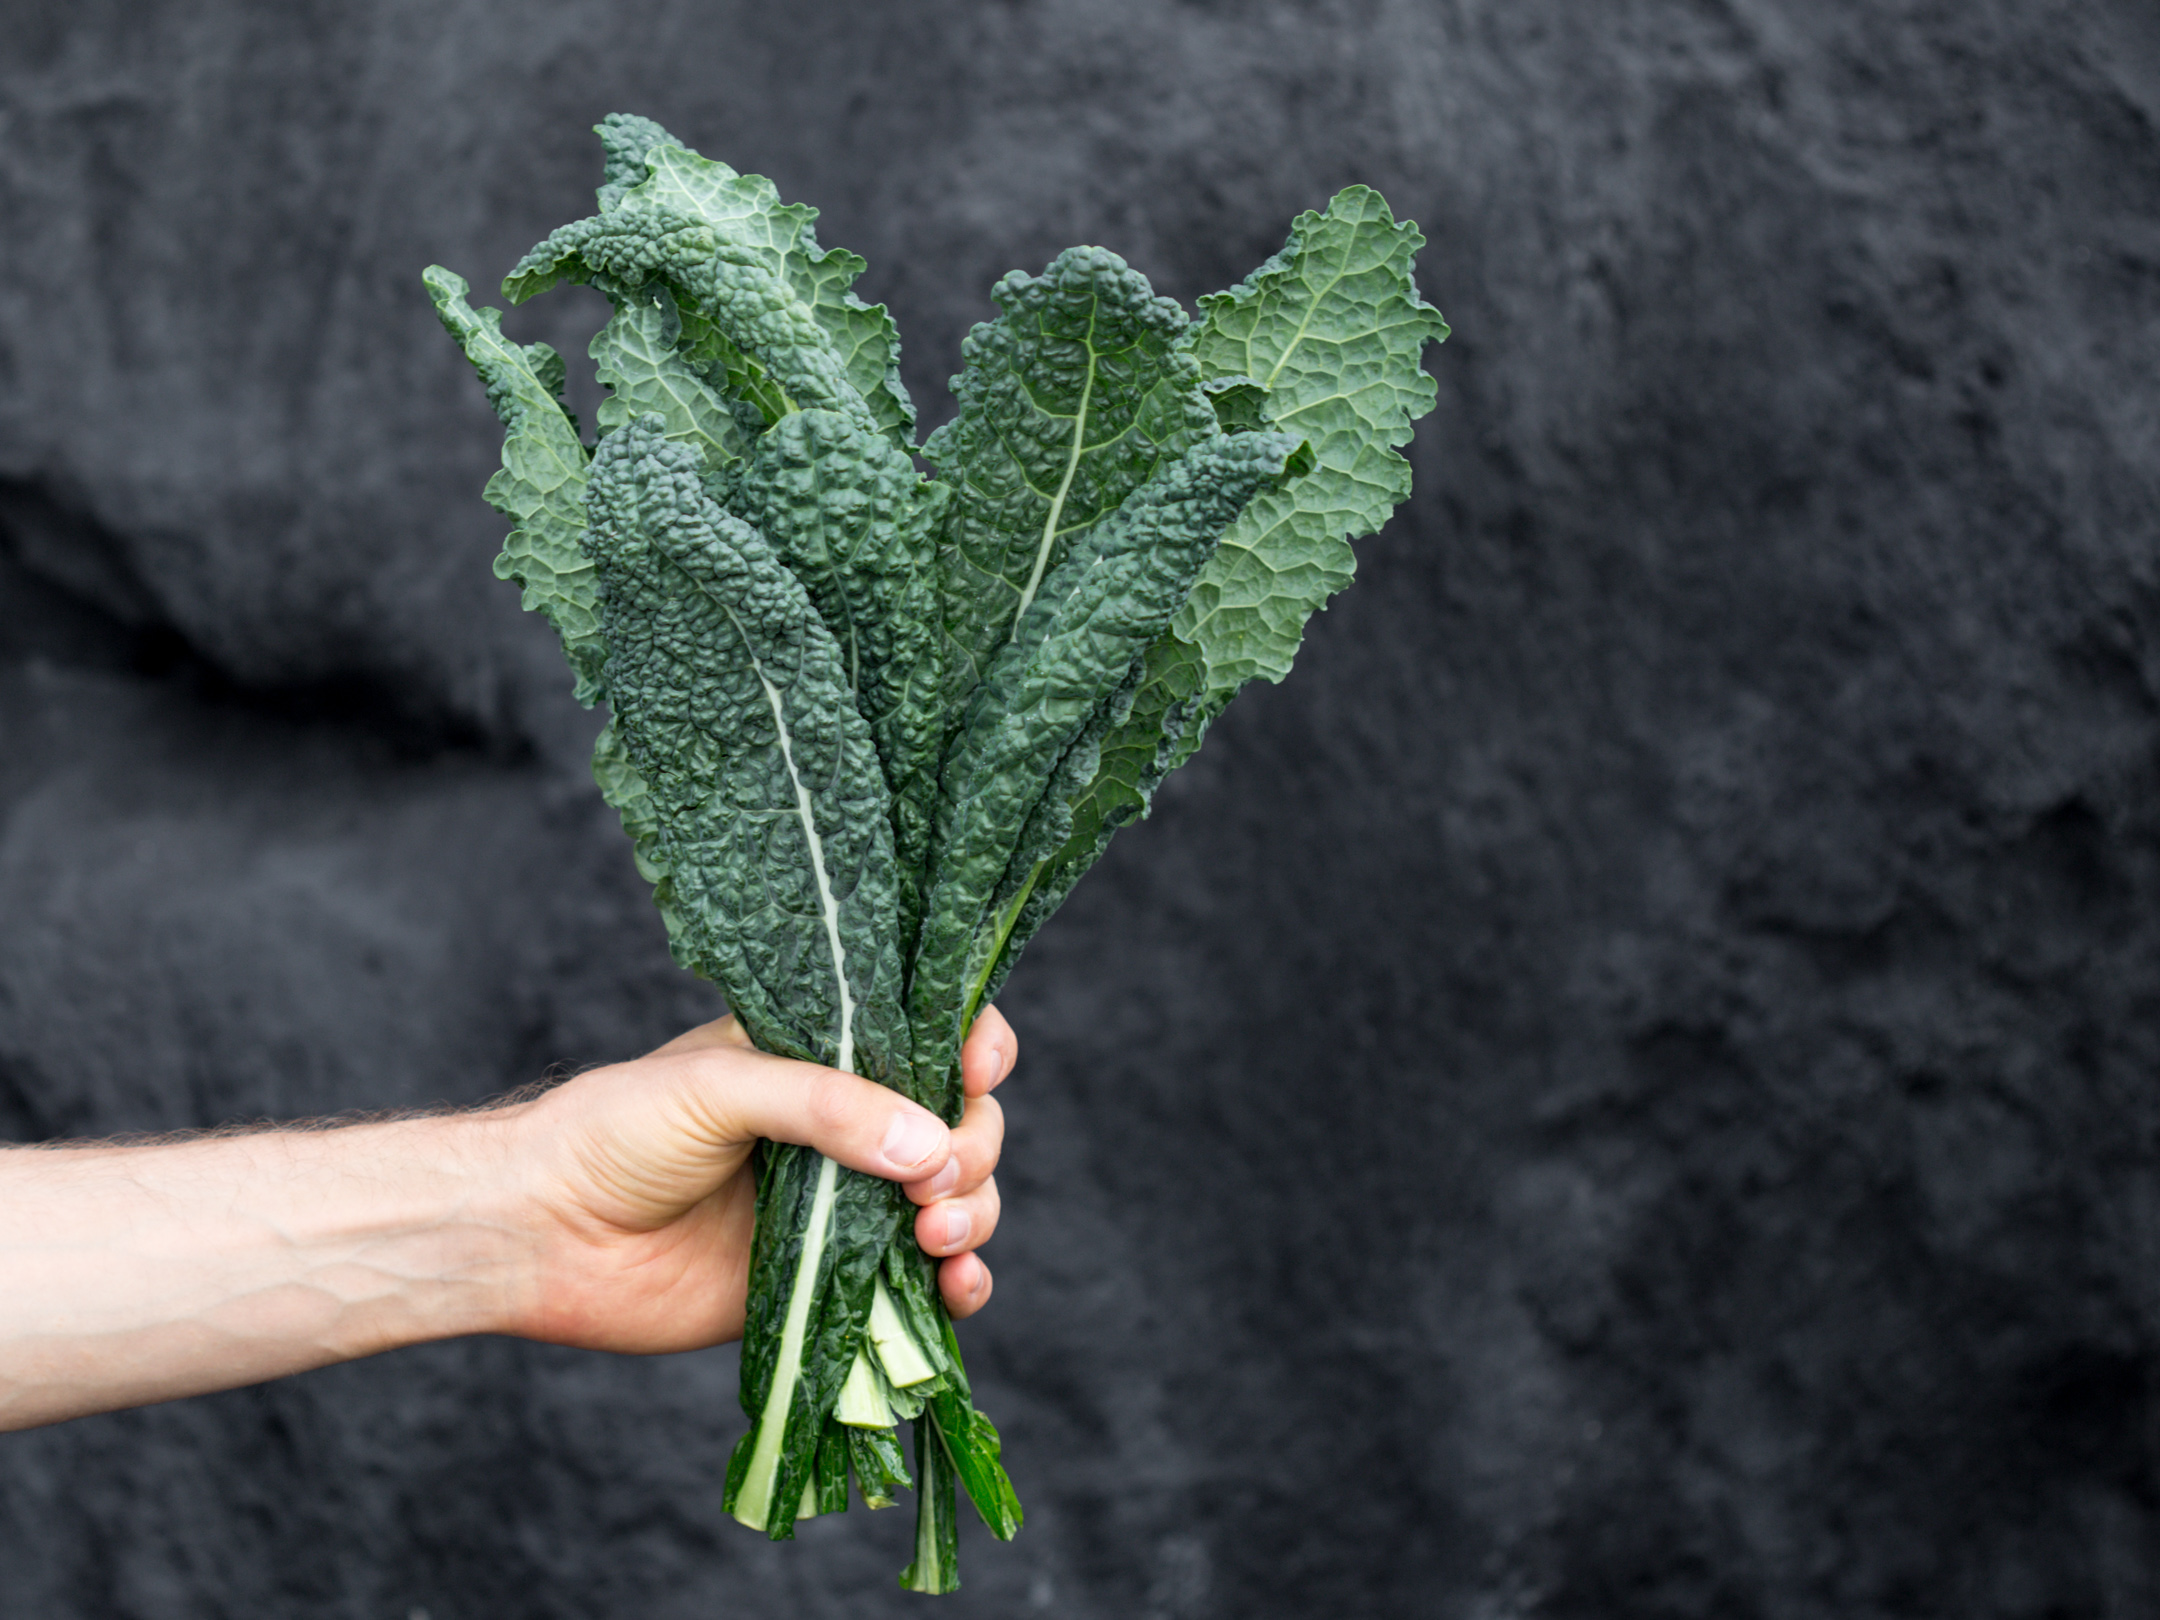
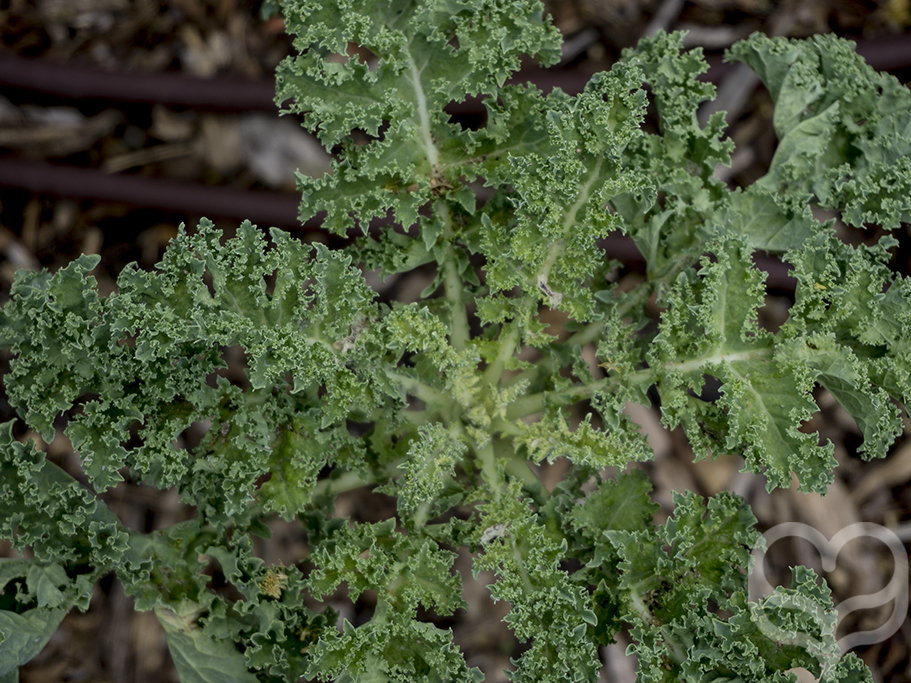
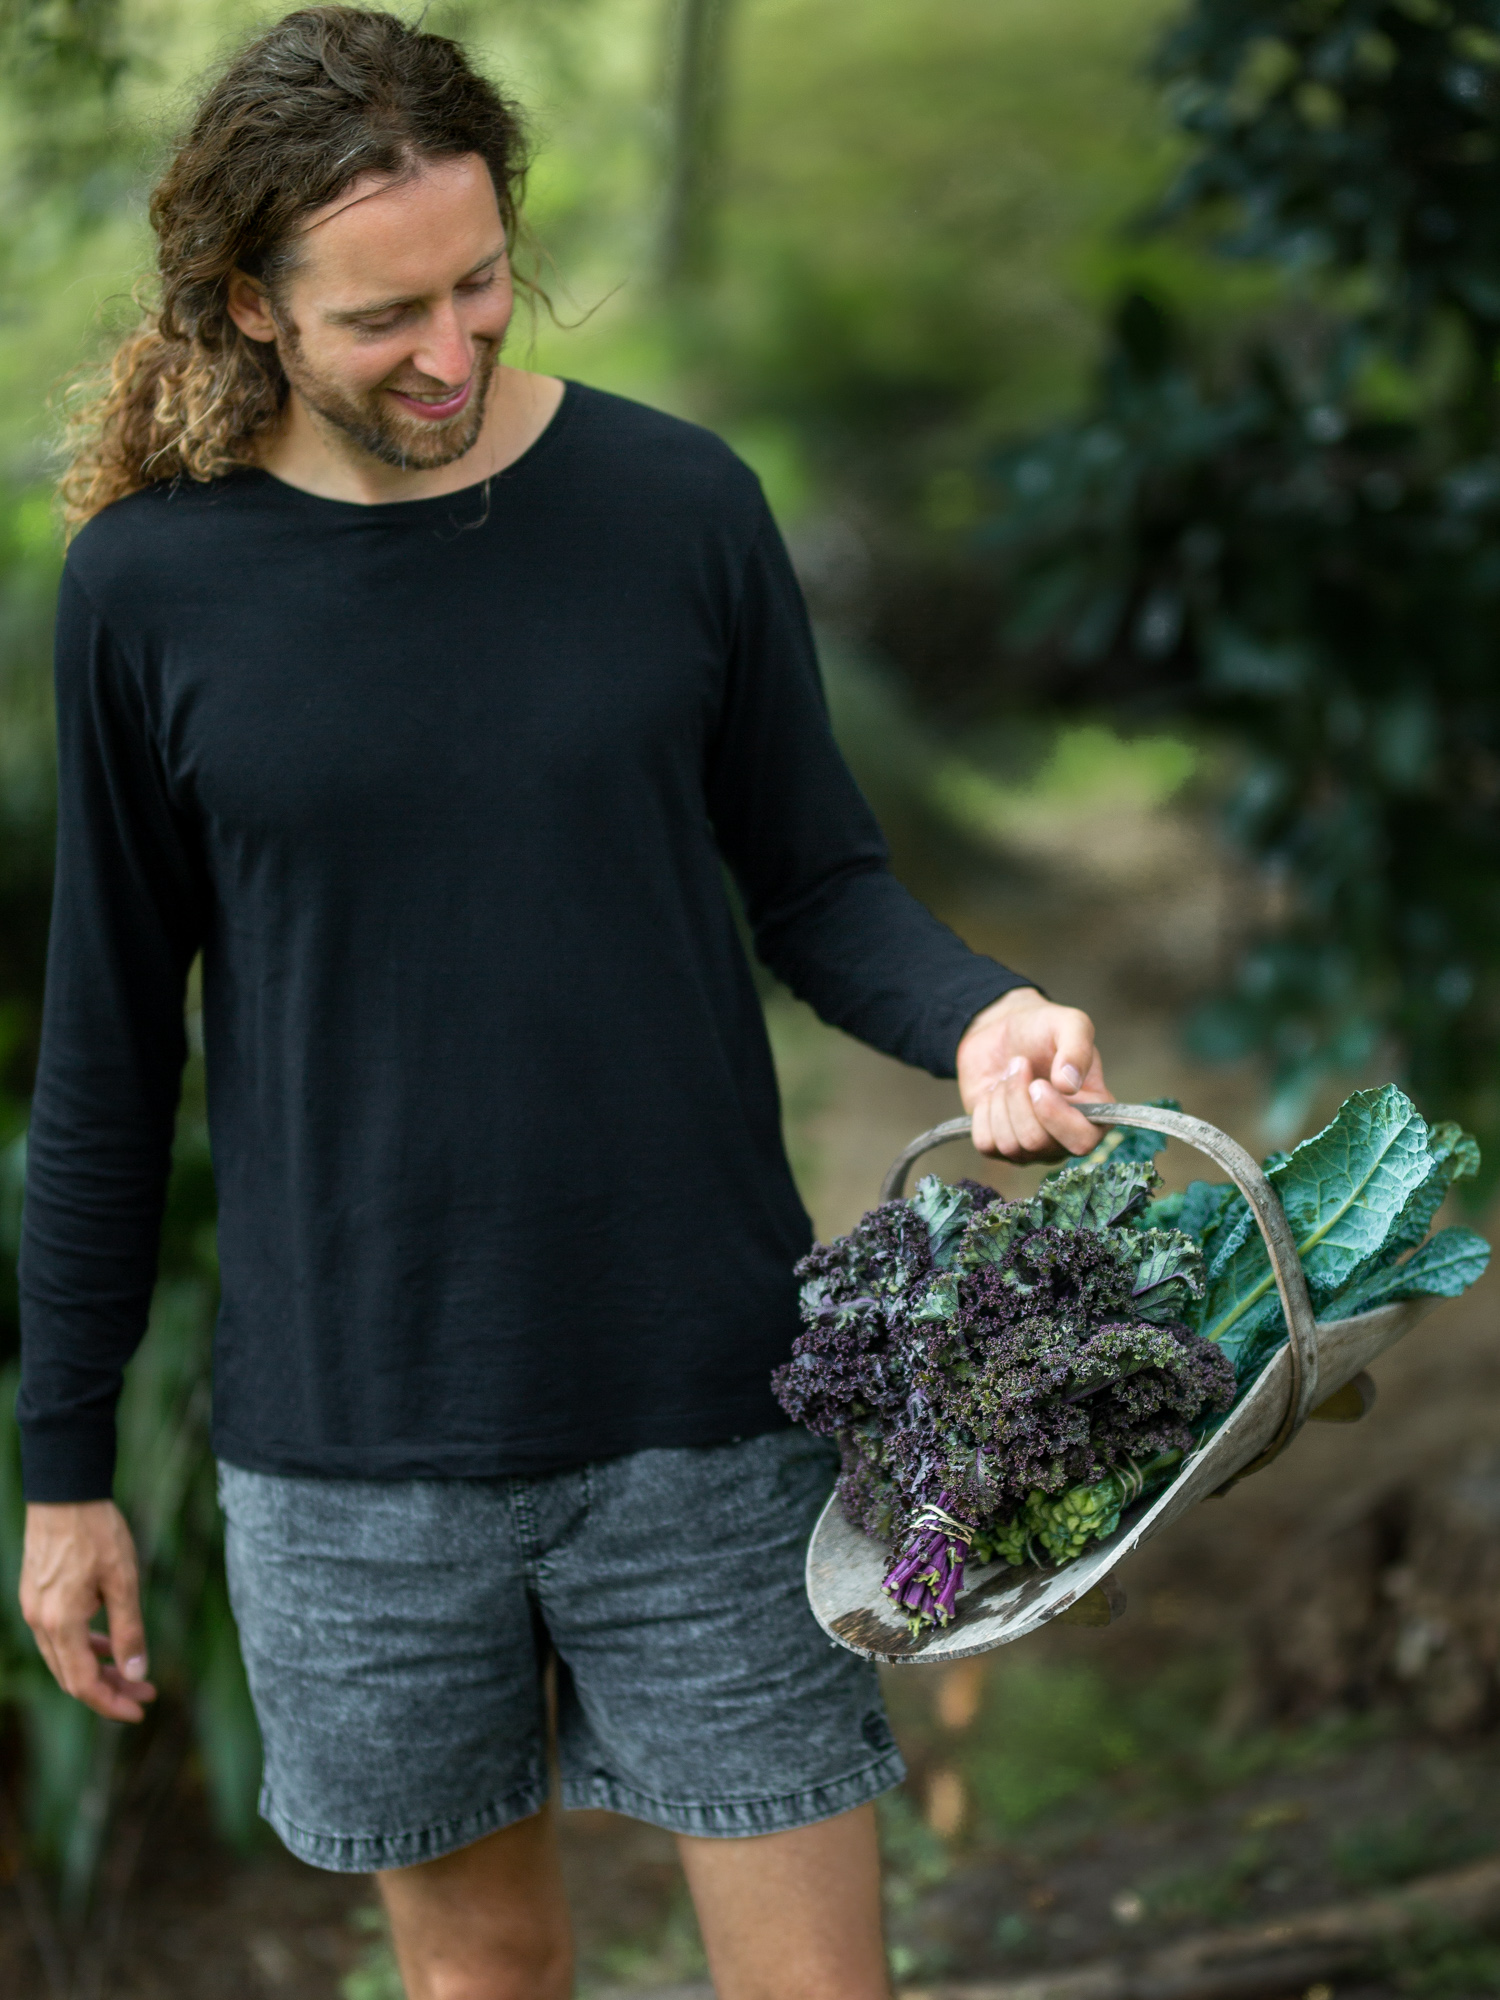
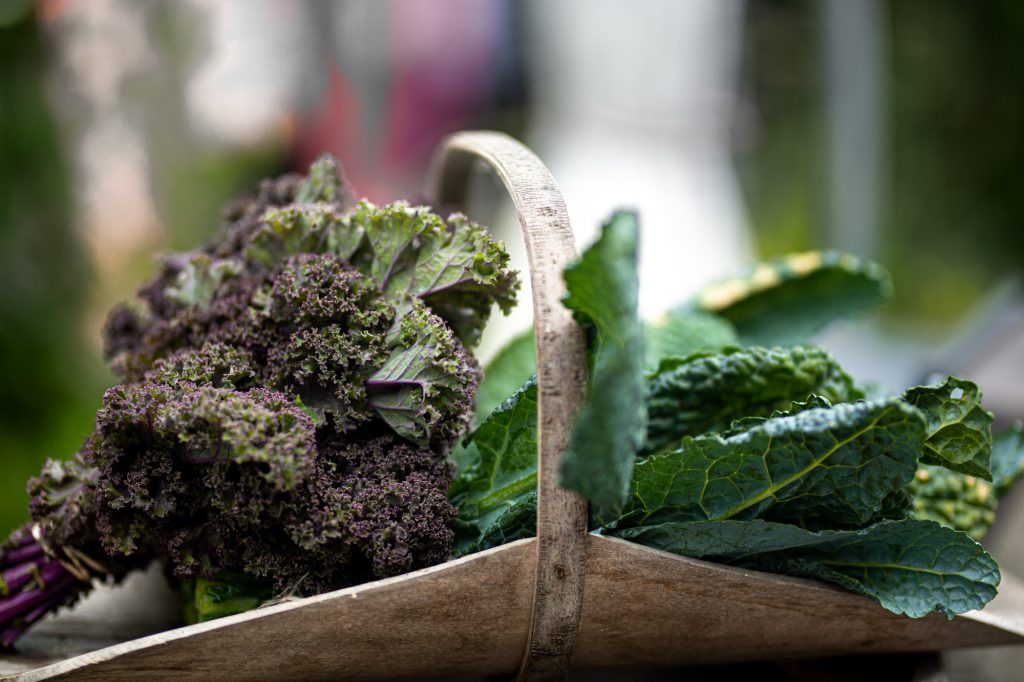
You can find different kinds of kale at health food stores and farmers market.
Some of the most common kale varieties are dino kale, curly kale, Russian kale, and black (Tuscan) kale.
Kale is a very versatile green. It’s easy to store and widely available almost anywhere around the globe in organic quality. Even during the colder period in the late autumn kale can be purchased at a local farmers market.
If you have a little garden, you can easily grow your own kale. It attracts some of the parasites and also the snails, so make sure to plant more kale that you are planning on eating. You’ll be sharing with the wildlife for sure.
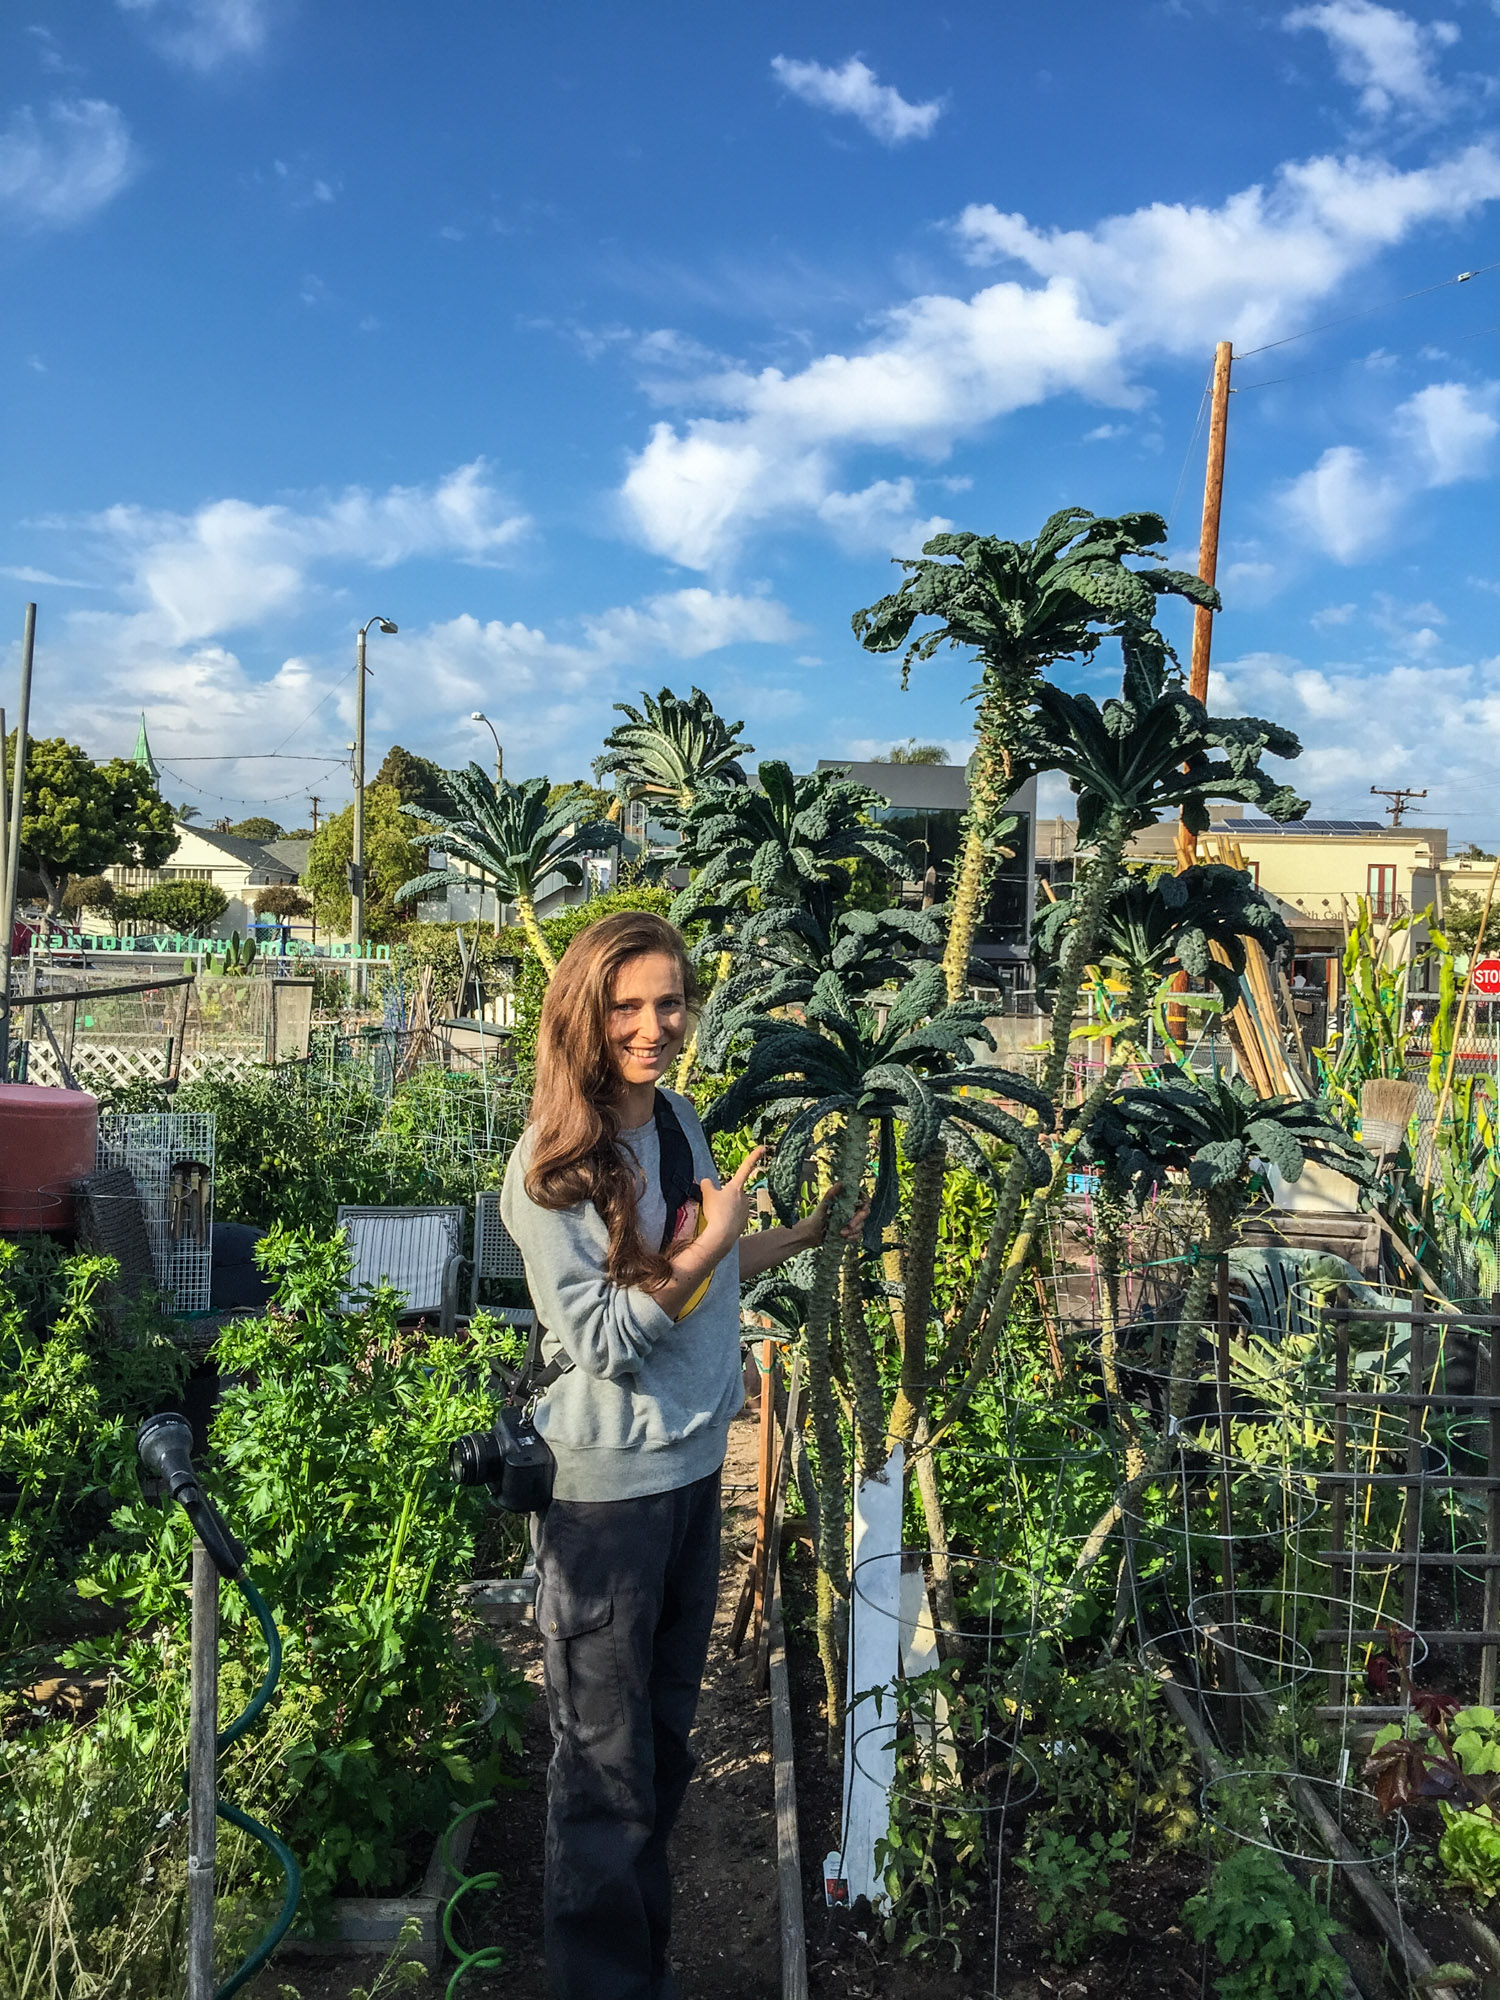
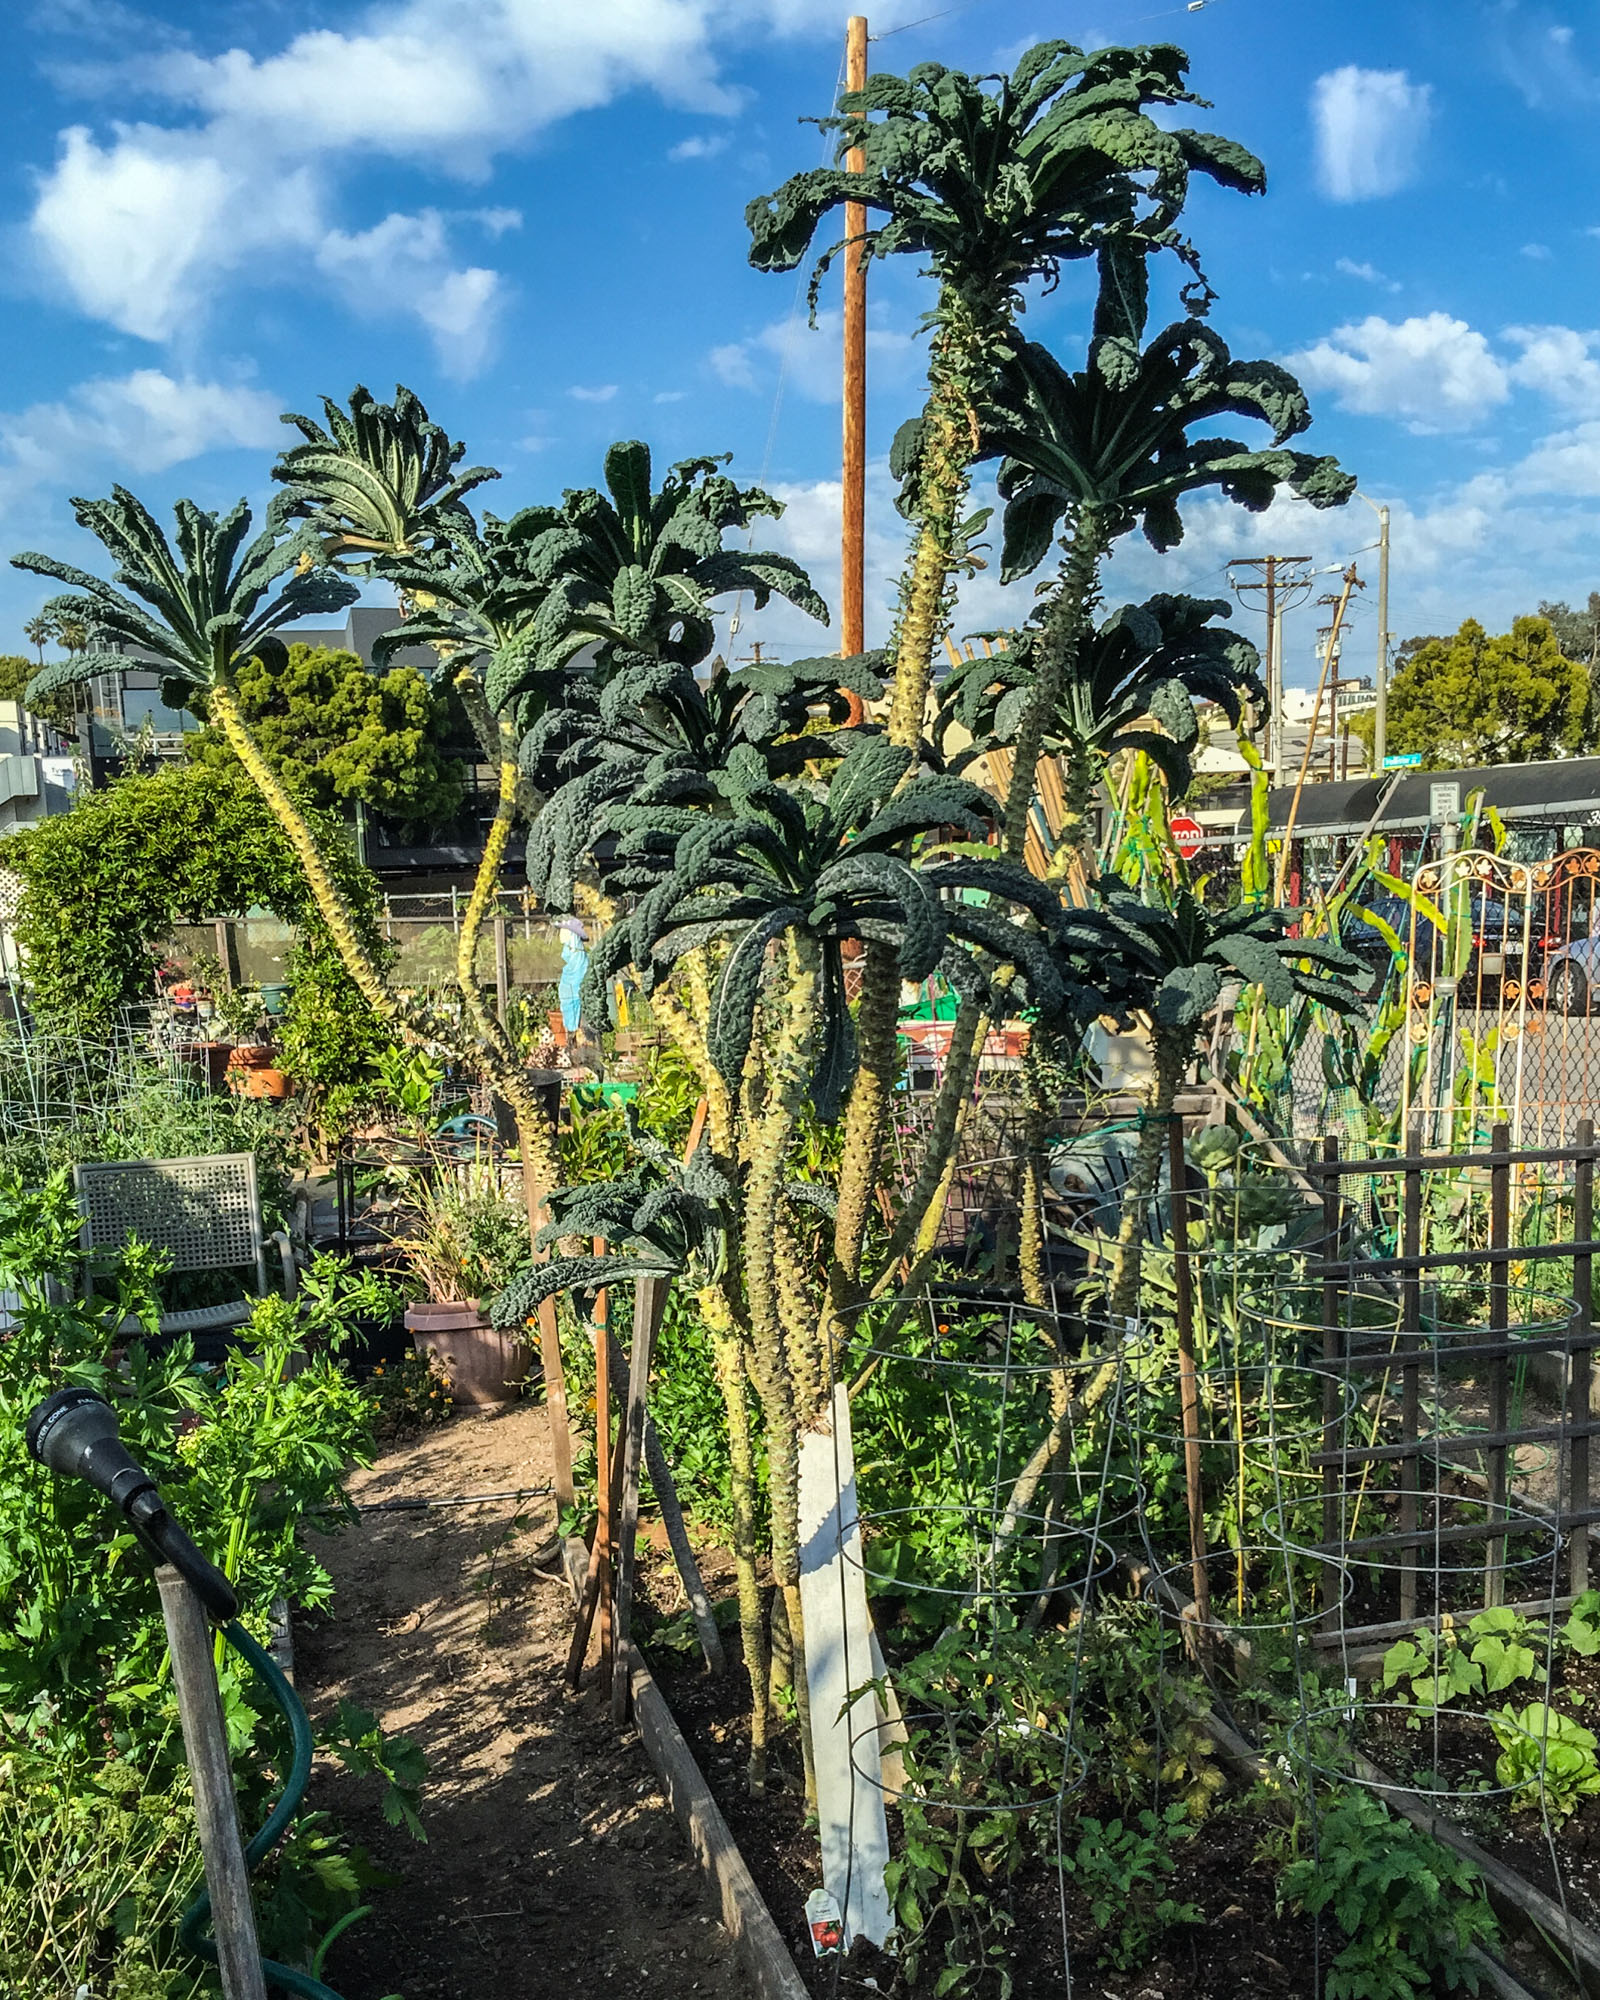
In a warmer climate kale plants can grow into a huge palms. Here is probably where the palm kill name comes from. This was a little garden community in Los Angeles close to where every state. Some people we knew were bringing their fruits scrapes to the garden and giving them to the people taking care of the garden to compost. Actually an amazing way to save the fruits scrapes from going into the landfill.
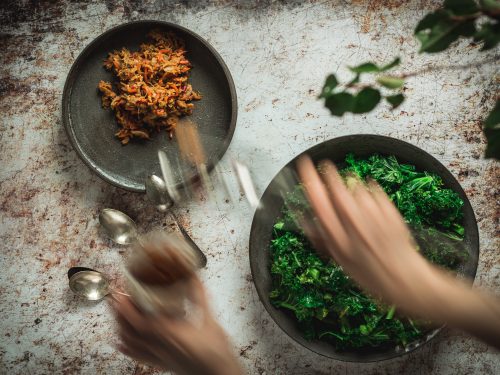
Kale prep
Here’s a little demonstration on how I prep Kaylee usually. This video was taken years ago in Costa Rica. The farm we stayed on had a huge organic greenhouse. With tons of kale plants and also some veggies, like tomatoes. The avocados in the corn came from and an organic farmers market nearby. Sorry for the German video guys, I will make sure to find the English version on Youtube or to repost it again.
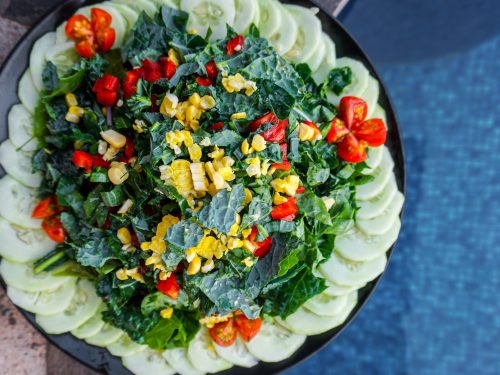
Here, Stefan made a kale salad in New Zealand. You will find more amazing recipes curated by him in his fruitadmin book.
Get the Essential Raw Vegan Recipe Book
with more than 100 recipes for more raw food in your life. The book: a simple guide I wish I had starting out with raw food. Filled with tasty recipes + shopping tips. Take a closer look here.
Recipes in the book
Most recipes are made with only a few simple ingredients. All recipes are suitable for beginners:
The huge kale palms in Los Angeles, or actually in Santa Monica, without me.
The freshest kale is the best
It’s needless to say that fresh kale is the best the tastiest in the crunchiest. I always make sure to purchase organic kale as kale attracts tons of pests. I had organic kale fully covered in spider Myers so it makes me think that conventional kale is heavily treated to prevent that. I do not mean at all to say one should be avoiding conventional or not organic produce. Not at all. It’s always better to eat greens then not to eat them, even if you can’t get organic. Buying organic is just another layer of protection for me, and I try to support organic farmers as much as they can.
How to store Kale
Kale usually lasts up to 10 days in the fridge. So if I find wilted kale at the supermarket, I know it has been sitting out there for quite some time.
But there are ways to rescue wilting kale. Cut off the stems a little and place the kale into a container with some cool tap water like you would do with fresh flowers. Let it sit in the water filled container for a couple of hours. You can place the kale with the water into the fridge if you have the space for it. I usually cover the container and the kale with a plastic bag, that I reuse over and over again.
Don’t have to space in the fridge, able to place the kale without the water into an airtight container or an plastic bag. Store it in the fridge until needed.
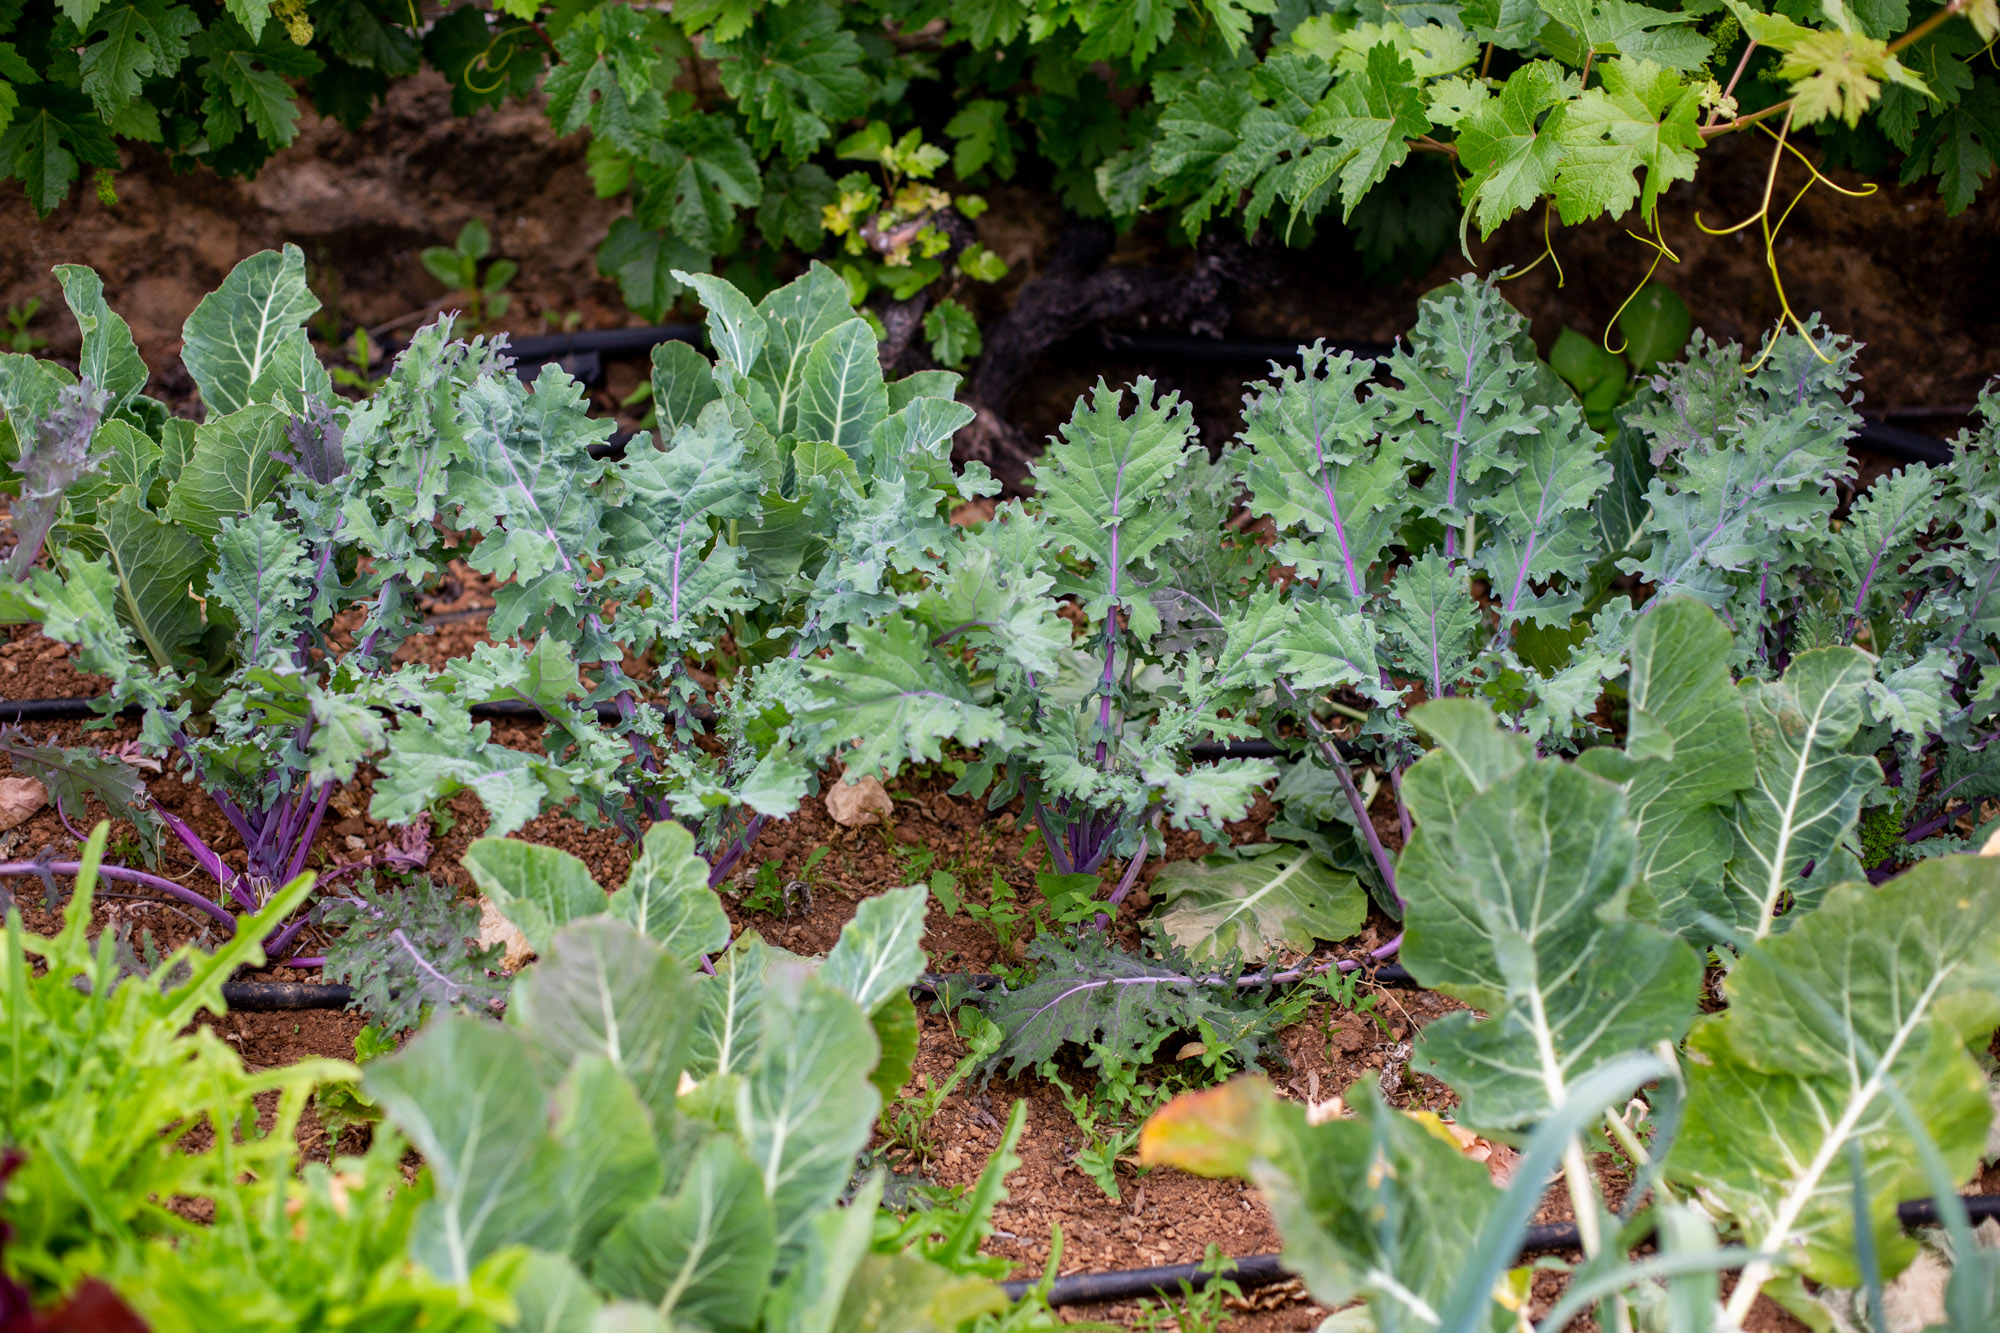
Here is an organic field in Teneriffa. You can see Russian kale growing in the back.
Here is some kale bought at an organic farmers market in Berlin at Kollwitzplatz. The tomatoes came in plastic containers, but I was able to give those back to be reused again the next time I went to the farmers market. I always try to save those paper containers and to bring them with my next market visit. So I never have to take the plastic containers home.
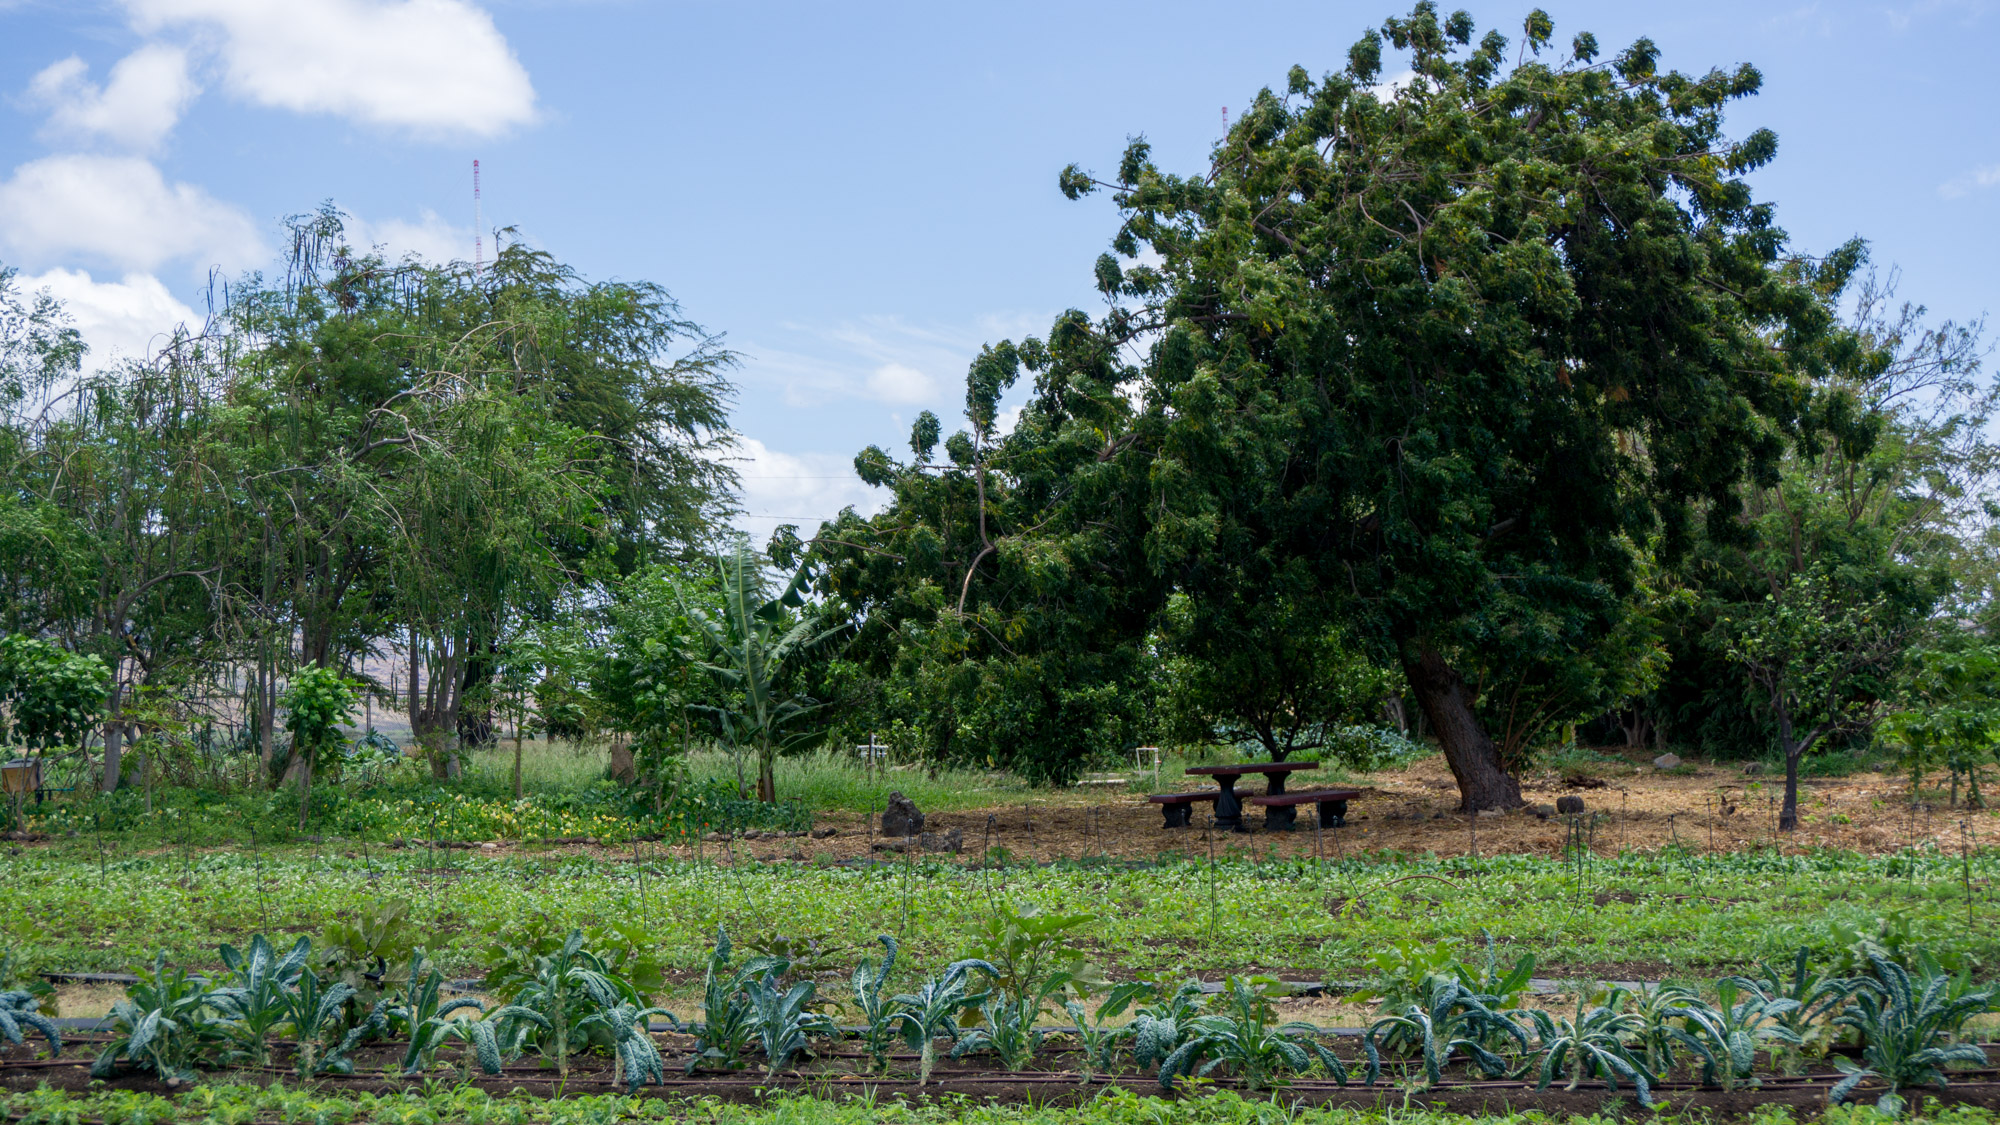
Here you can see an organic kale farm in Hawaii. This palm kale you could grow into huge palms like the ones in Santa Monica.
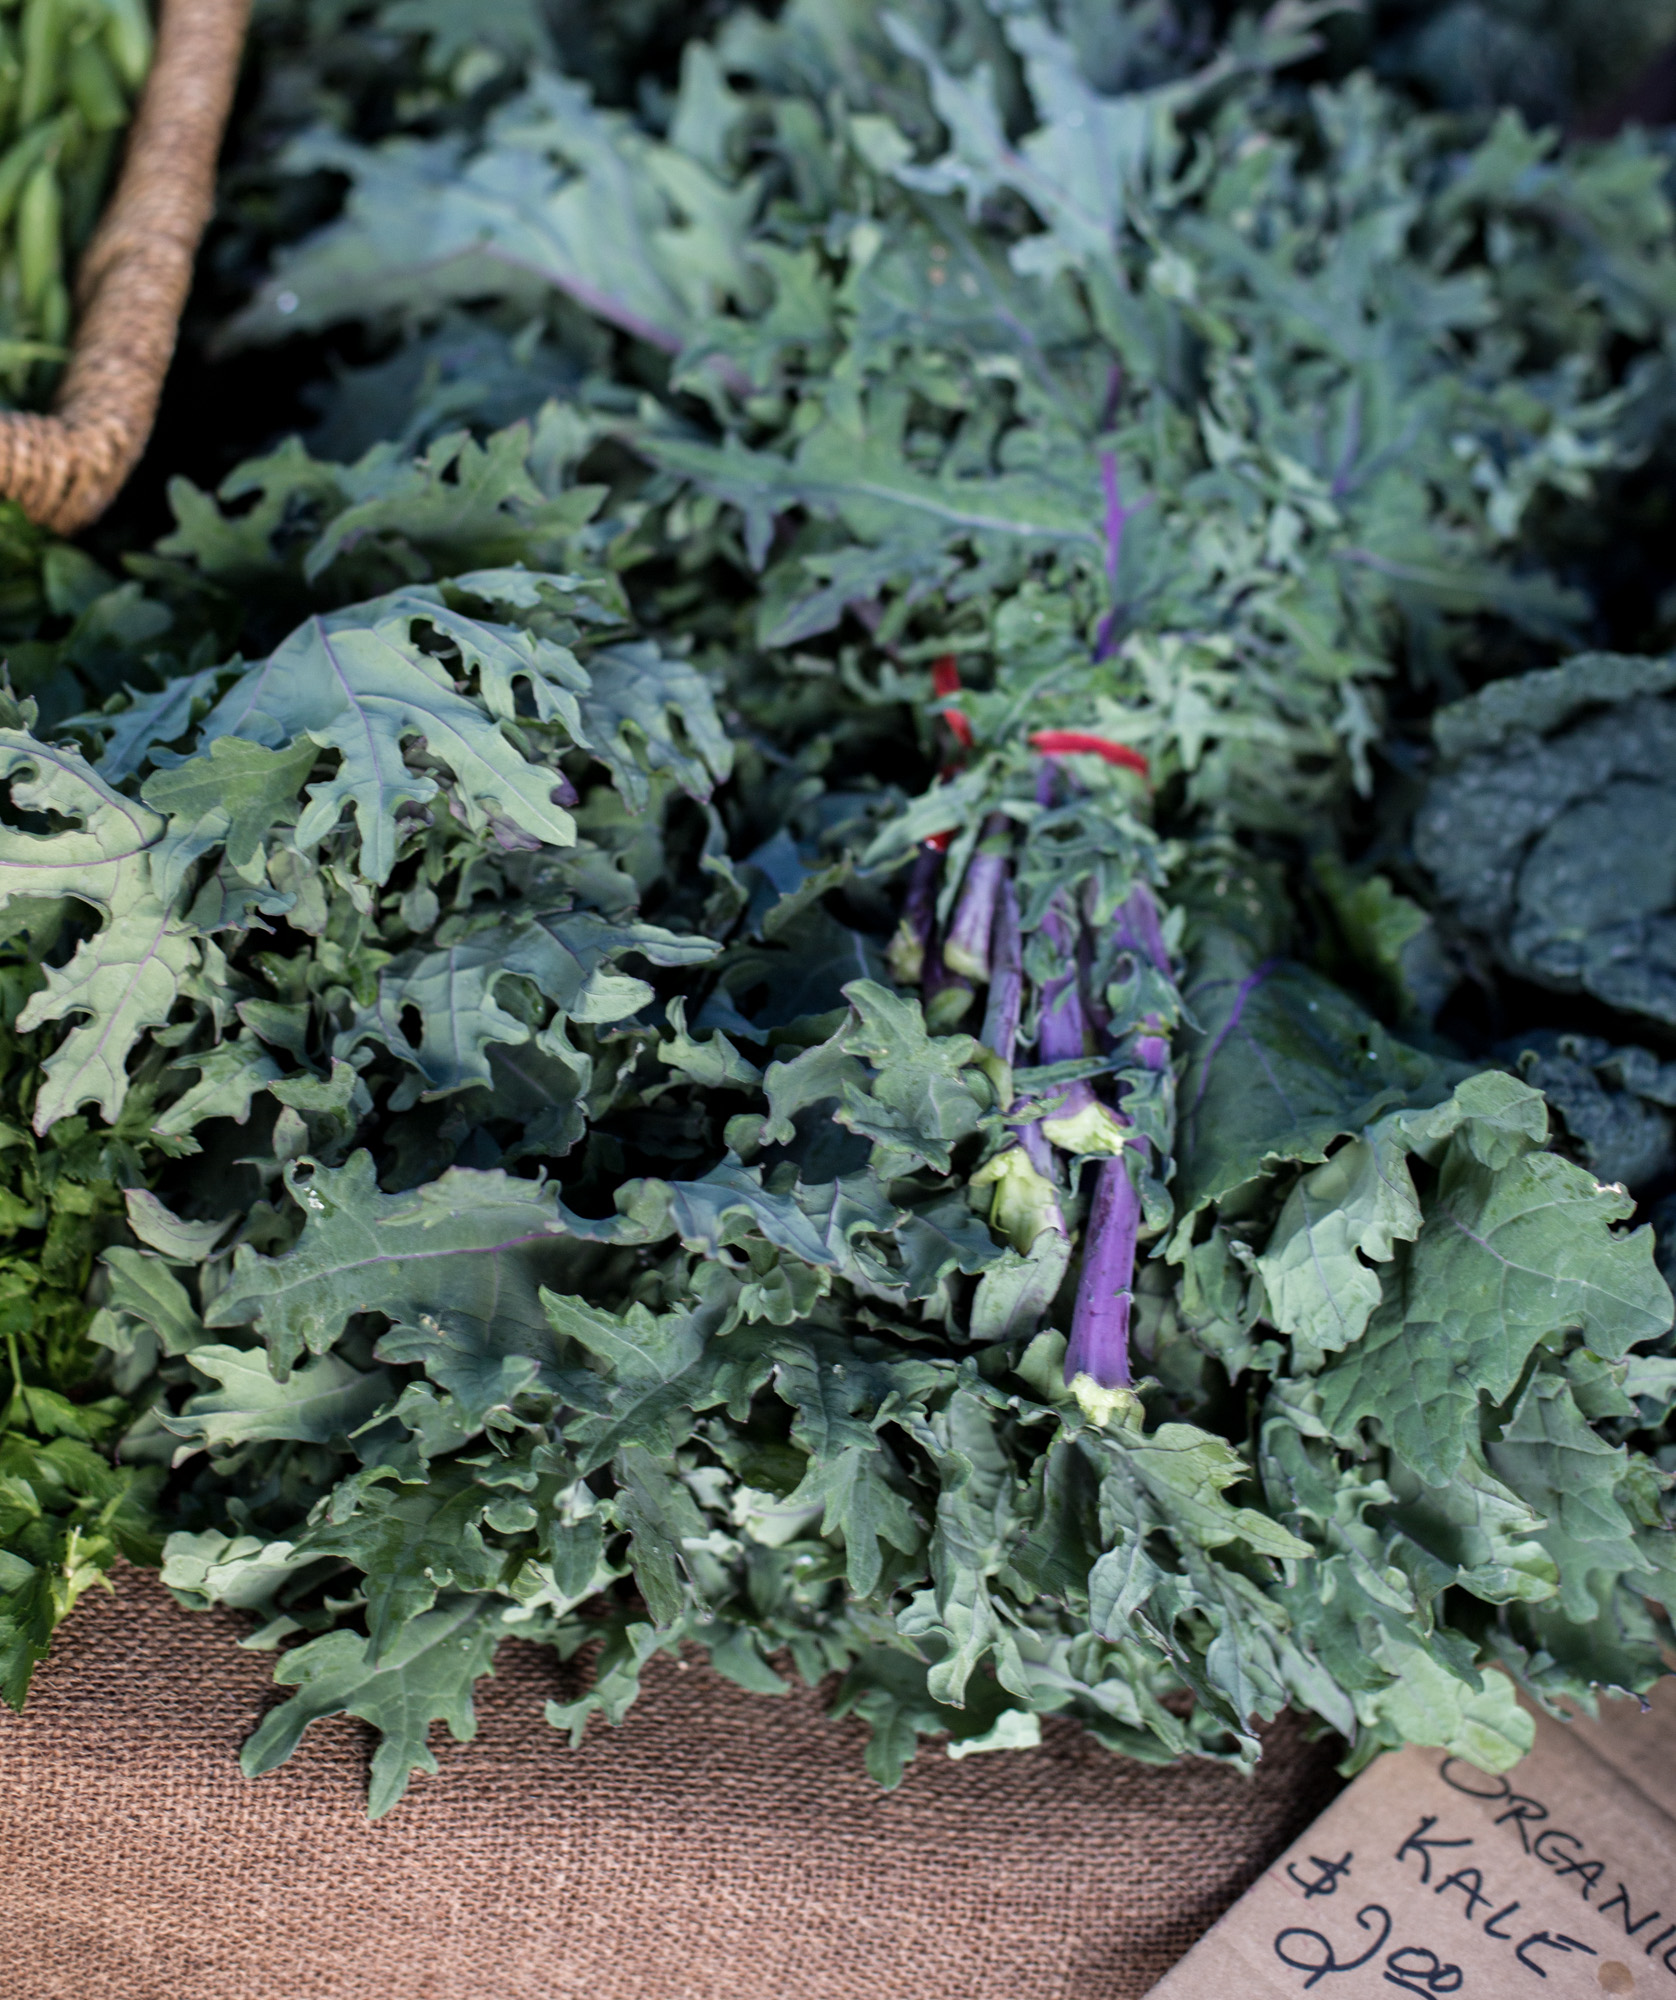
Here we bought different kill varieties in New Zealand.
Welcome to Rawismyreligion! I'm Ina. I love having you here, sharing my lifestyle with you, getting to know you better. You can get in touch with me here on my blog by leaving comments under the posts and on all my social media.
I love having different backdrop options for my food and product photography. So I’ve decided to start making my own backdrops using simple materials I can find at a hardware store.
There are so many amazing YouTube tutorials on how to do this. I linked my fav onew for you down below. I use them as an inspiration for my own projects. Here are some (similar) materials I’ve used to make the backdrops.
Here are supplies for the project at the german amazon store
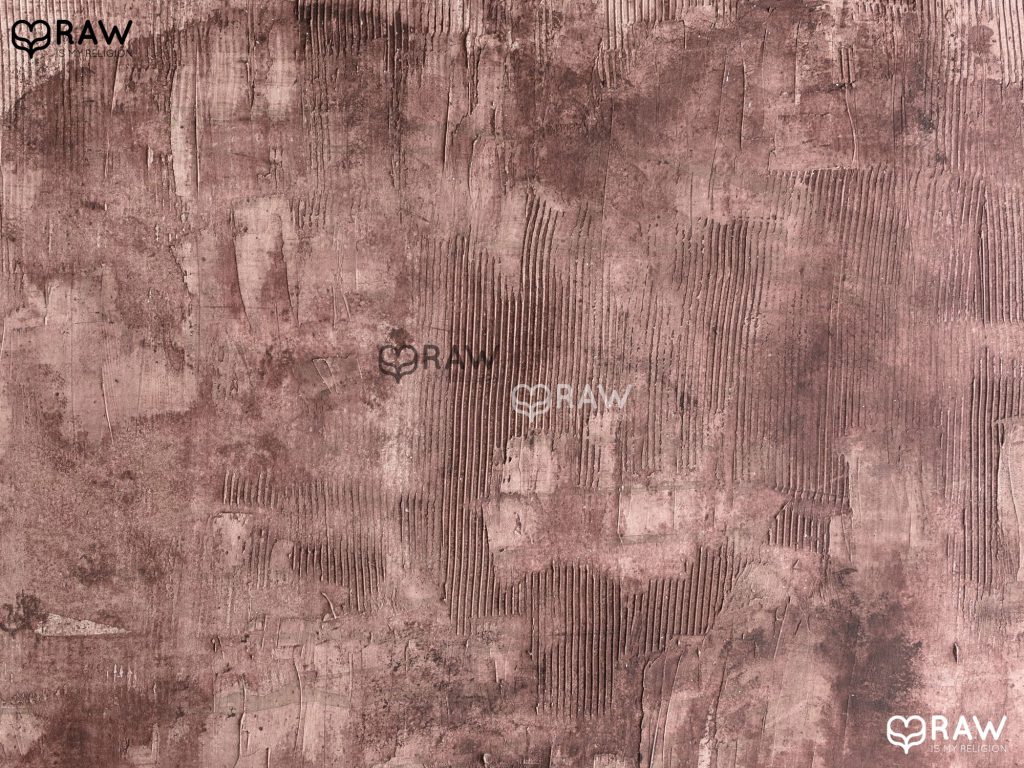
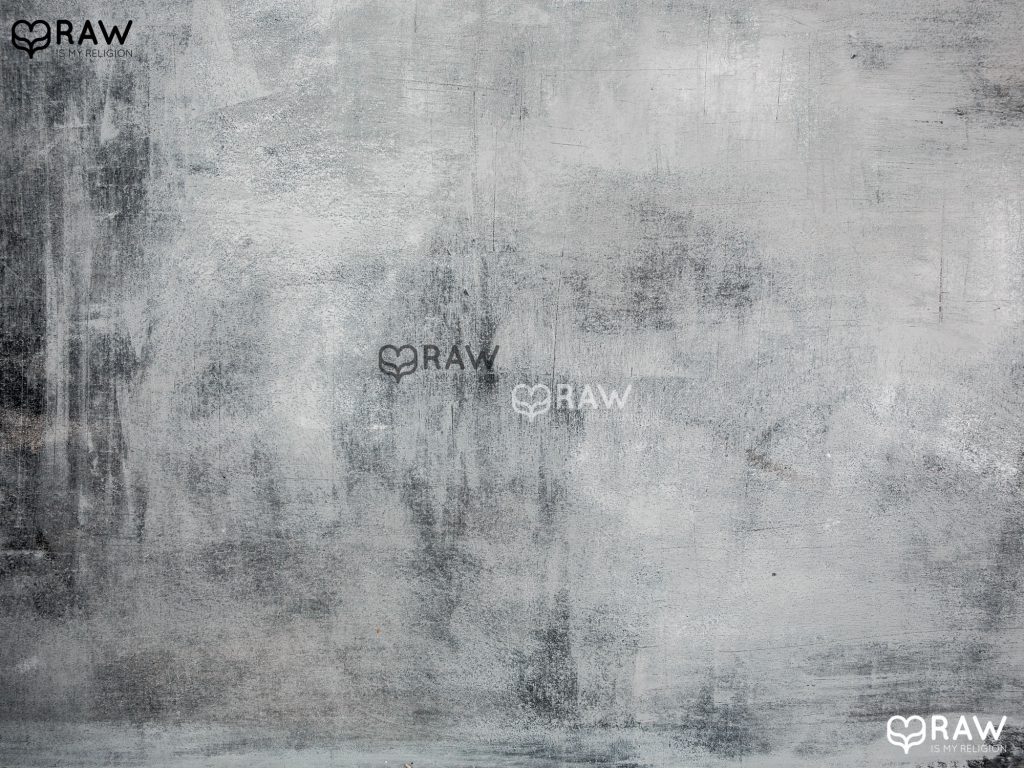
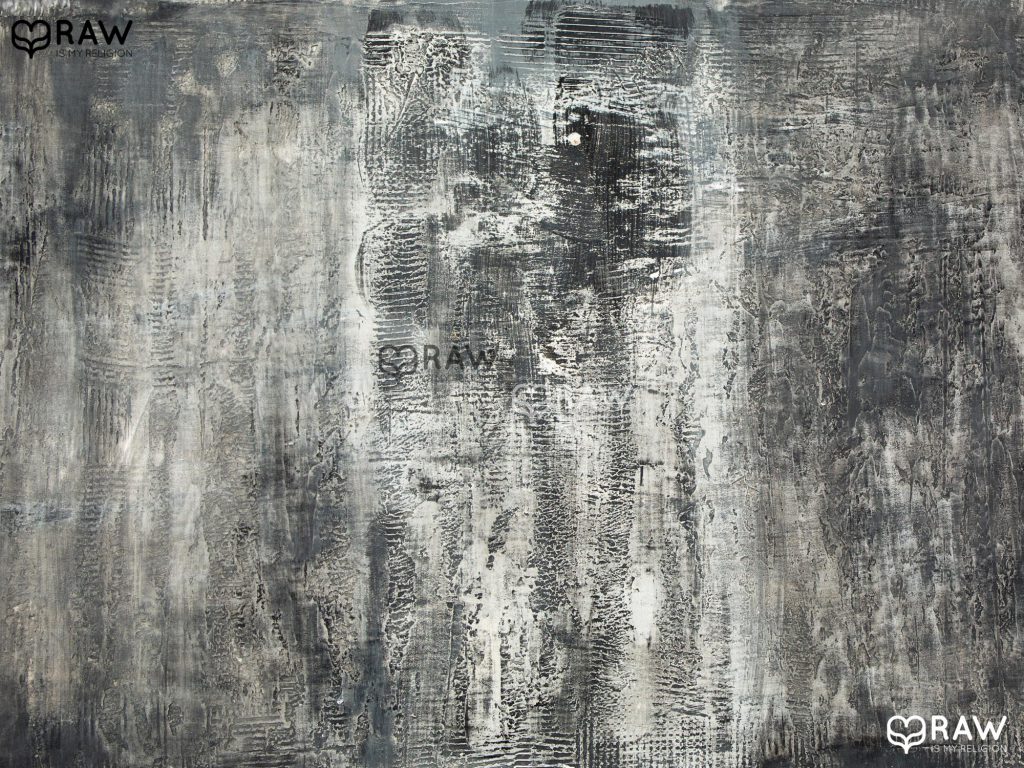
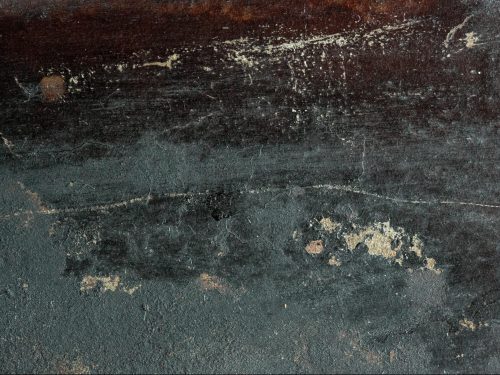
Here are some of the concrete deck shirt backdrop examples I’ve made recently.
The last one was a little to contrasty for food photography and I painted black over the texture for now.
The great thing about the hand painted backdrops is, that they can be repainted or readjusted in anyway you want. It’s sometimes a little hard to take away the texture I have applied completely, but it’s possible to sand pretty mush all of it.
For the first project I would suggest choosing the smallest board you could possibly use. For me it’s 40 x 60 cm. After trying to create couple of big drops on the smaller scale on thin boards I am now advance too big or big drops that can be used as surfaces for larger composition as well. Right now I’m using 60 x 120 cm boards, which are 1 cm thick.
Whenever possible I try to reuse boards I already have and also use both sides of the boards for my backdrops.
Welcome to Rawismyreligion! I'm Ina. I love having you here, sharing my lifestyle with you, getting to know you better. You can get in touch with me here on my blog by leaving comments under the posts and on all my social media.
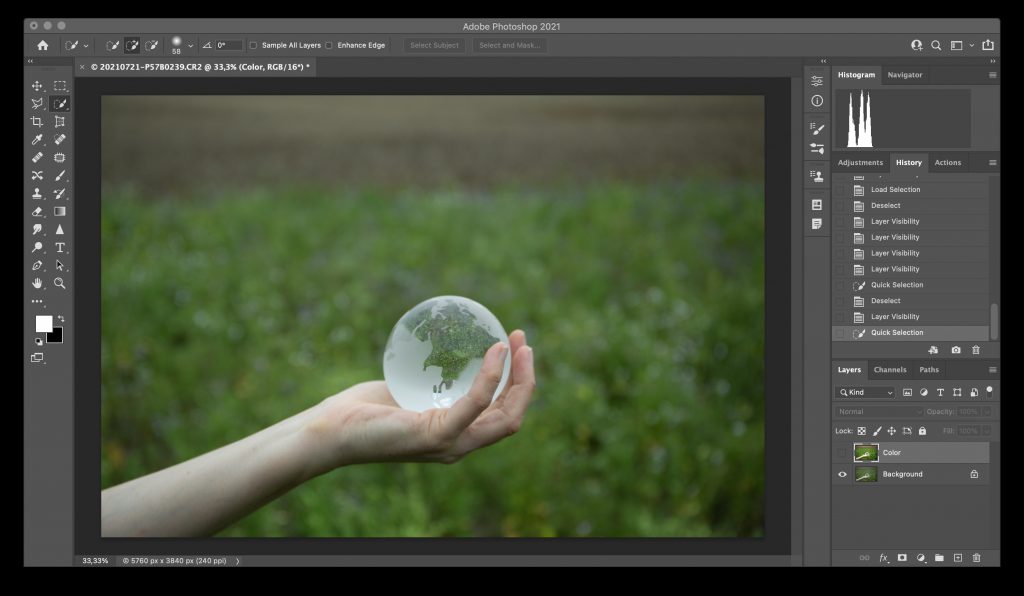
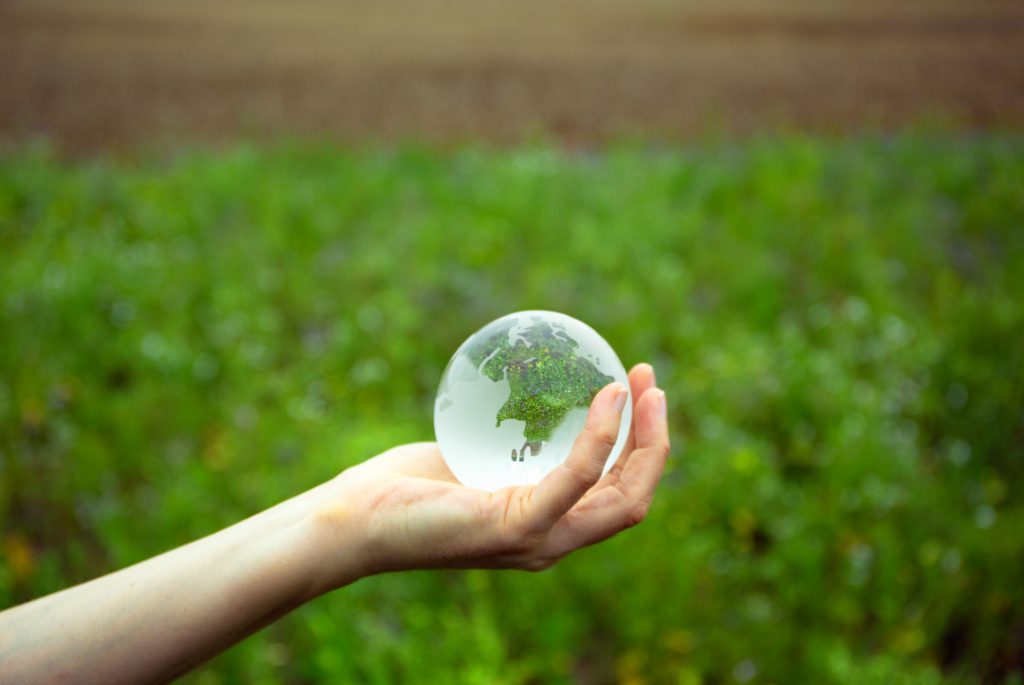
My original photo opened in Photoshop, where I wish to add something eye catching. It would have been nice to shoot this photo backlit, but the weather was not in my favor yesterday and I will add the sun rays manually using the lens flare effect. There a many many ways to add sun, sun rays, sun flare in photoshop. This is just a fast and easy one.
Here is a quick video, read the post with still pics for easier edit along.
Open the photo
I opened the original photo in Photoshop and adjusted the colors a little ro match the backlit dreamlike mood.
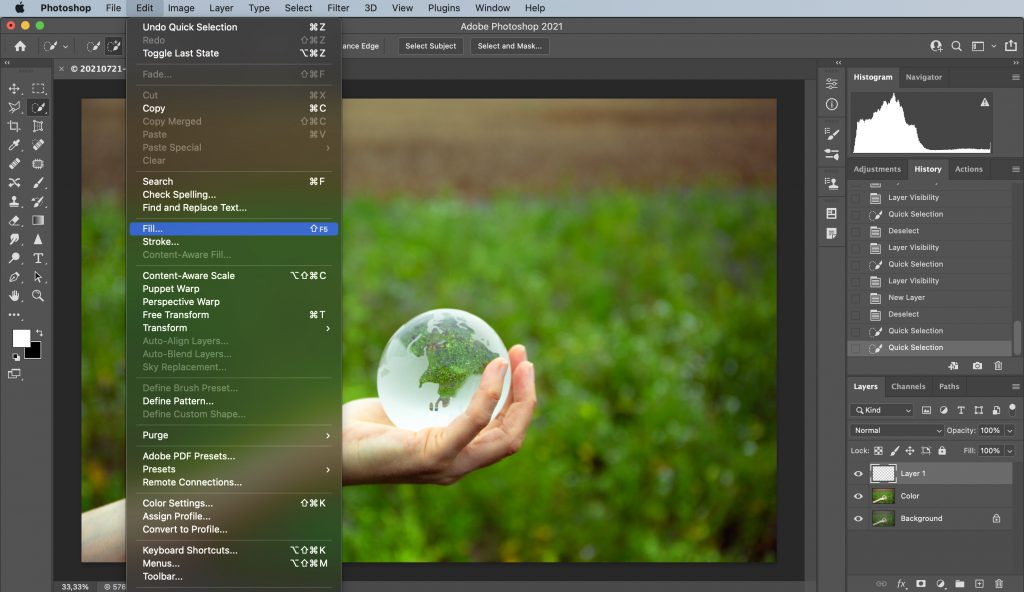
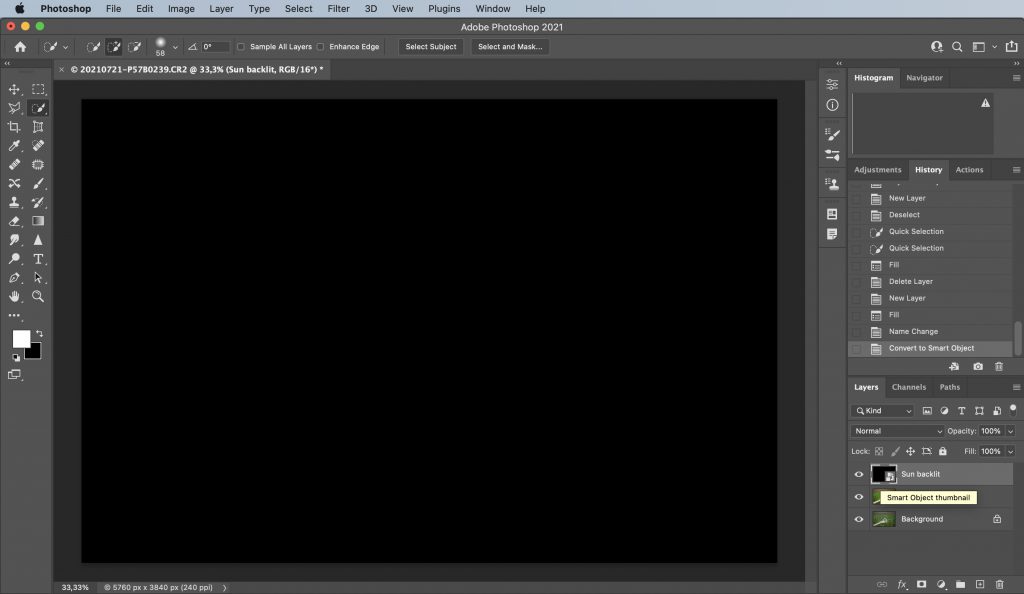
Adding a new black layer
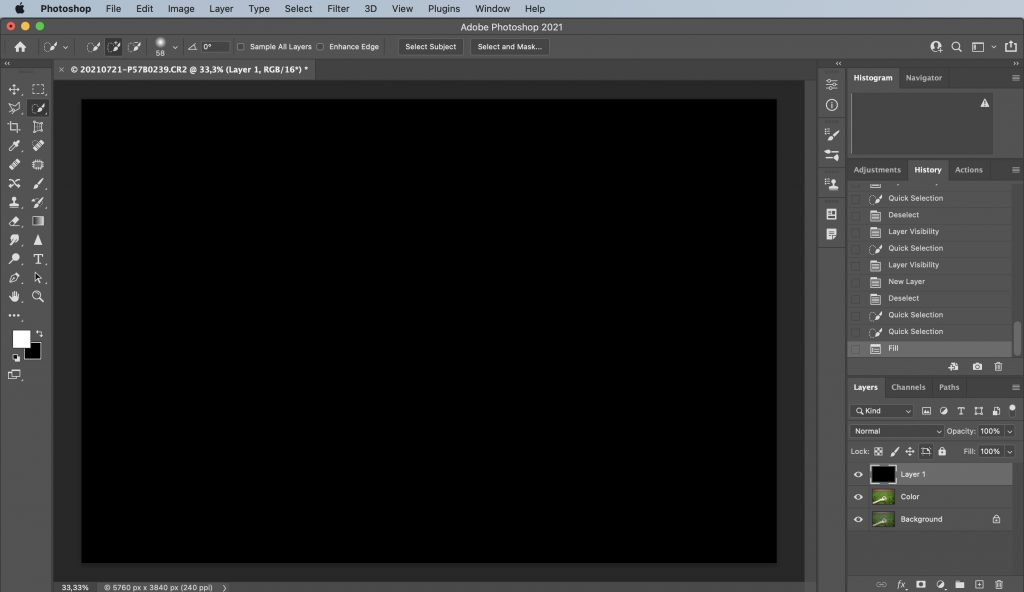
Then add new blank layer and fill the layer with black color.
I named the new layer “sun backlit”.
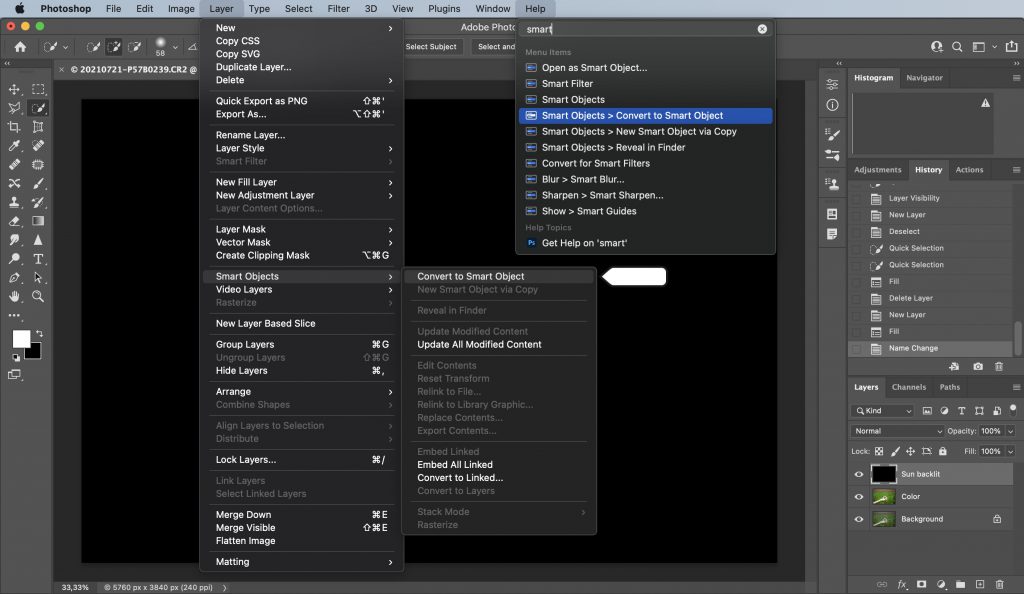
I converted the layer to a smart object. If you are unsure where to find this option, just type “smart” in the help-menu in photoshop.
My layer has now the smart object symbol.
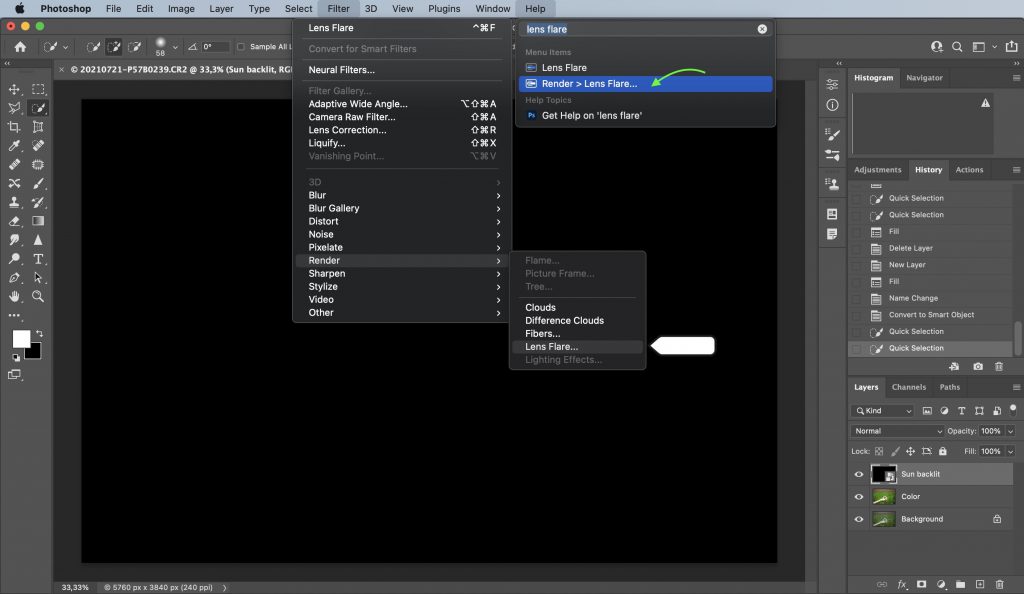
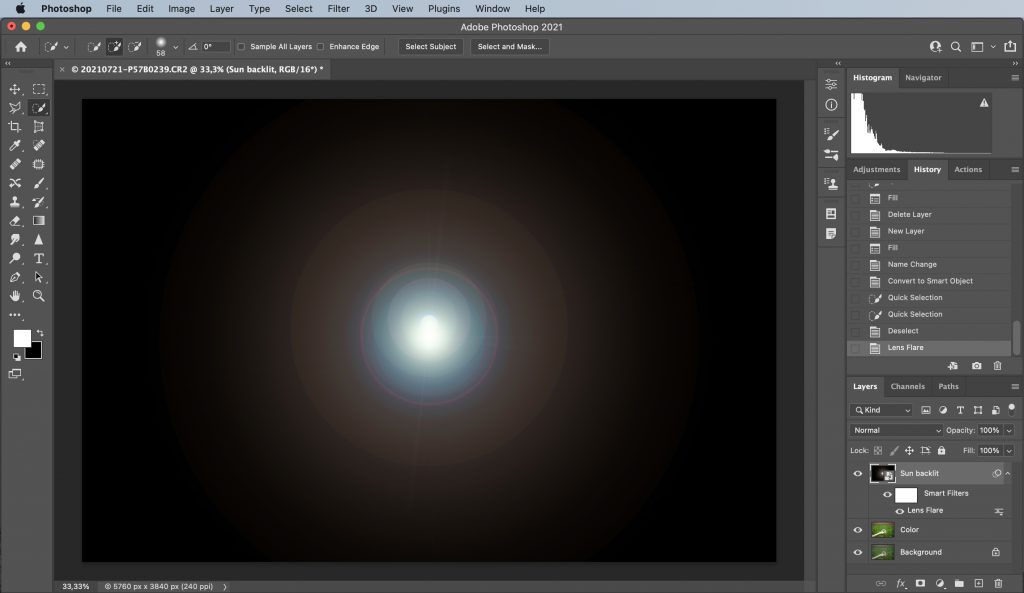
Add lens flare
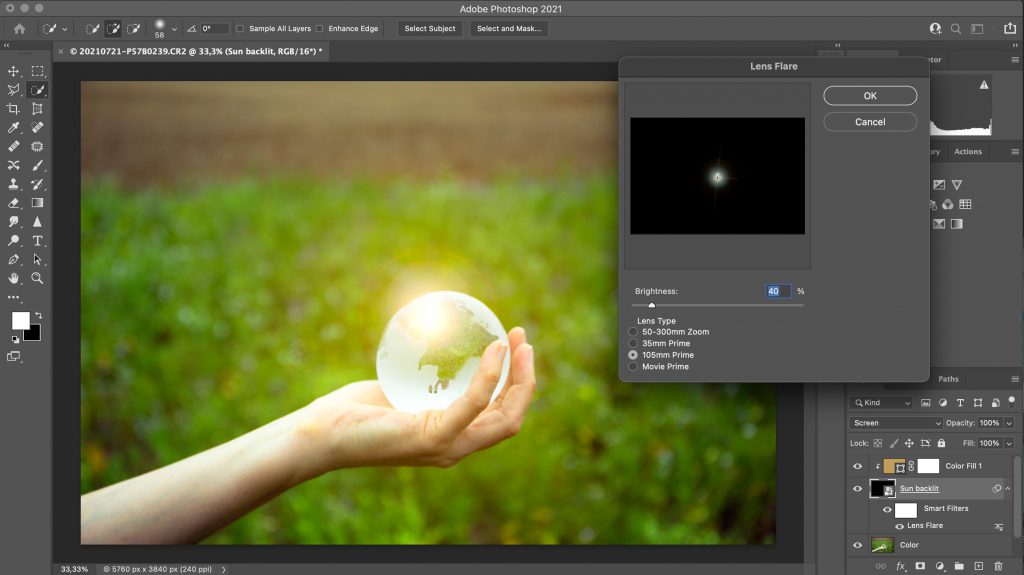
I will add the lens flare. It’s in the filter men. Chose render and lens flare. Or just type lens flare into the help menu and click onto the render-lens flare search result.
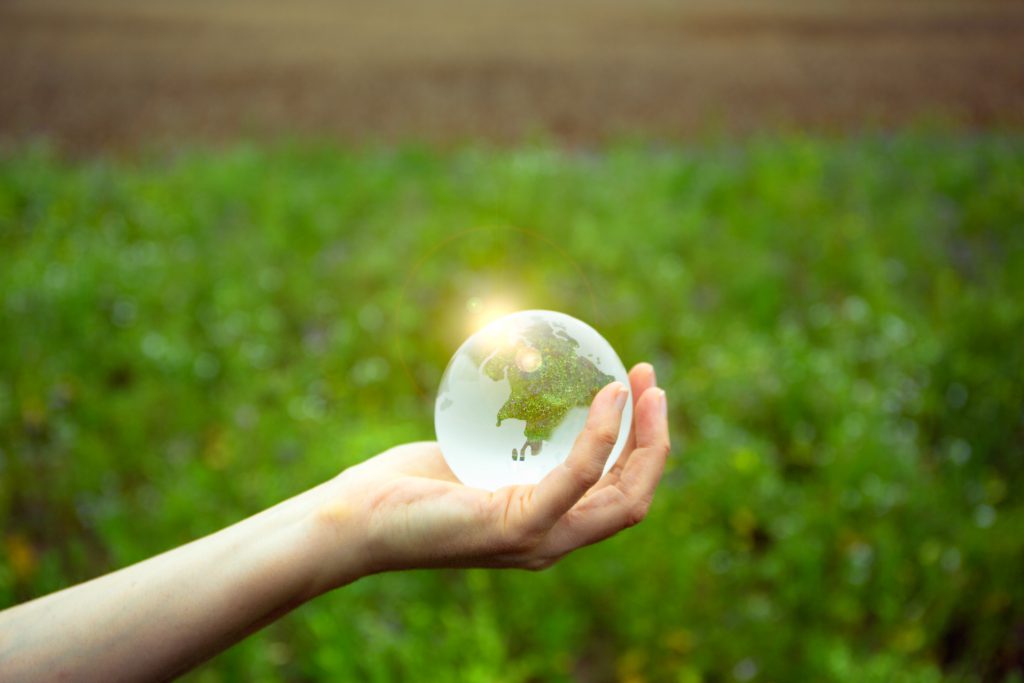
Lens flare creates a realistic sun rays effect in Photoshop.
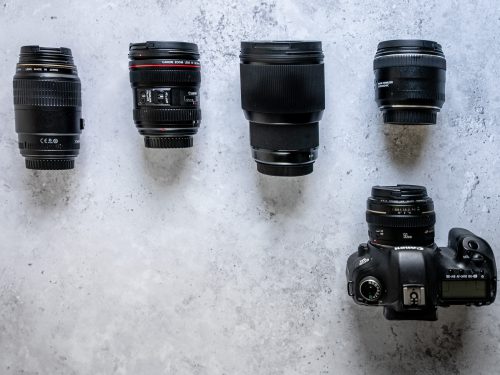
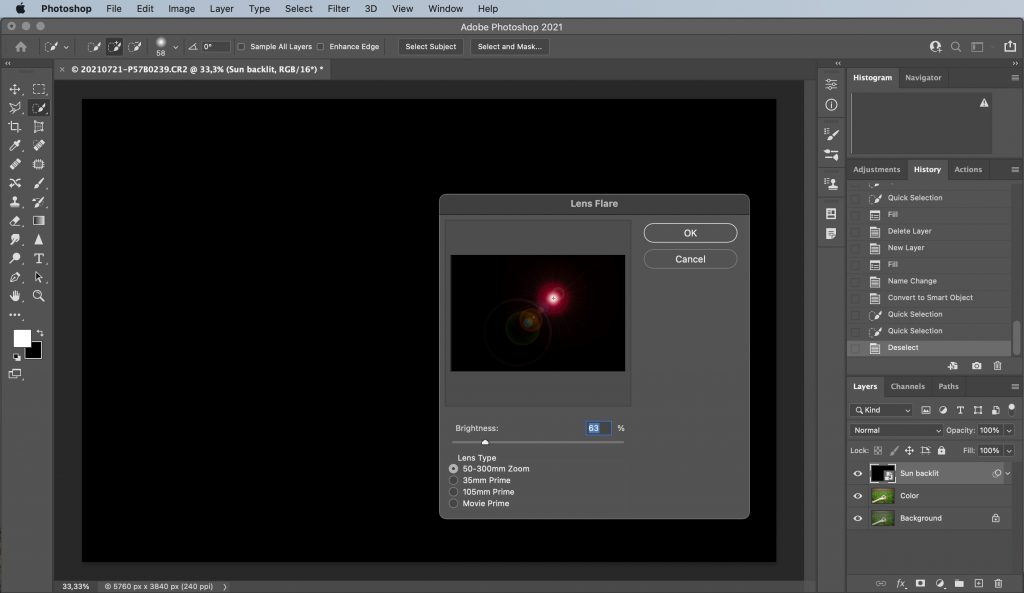
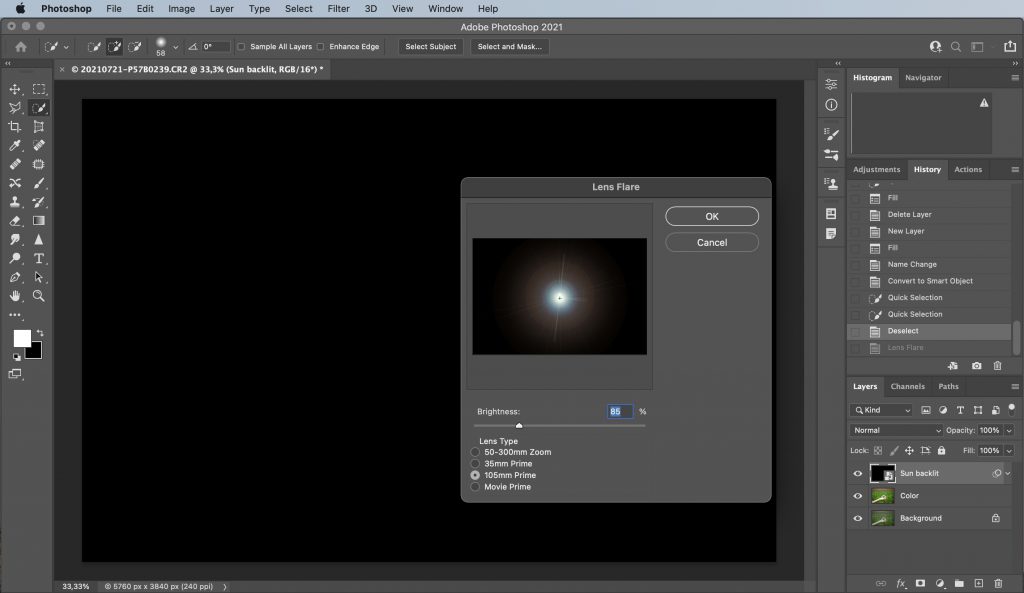
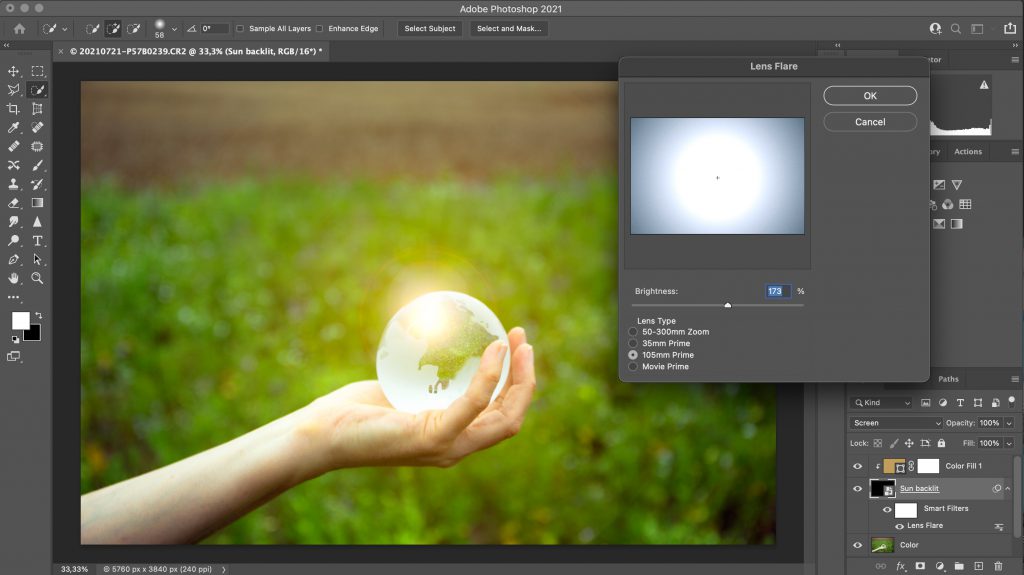
I select the 105mm prime lens and adjusted the brightness.
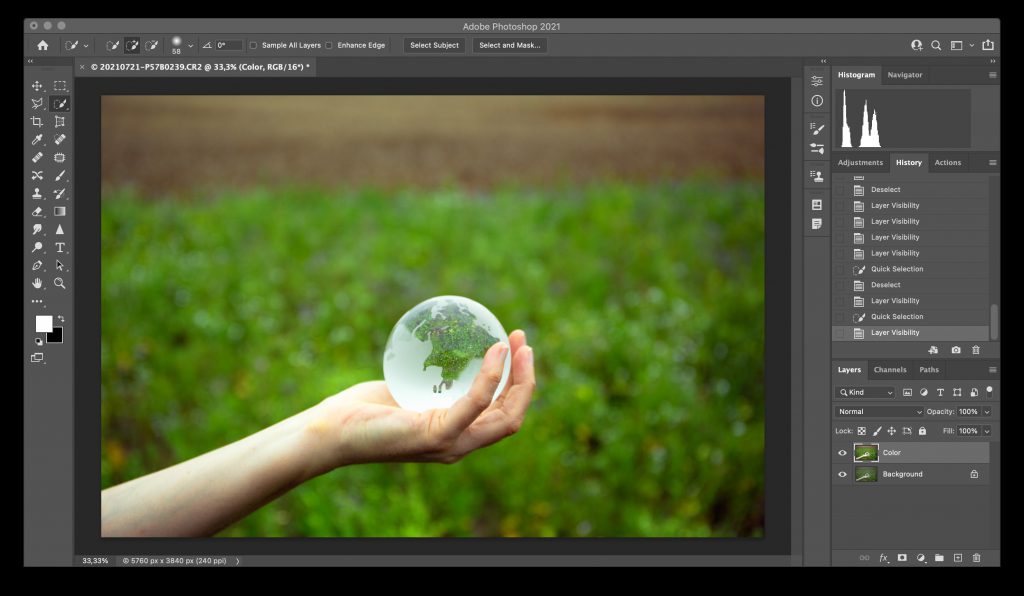
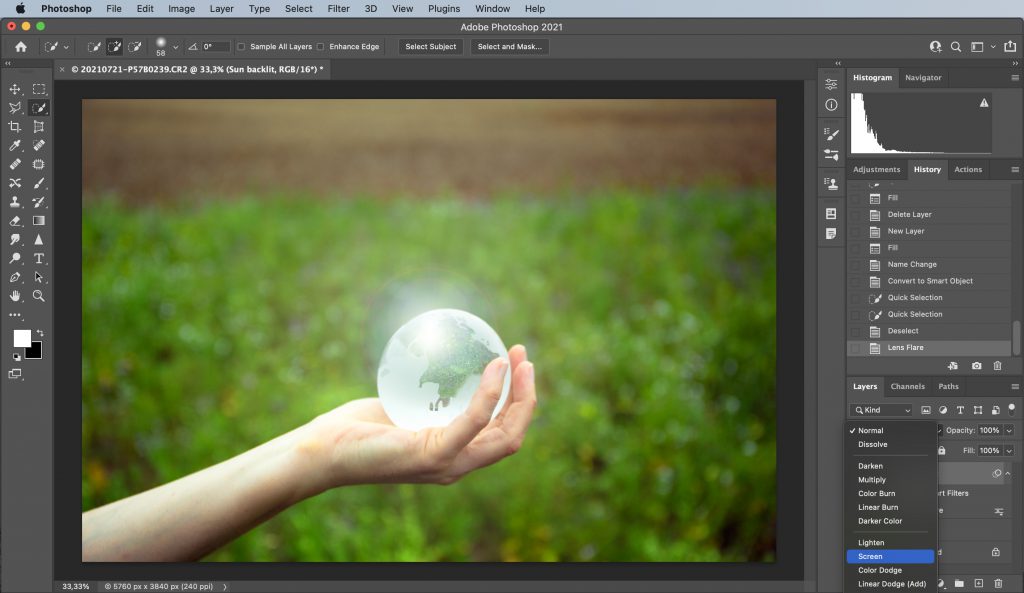
Ok. Now the lens flare in on top of our photo and needs to be transparent. To achieve this transparency, we can use the screen mode to blend both layers together.
Blending mode “screen”
Right click onto the Sun layer to set the mode to Screen.
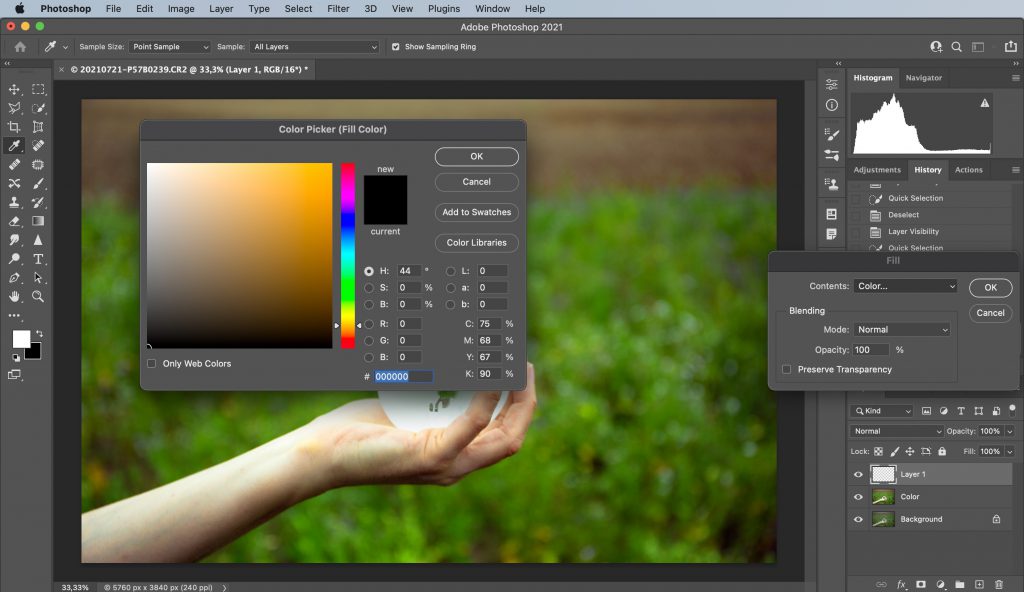
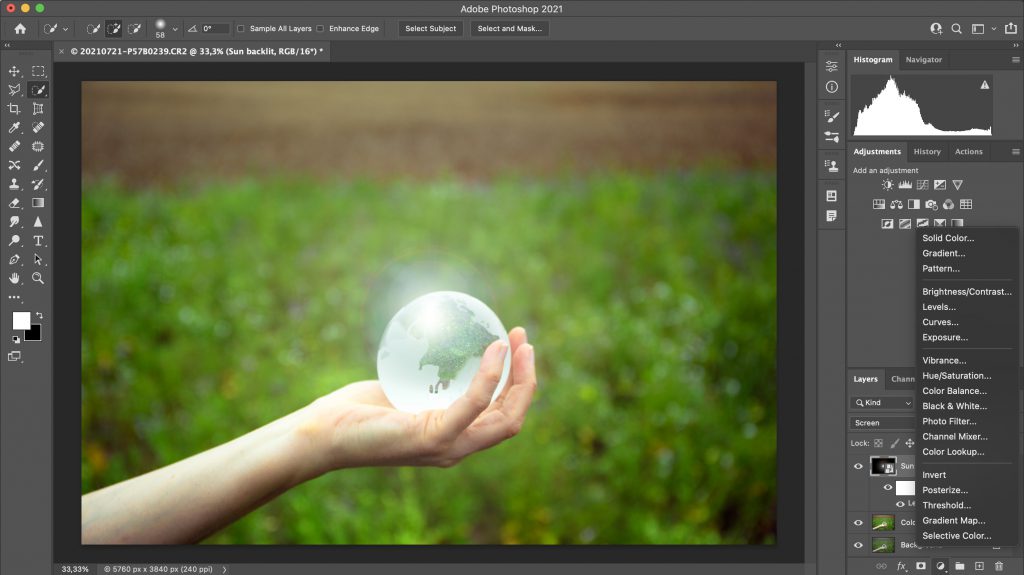
Solid color fill adjustment layer
To create a more realistic sun effect I need to add some color. Depending on the time of the day I want to simulate, I would add a different color.
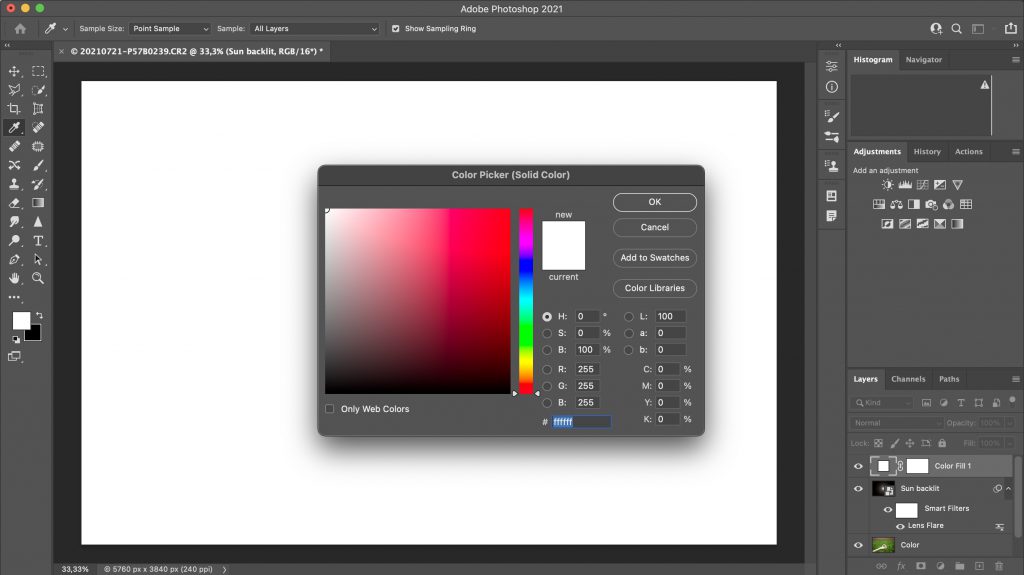
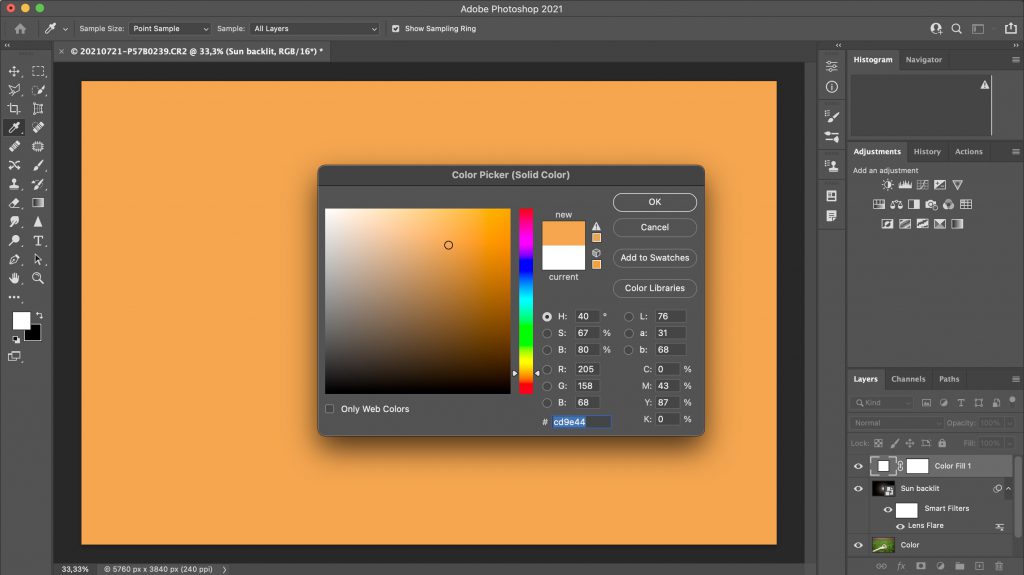
I added a new solid color layer. Click the round symbol and pick solid color.
This window should pop up and I chose an orangey color.
Ok.
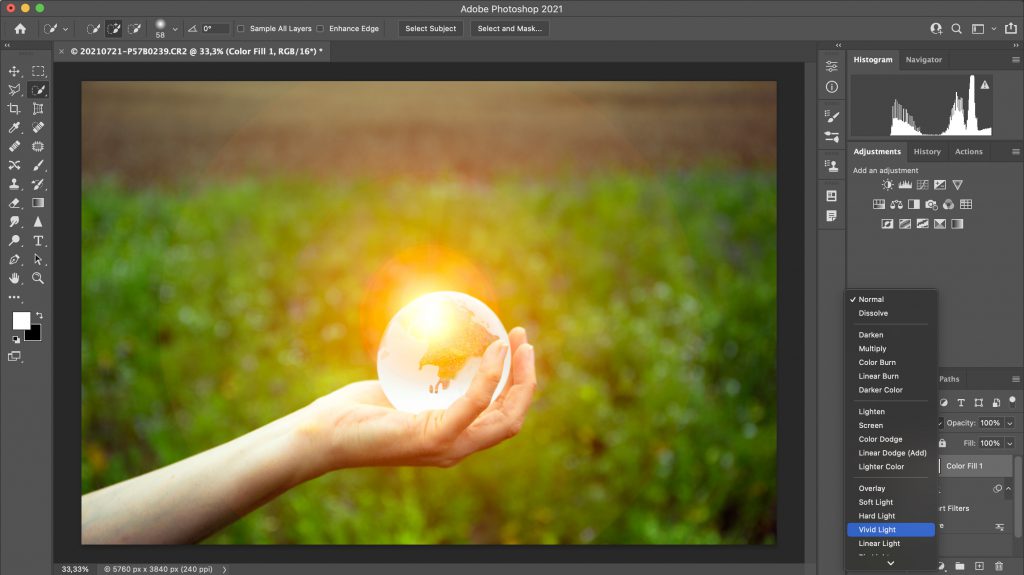
Color layer “vivid light”
I set the mode to vivid light.
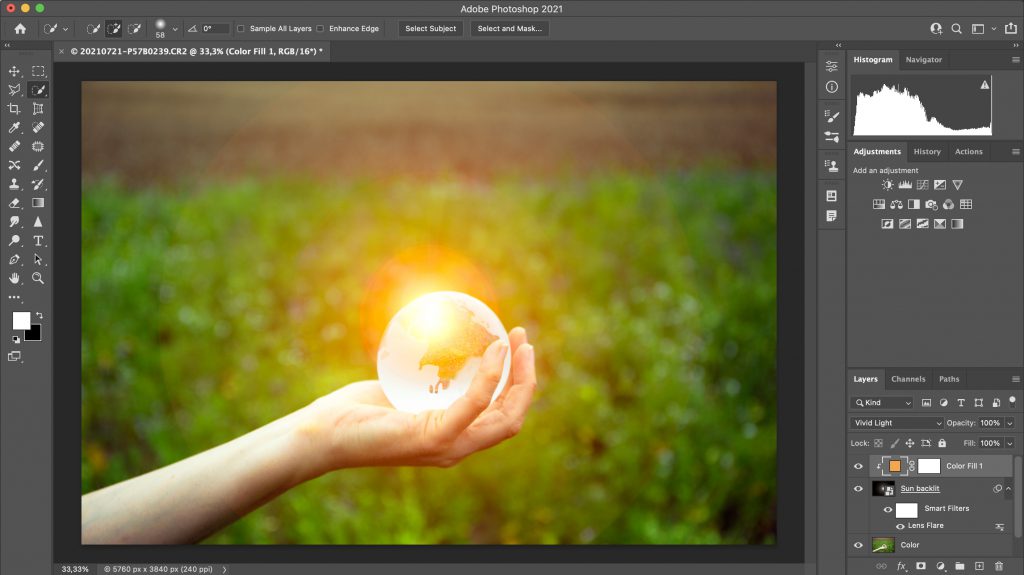
Here I created the clipping mask. Simply by right clicking onto the Color fill layer (not the white or orange square!)
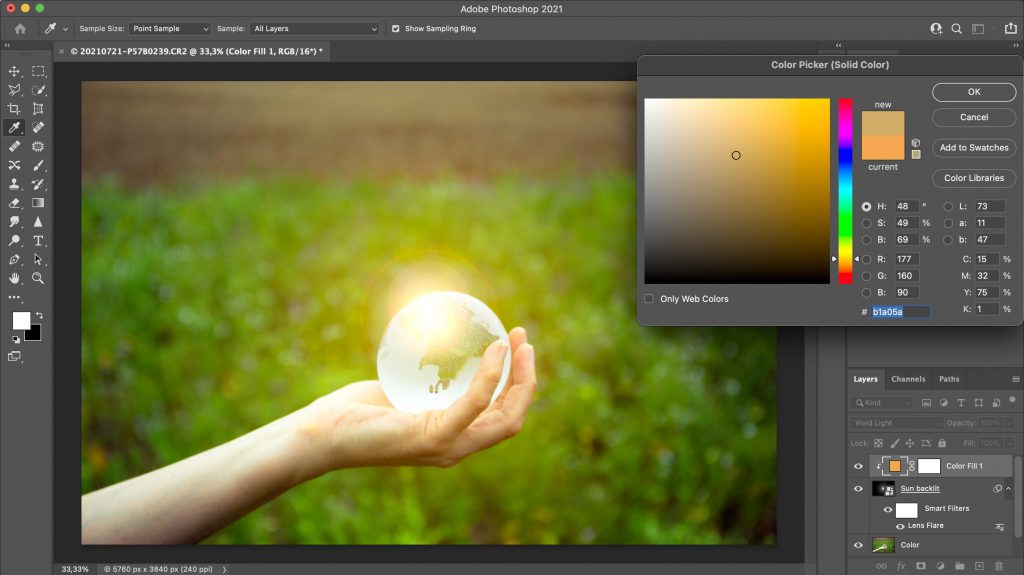
Now I can further adjust the color by clicking the (orange)color fill symbol. I wanted to brighten it up.
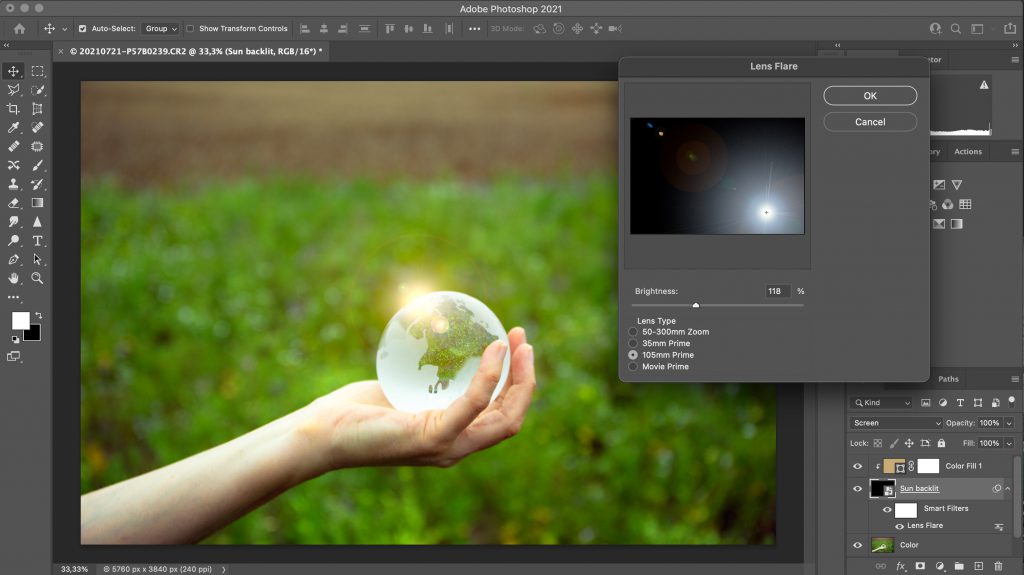
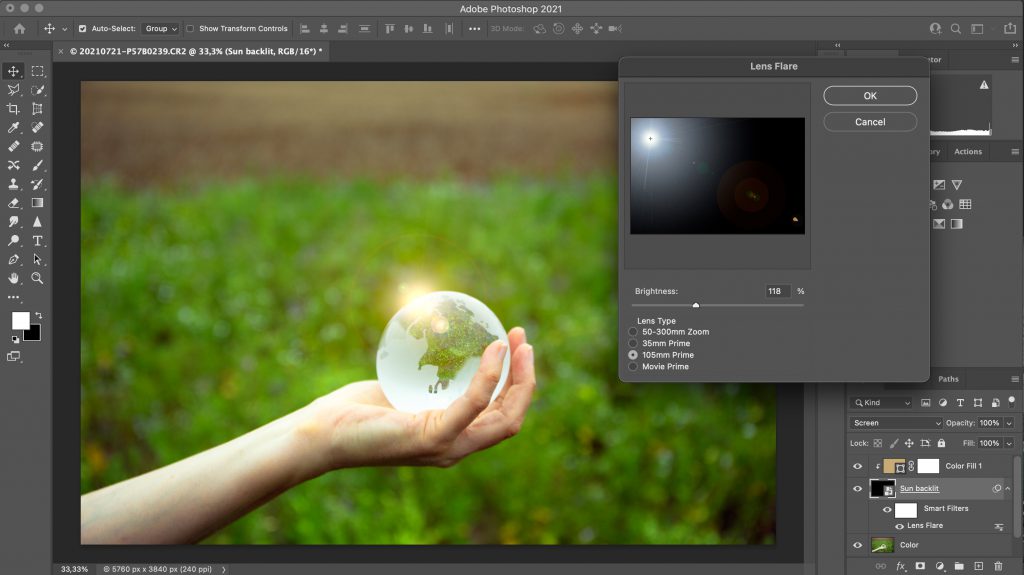
The size and the position of the sun can be adjusted by clicking the lens flare symbol.
Similarly we can change position of the sun as well.
The sun rays are composed of different colors. You can duplicate the top layer once or multiple times and play with different colors and different modes! Try soft light for example. Overlaying different colors will help to create a more realistic look. Google to find a good reference picture of the sun you want to replicate.
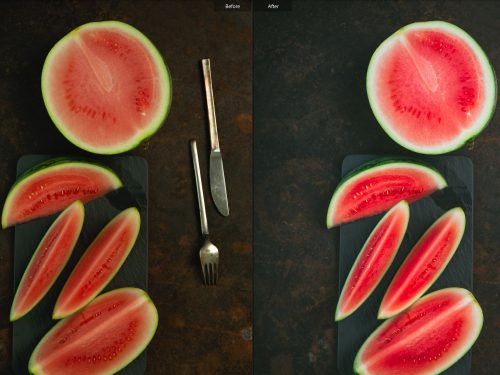
Before-after
Share with your friends! They love what you love!
If you are looking for a slightly different effect, there is probably a way. You can apply a png of a sun to the photo or even draw your own sunrays.
Hi lovely people
Welcome to Rawismyreligion! I'm Ina. I love having you here, sharing my lifestyle with you, getting to know you better. You can get in touch with me here on my blog by leaving comments under the posts and on all my social media.
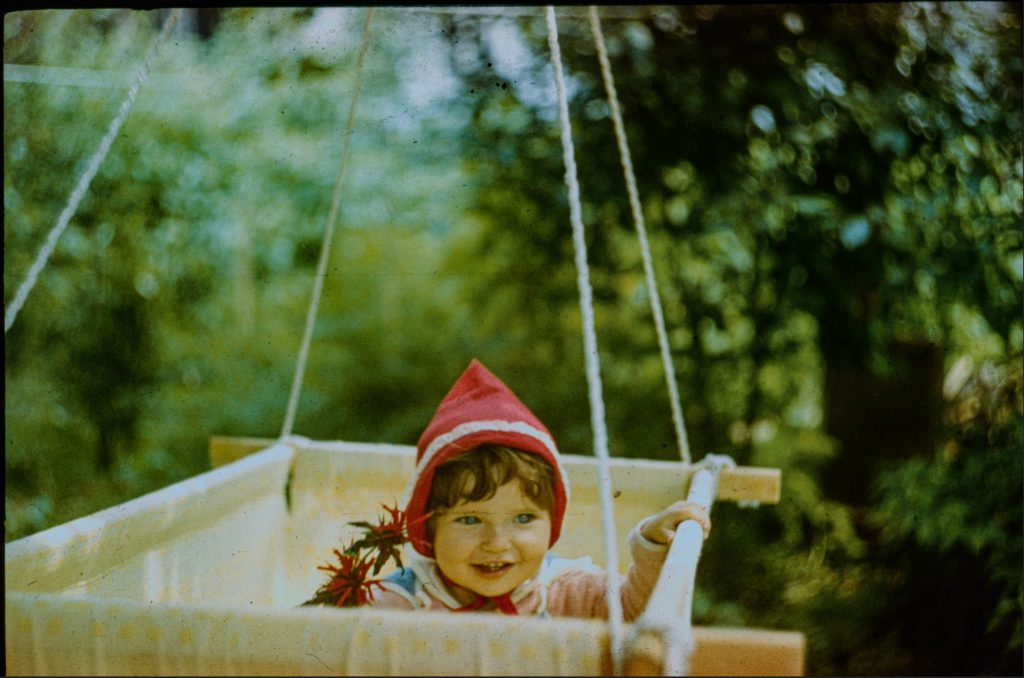
I found an old dusty scratched-up dia slide and was about to restore it, when I noticed: it’s not possible to remove every single piece of fluff, every single corn of dust, and every single scratch by hand simply because there are too many. Also, the image has some other major problems and is simply not worth hours of work. I want to fix it up as good as possible but rather quickly.
I was contemplating sharing the story of my life like every good recipe creator would, but decided not to.
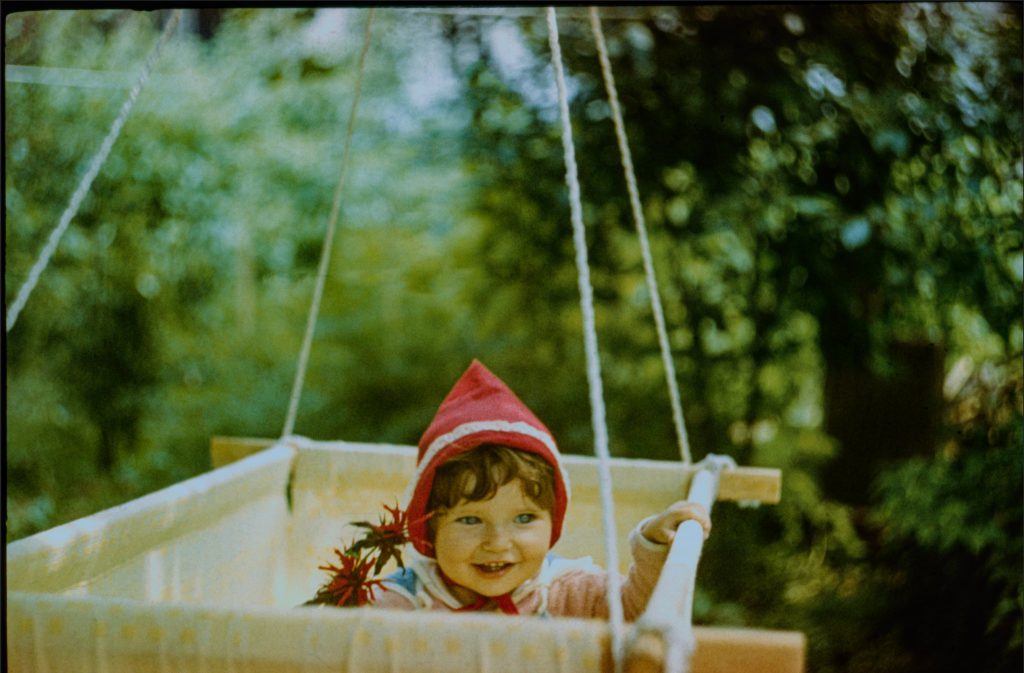
Before and after a simple dust removal in Photoshop
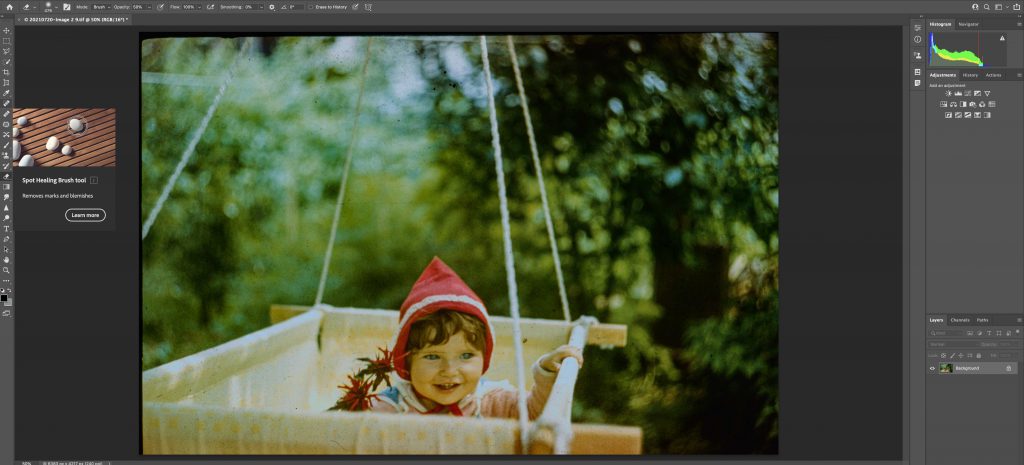
The tool I grab for smaller jobs on digital photos would be in most cases a Spot Healing Brush tool. It repairs small areas, but every single sport and dust corn needs to be touched up manually. The Spot Healing Brush “heals” a spot sampling the neighboring areas. The dust ist then covered by the patterns and colors of the neighboring areas.
Spot Healing Brush tool works well for small ugly spots in not so prominent areas. The effect is similar to the Content Aware Fill tool. This strategy often fails in face areas, where there are many textures, shades and highlights very close to each other.
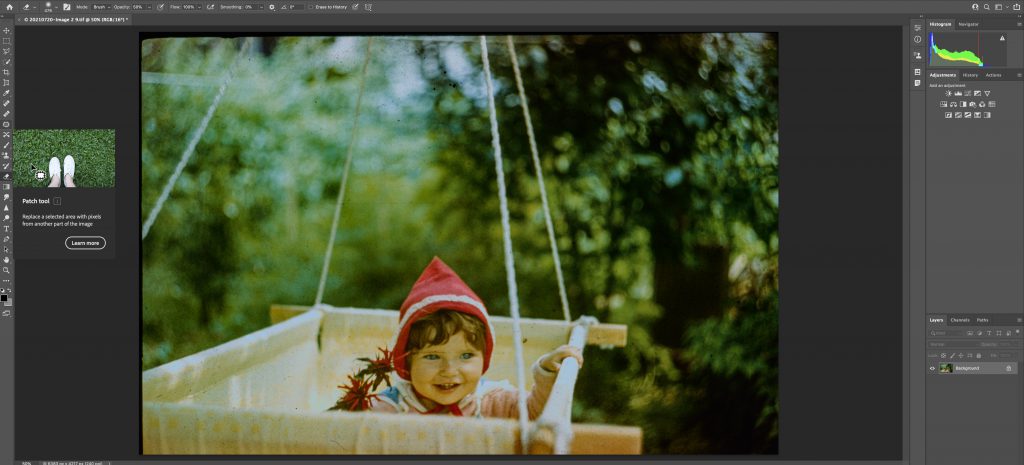
A more precise tool is the Patch tool. I can select one particular scratch or dust particle and define the exact area I want to replace the scratch or dust with. This way, I have more control for working in the face area.
Share with your friends! They love what you love!
Best photoshop tools for dust and scratch removal on larger areas and the face
Dust Filter for the quick overall dust removal and Patch tool for the touch ups in the focus areas (face, main subject, etc.)
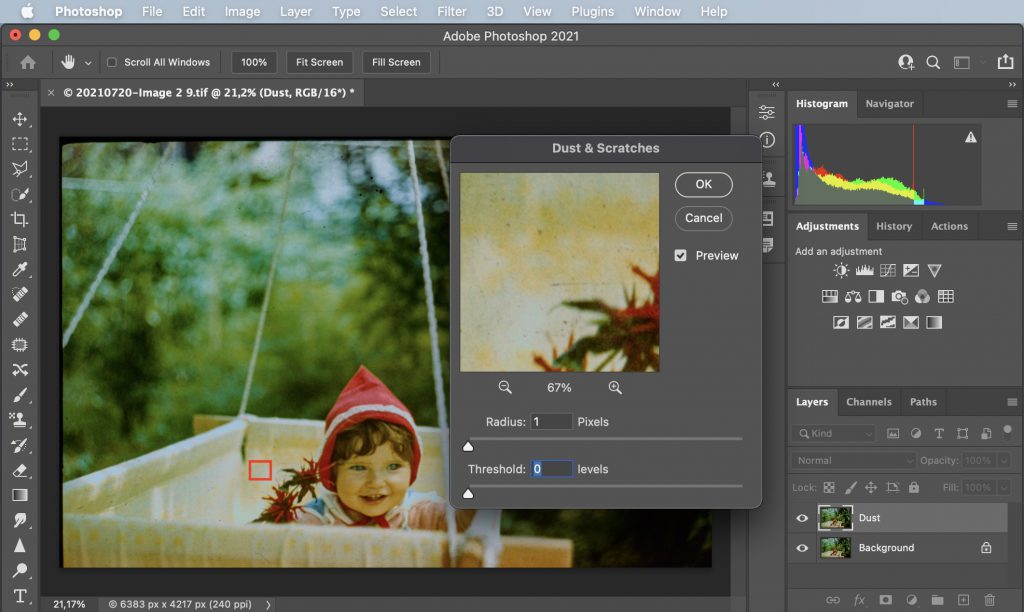
Simple and fast scratch and dust removal with the dust filter in Photoshop
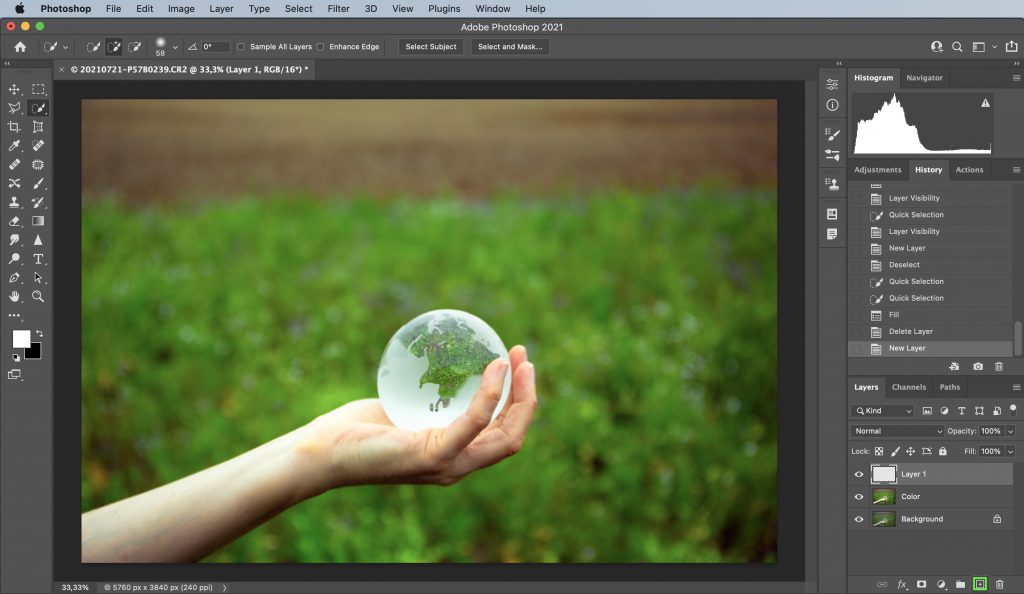
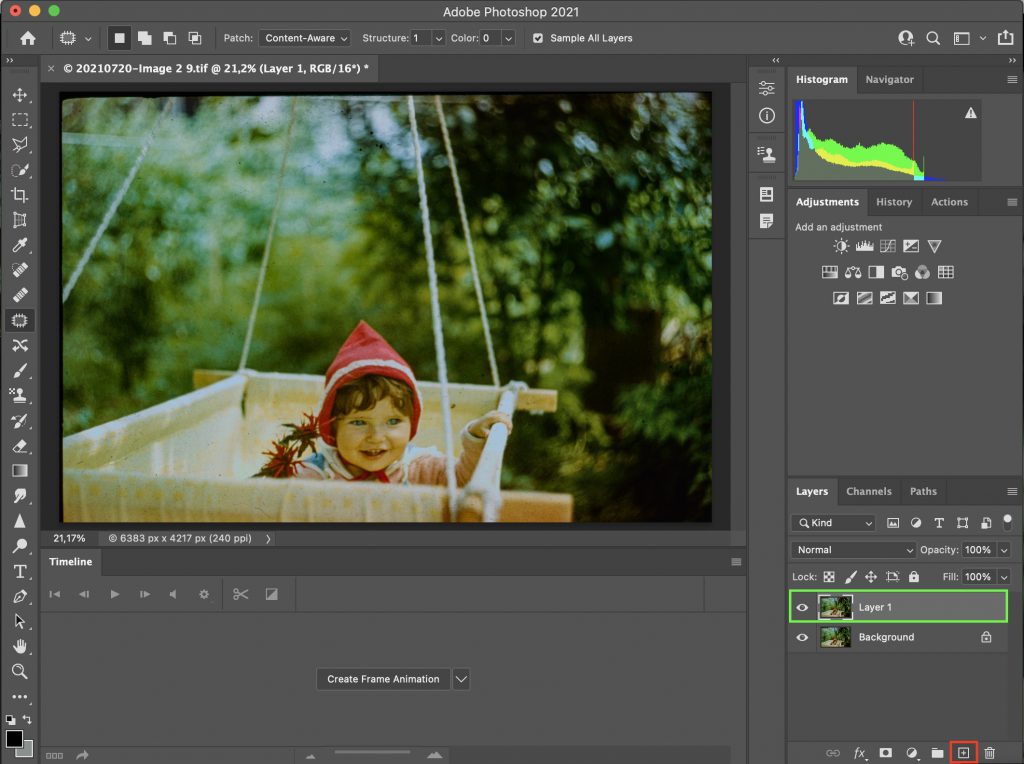
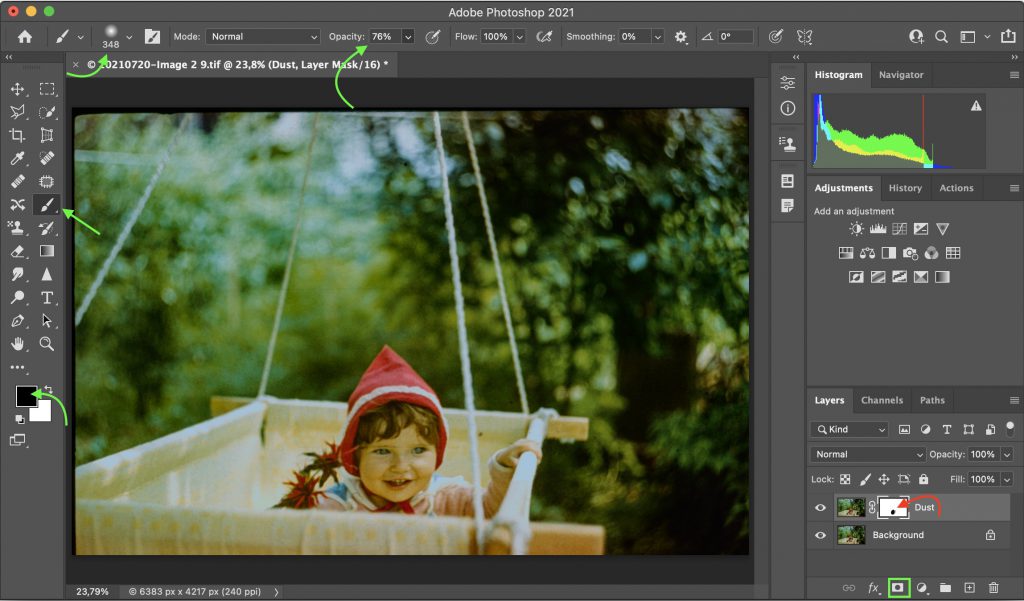
In order to work non-destructively I create a new layer by pressing ⌘+j or by just pressing the “+”-symbol.
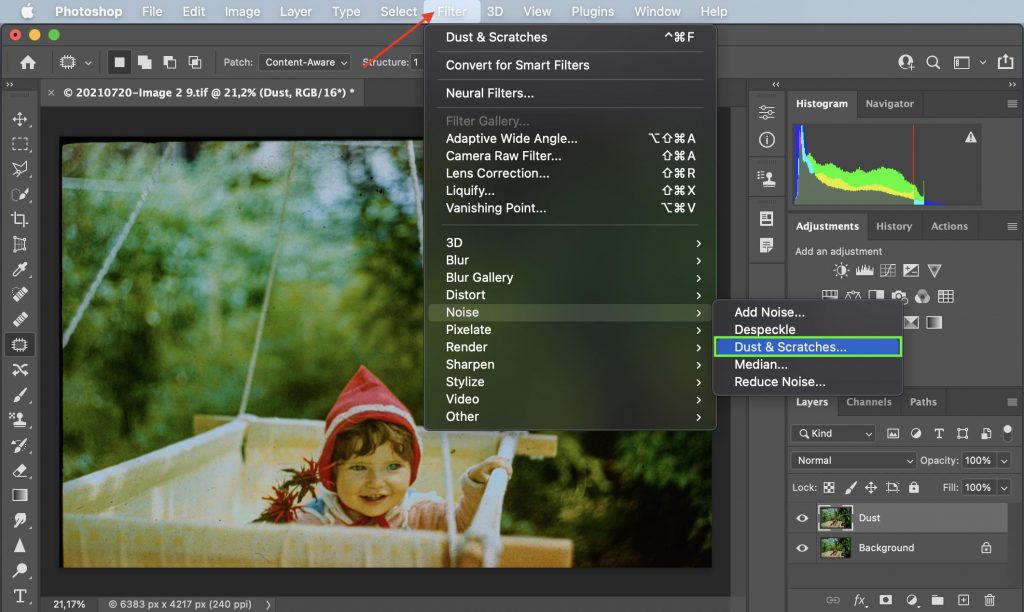
I renamed my layer first to “Dust”. Now I can select the dust filter.
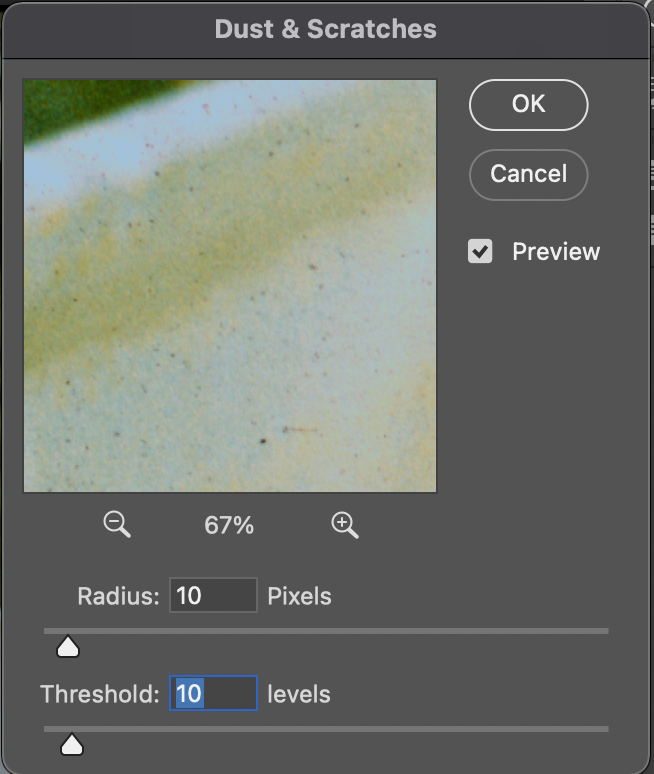
Pick a reference area you want to see in the magnifier window by clicking outside the window onto the photo.
Here are the before-and-after for Radius: 10 and Threshold: 10
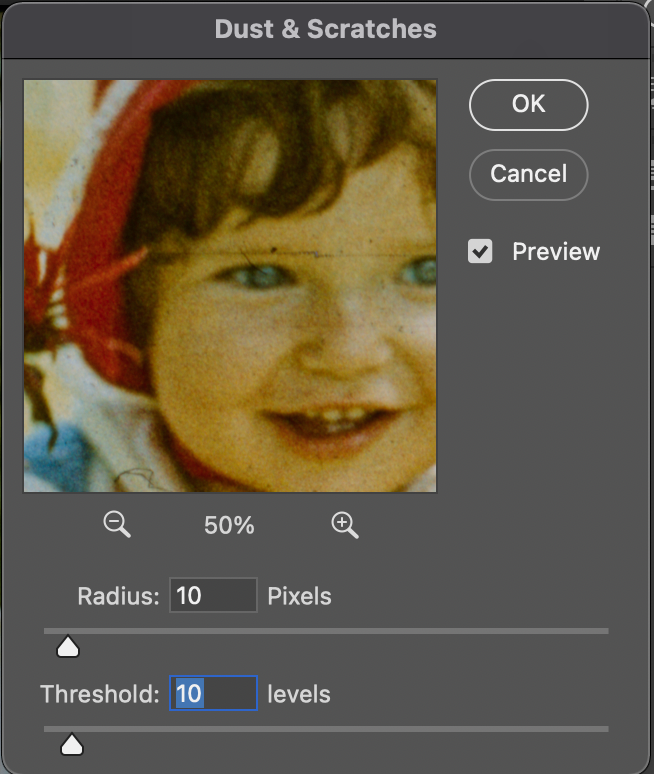
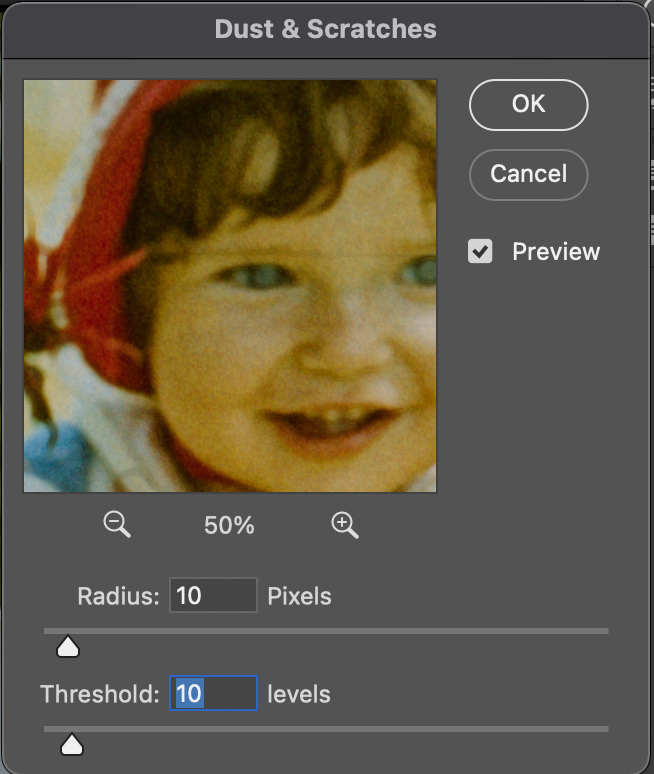
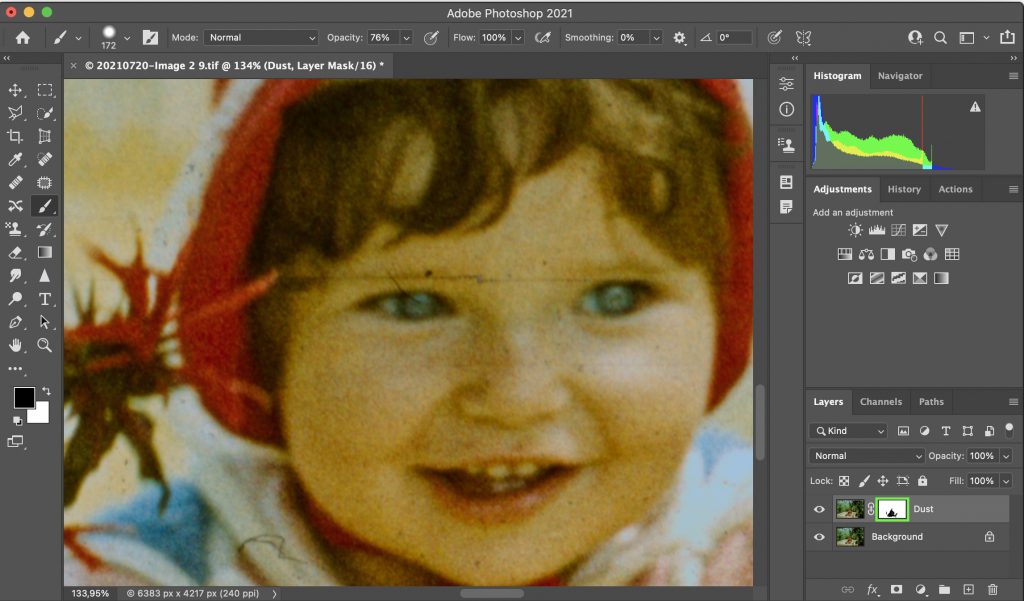
Let’s look at the face. I don’t wanna loose any sharpness in the face area and will most likely always want to remove the filter from the face.
I definitely lost a lot of definition in the eyes and mouth area and will try to remove the dust and scratches from this are in a different, less destructive way later on.
Removing the dust filter from the face
Create a mask by pressing the vector mask symbol in the bottom right corner (marked green).
The mask should be white (if black invert it by pressing ⌘+i).
Pick the Brush tool and set the paint color to black (switch between black and white while painting by pressing x). Black means erase, white jeans paint/cover.
Choose the right size and opacity for the brush.
The area you paint black=erase will turn black, creating a hole into your Dust Filter layer. The background is now visible though the black hole.
I recovered the face, the clothes, and the hand. Switching between black and white colors helps to modify the recovered area. In the bottom right corner you can see the shape of the recovered area.
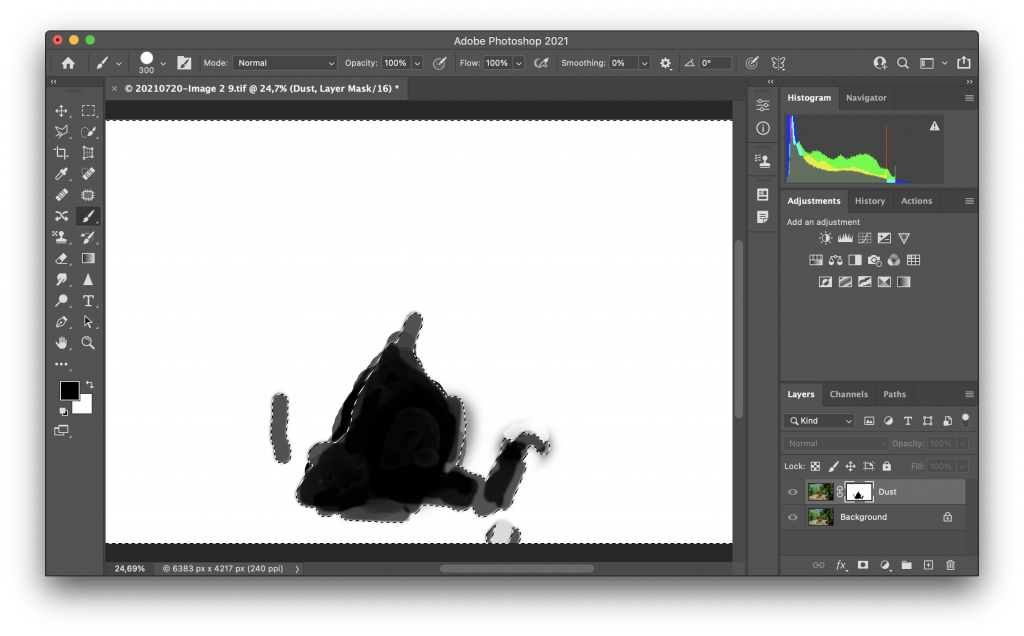
An additional step that might be useful in some cases is to check how well the mask was erased=how well the background was recovered.
I clicked onto the mask thumbnail (white square) on my “Dust”-layer while pressing the option-key (⌥ on Mac). I highlighted it green for you.
The mask will be shown instead of the main image and you can modify it if needed.
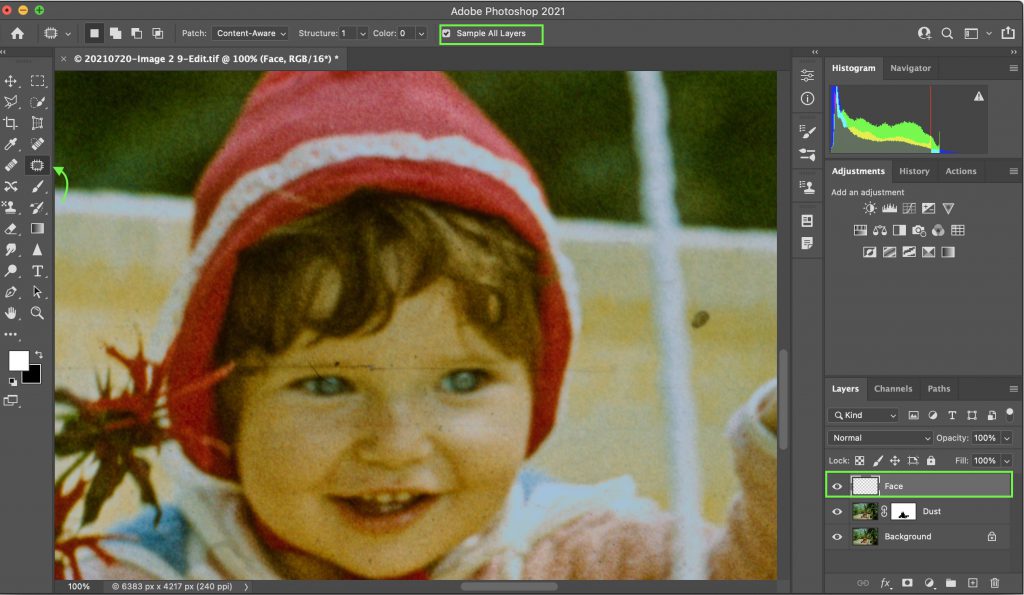
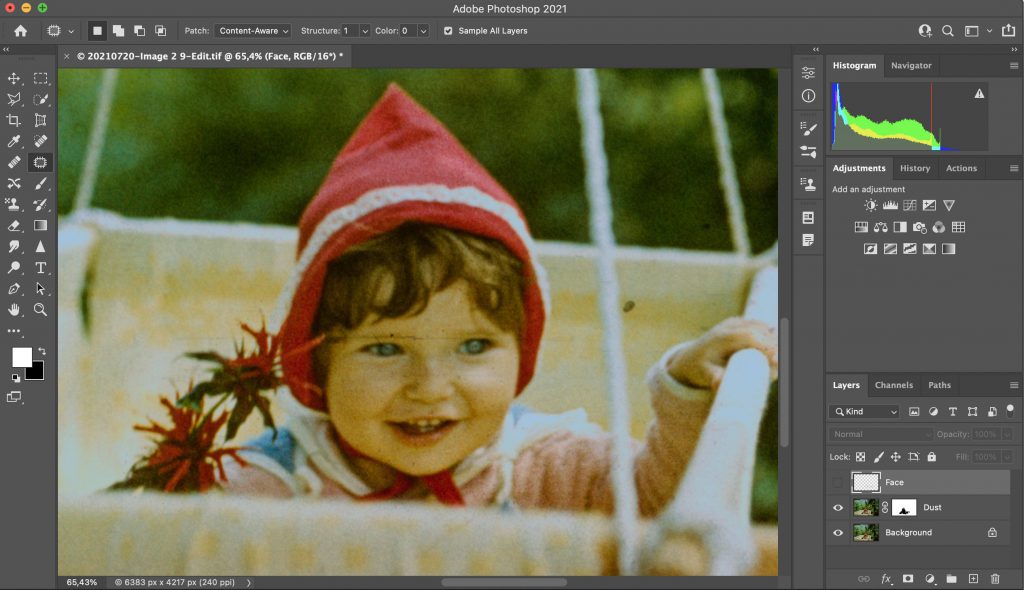
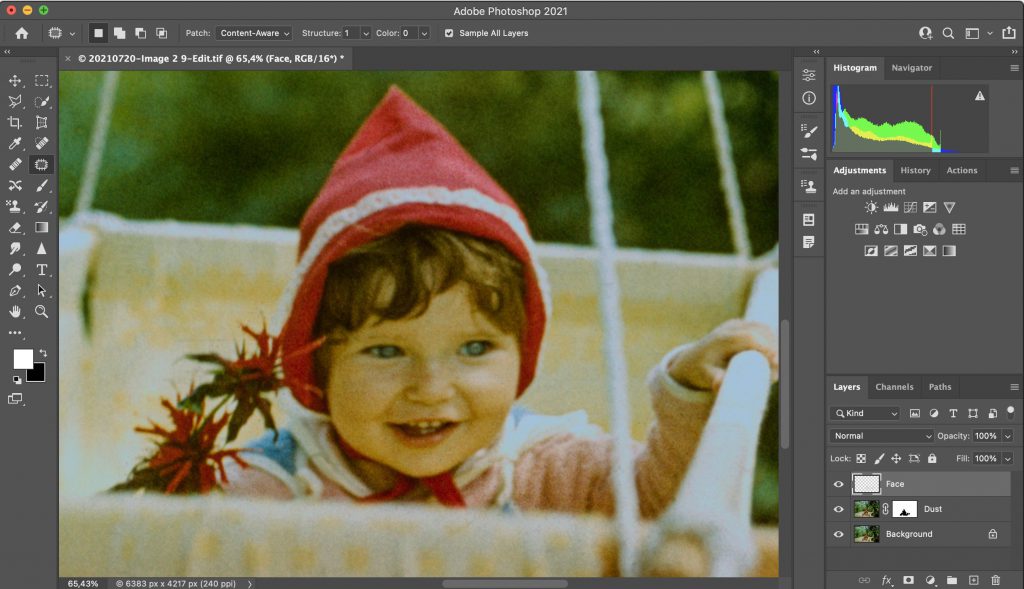
Working on the face: precise dust removal in photoshop
I created a new layer and named it face. I will be using the Patch tool. Here, it is VERY important to sample all layers below.
Additionally, the Spot HealingBrush tool might be useful for bigger spots around the face. Clone Stamp tool is handy to bread down continuous lines, that usually mess up the performance of the Patch tool or the Spot HealingBrush tool.
Here is a before-after of using mostly the Patch tool and a little Spot HealingBrush tool.
The image still needs a tone of work on the color, but the dust and the worst scratches are gone in just a couple of clicks. The fool befor and after is on the top of this post.
A more advanced way to edit out dust
Subscribe to the newsletter!
Awesome!
Hi lovely people
Welcome to Rawismyreligion! I'm Ina. I love having you here, sharing my lifestyle with you, getting to know you better. You can get in touch with me here on my blog by leaving comments under the posts and on all my social media.
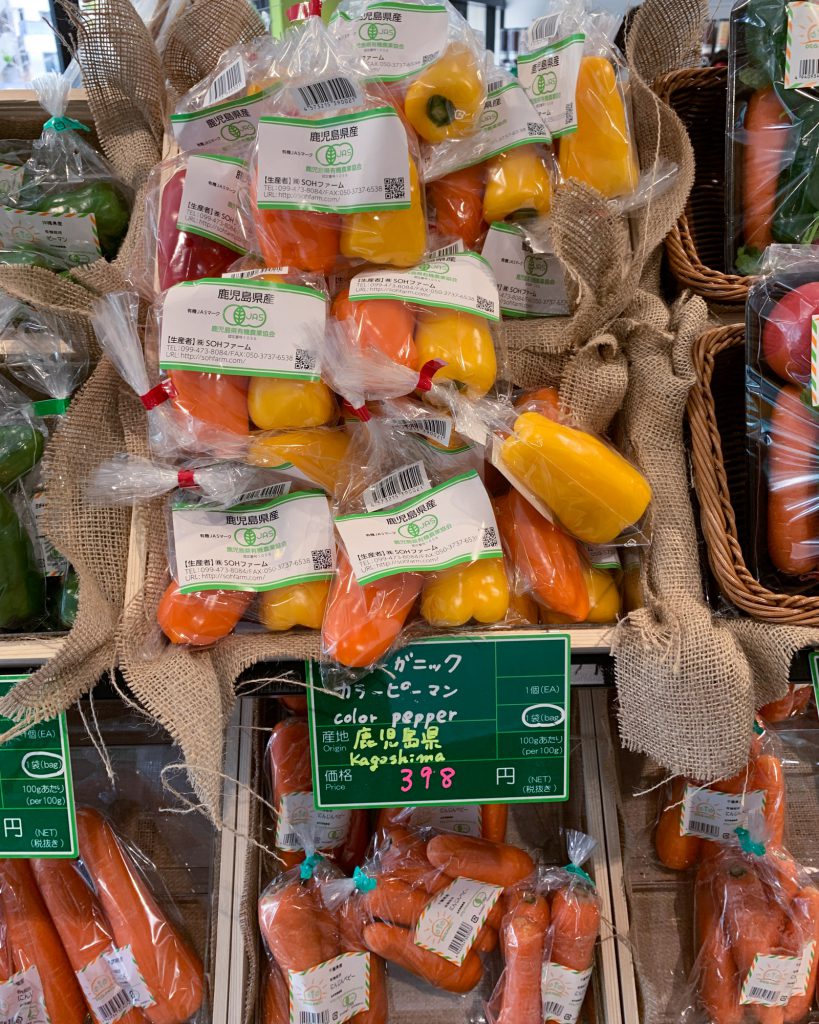
There is not a single fruit or vegetable that I haven’t seen being packaged in plastic even though other places sell the same product plastic-free.
EU is banning single use plastic in 2021, but food packaging is exempt from this environtally improve friendly move. The responsibility for shopping environmentally friendly falls once again solely onto the consumers.
We as consumers have some wiggle room to shop more zero waste produce, even though it’s not easy for sure. The legislation and the efforts on the business side need to catch up with the reality of the disastrous impact of single use plastic on the environment.
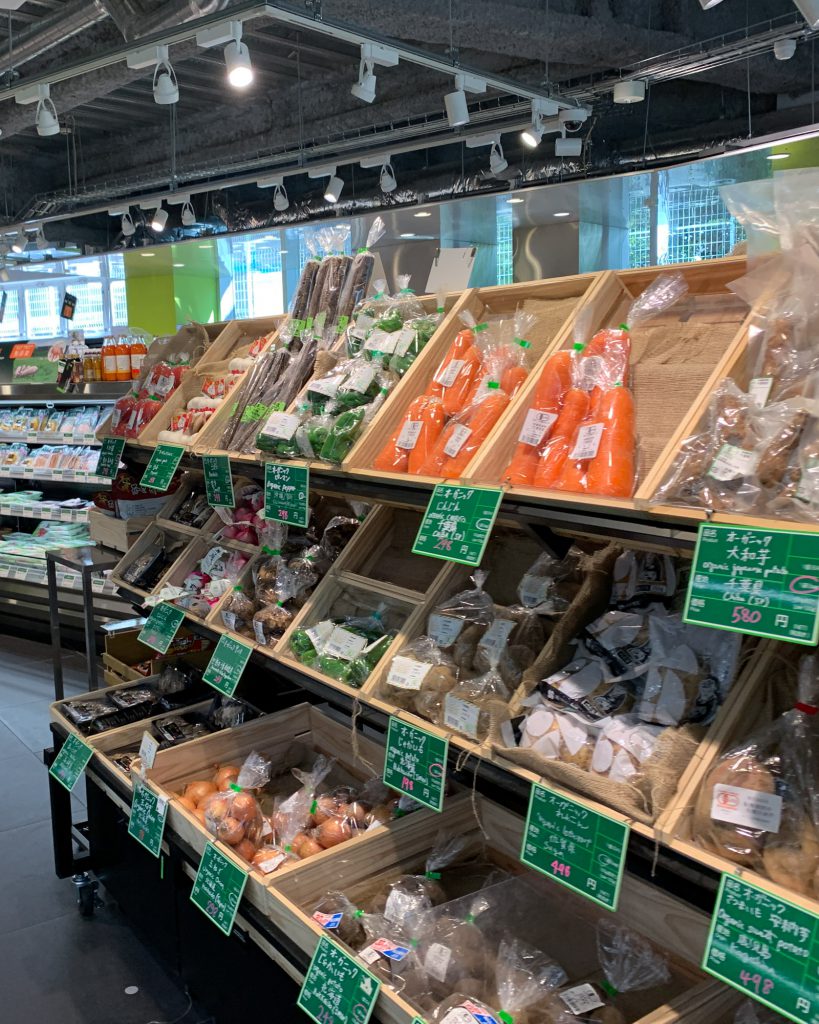
I found the packaging of fruits and veggies in Japan pretty scary. Here are some impressions of an organic supermarket in Tokyo. Organic store are usually at least trying to sell produce in as little packaging as possible. The reason being that there is no mix up possible and no need to separate organic and non-organic produce.
3 hacks for shopping plastic-free produce
Organic and health food stores
My first hack for shopping zero-waste would be to go to organic stores or health food stores. Those are usually not more expensive than regular supermarkets if you buy organic anyways.
Farmers’ Markets
Farmers market are usually also a great source of zero waste produced. Of course only if you go to a real farmers market the farmer sells their own produce stop at some farmers market you will find just the resellers to buy from our bulk store and sell the fruits and veggies prepackaged.
If you are a regular customer at the farmers market and like to buy in bulk, you can talk to the farmer. Ask for a more environmentally friendly bulk packaging. They usually would be more than happy to sell you a bigger box of berries without having to pack the berries into small plastic container. You might get a sizable discount as well.
Choosing a plastic free options
Sometimes you can get exactly the same product but package free. It’s always worth it to look around they kitchen unpackaged produced might be located in different places so it’s not so easy to spot.
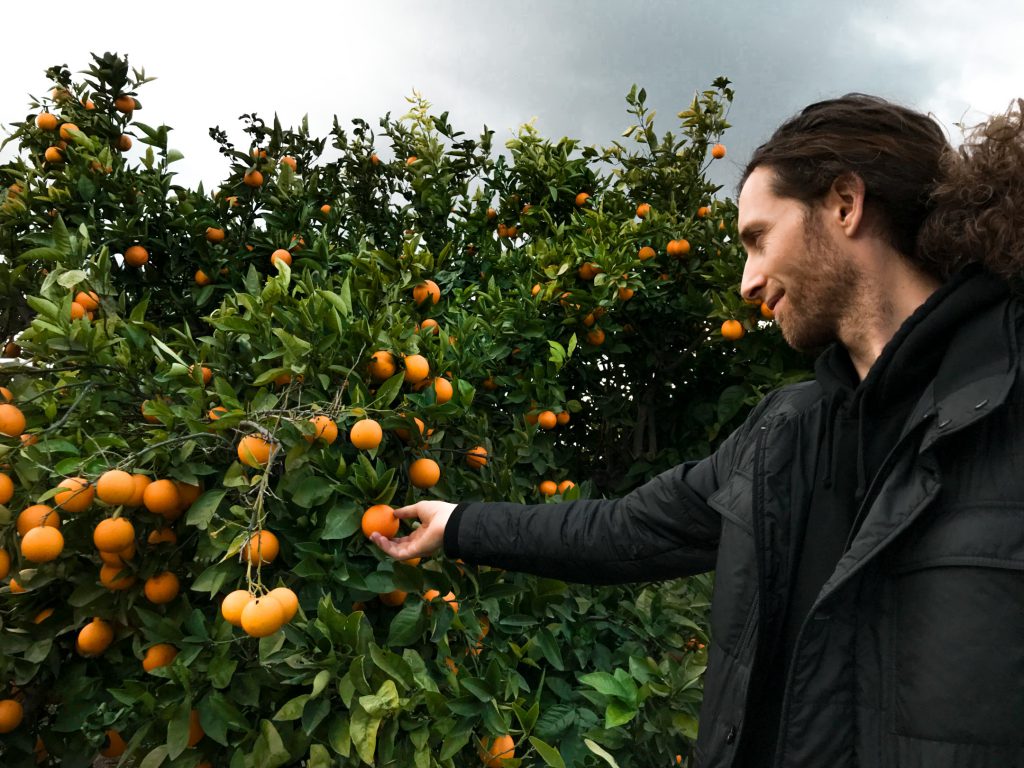
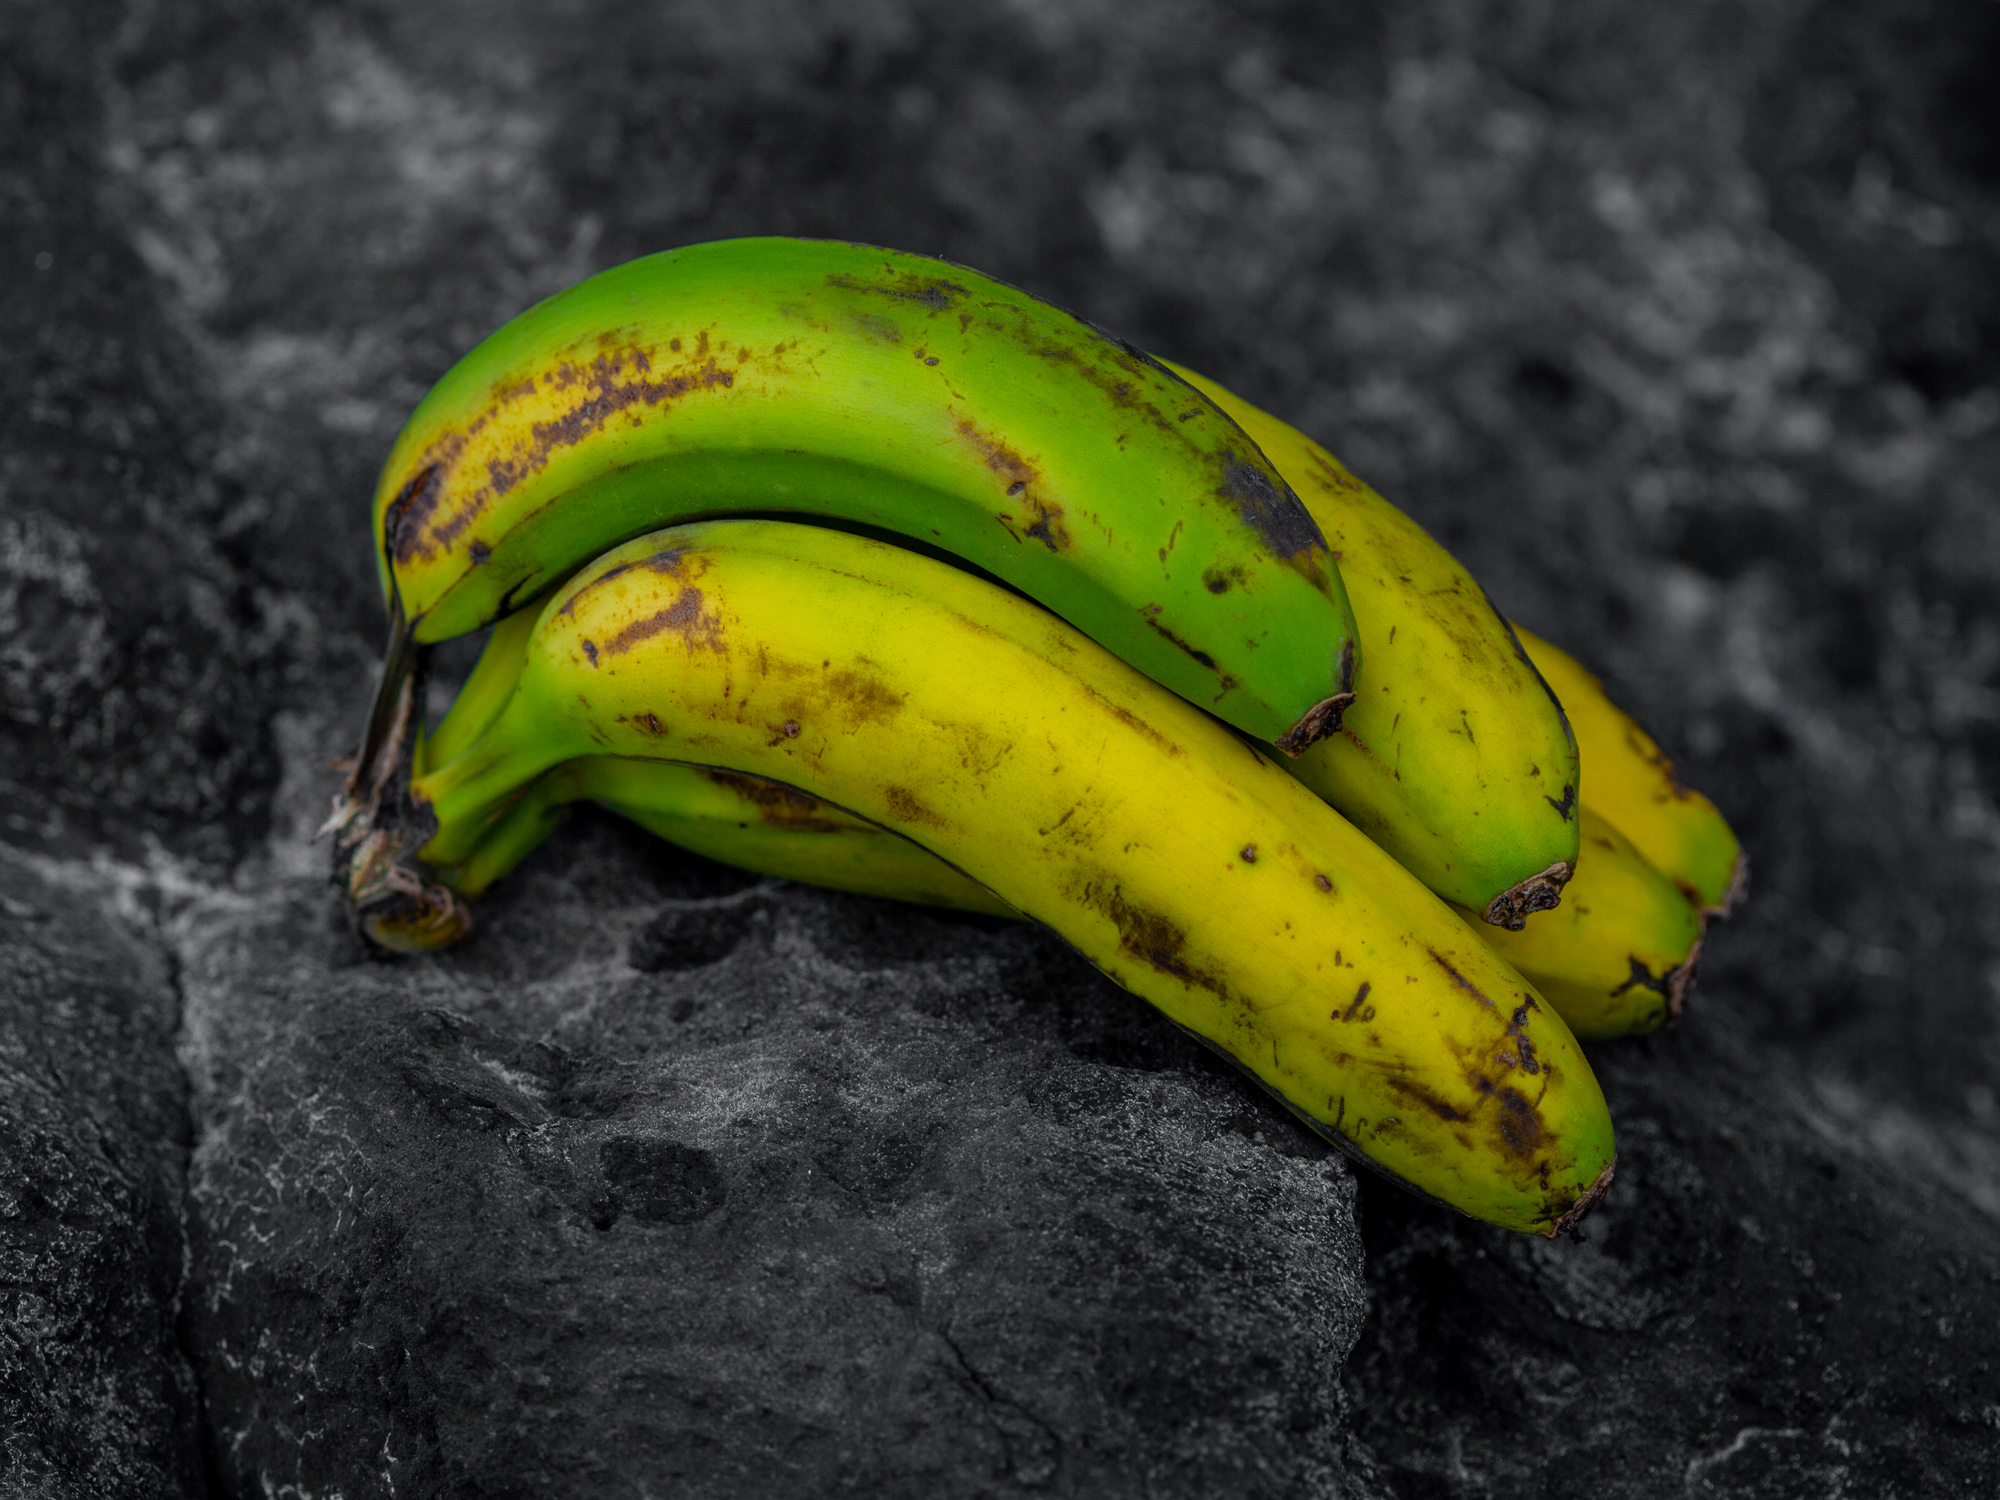
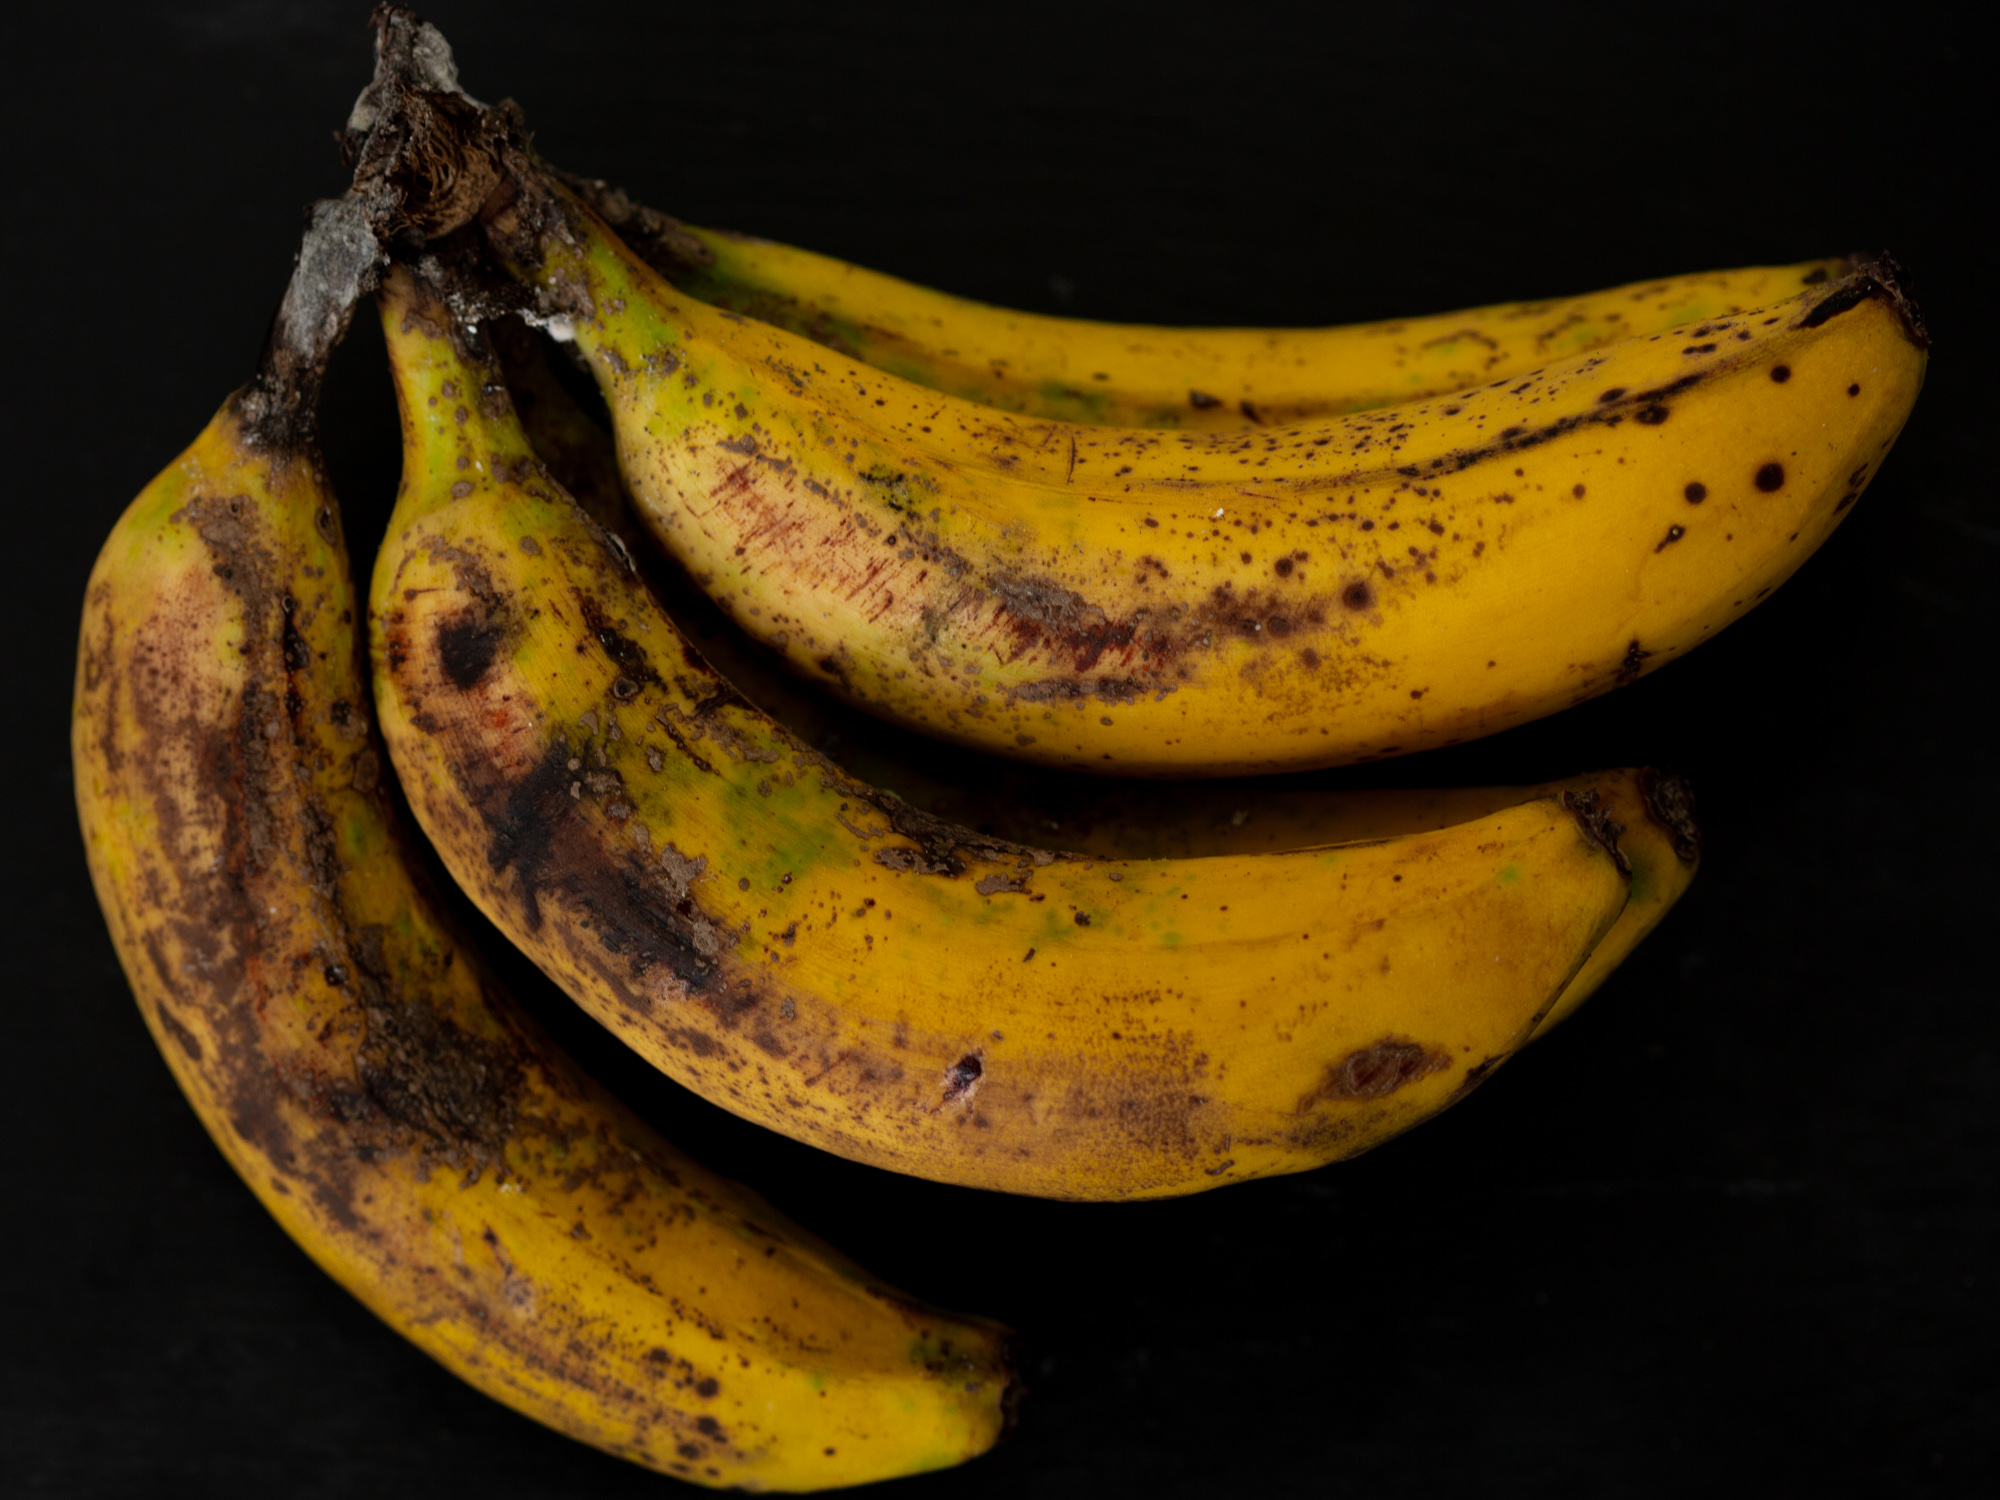
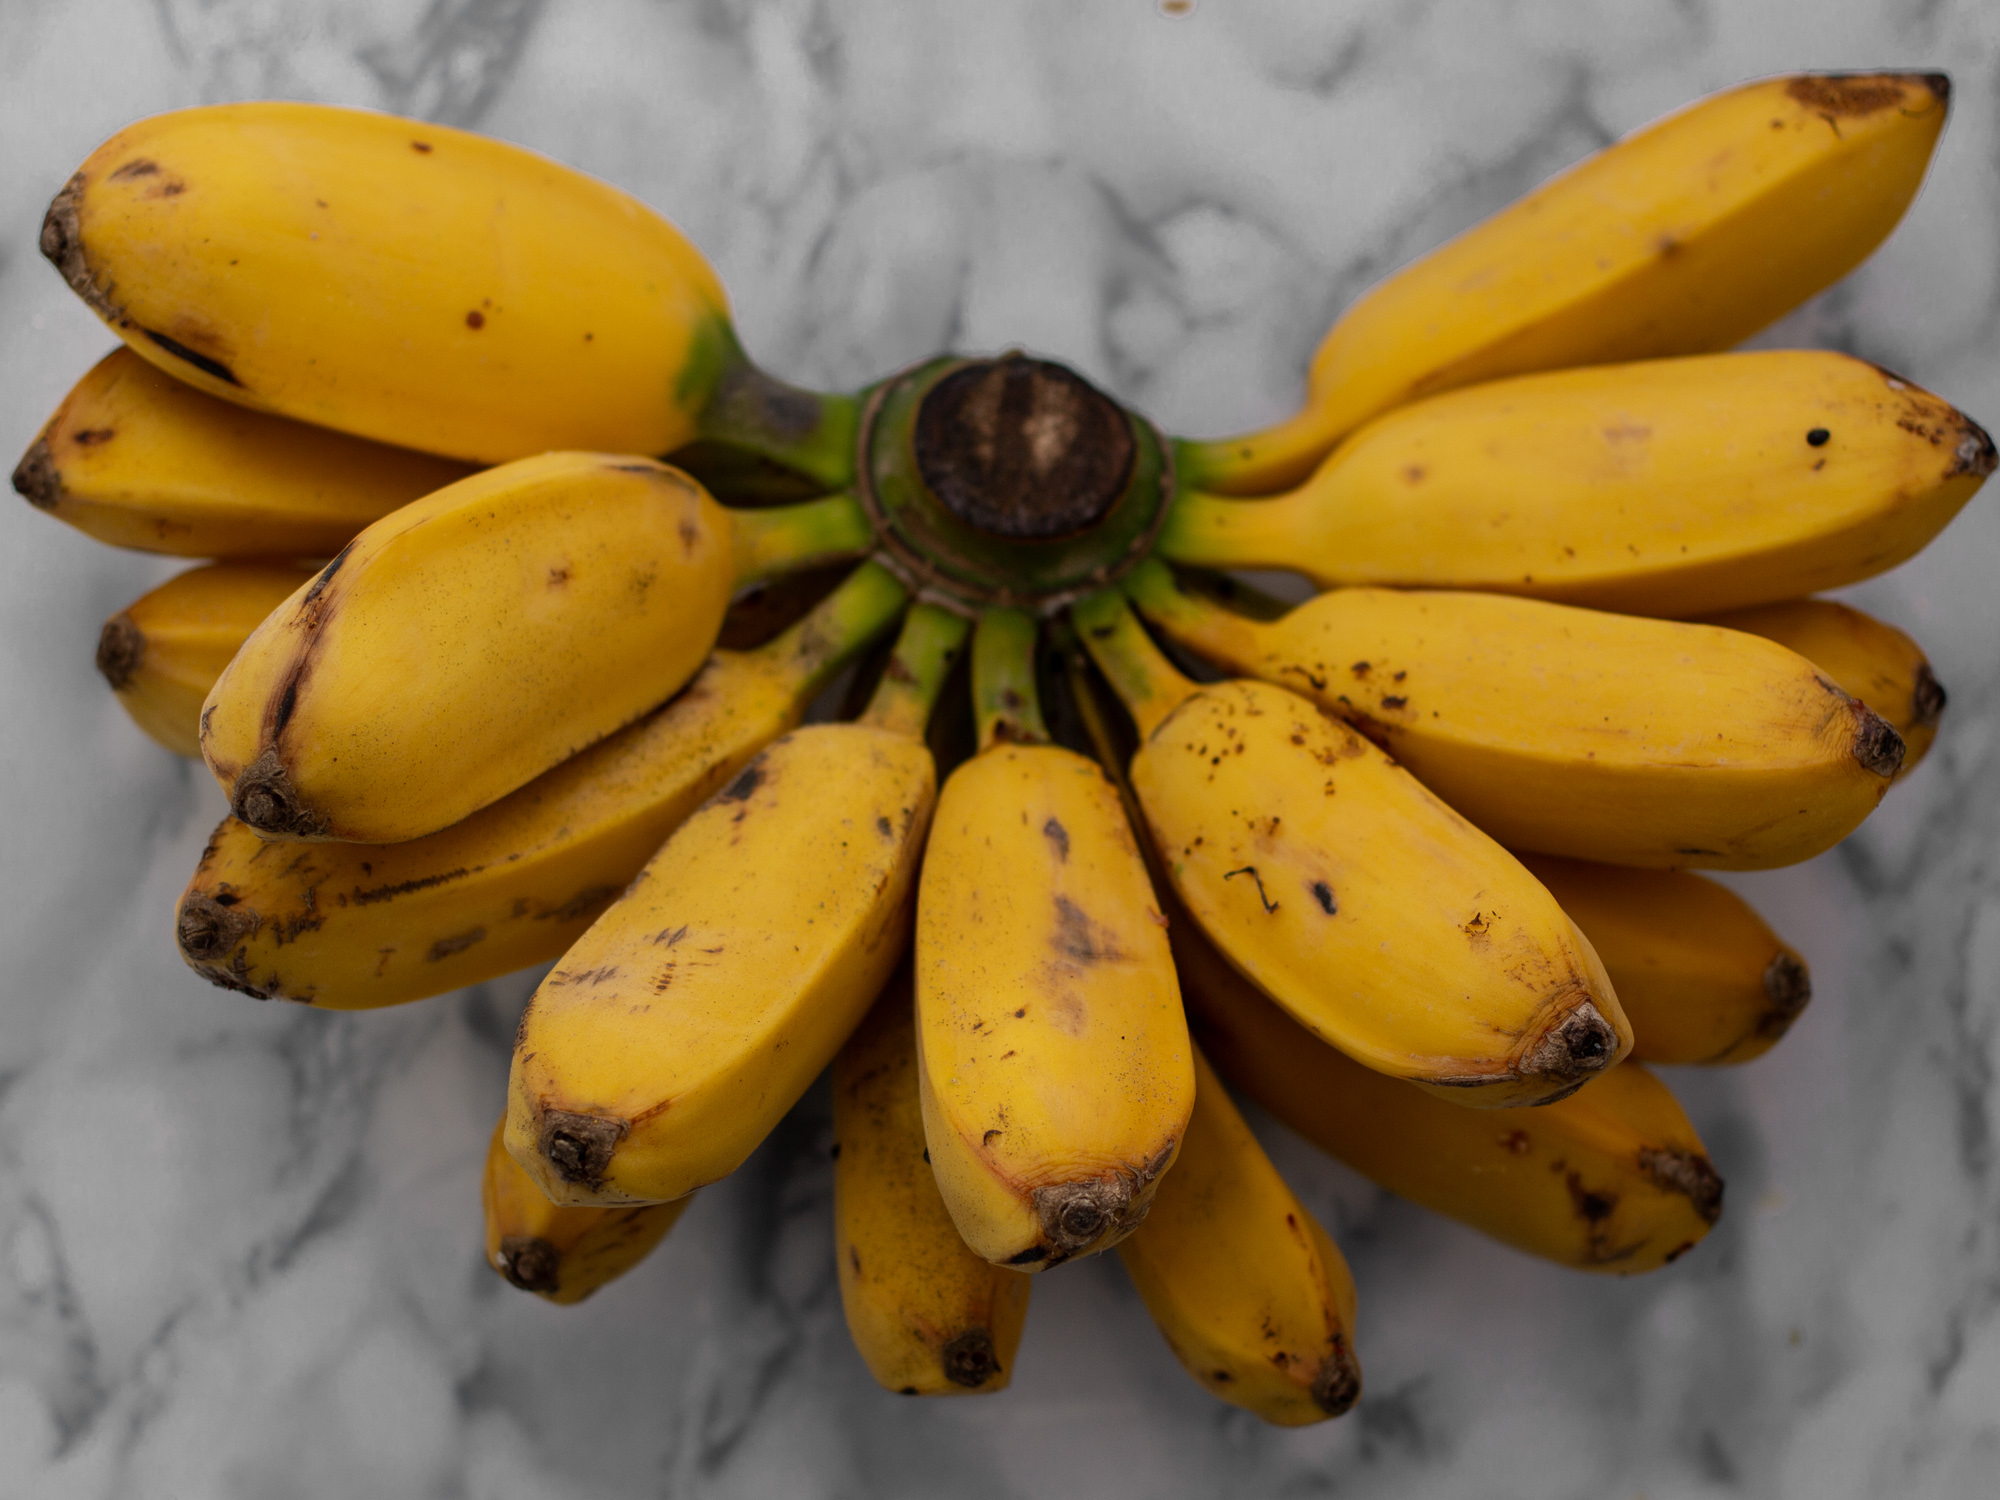
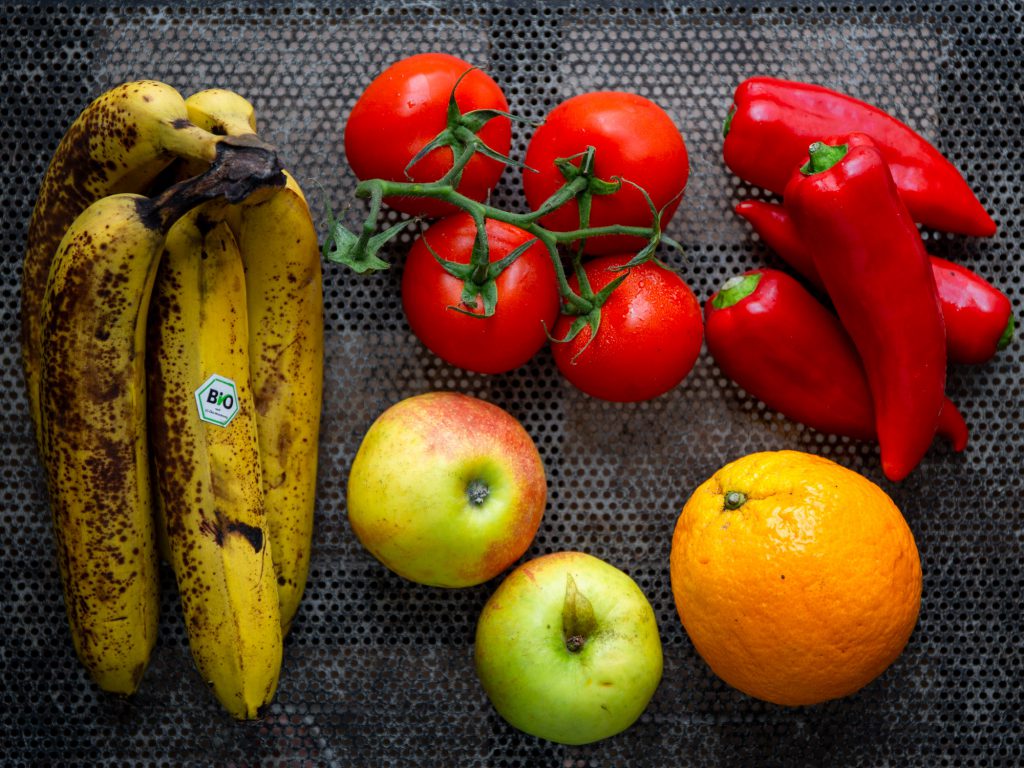
I also tried to remember what places sell my favorite produce fruits and veggies plastic free and plan my shopping trip accordingly. In Germany for example, discounters will have organic bananas wrapped in plastic or have a plastic sticky tape around them and the organic stores were usually half bananas just with some stickers but no plastic.
The plastic is not just horrible for the environment, but also takes time to remove, which is super annoying if I buy bigger quantities of bananas. I can save me some struggle and also pollute the environment a little bit less.
I'm passionate about eating the best food possible. I always buy organic and try to shop zero waste, in bulk and to support local farmers. For me, the people and the planet.
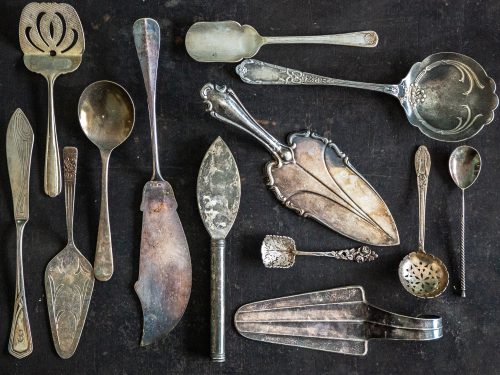
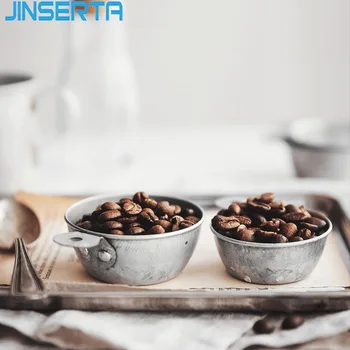
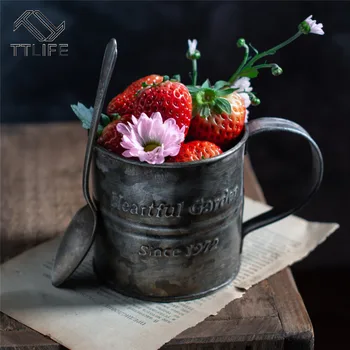
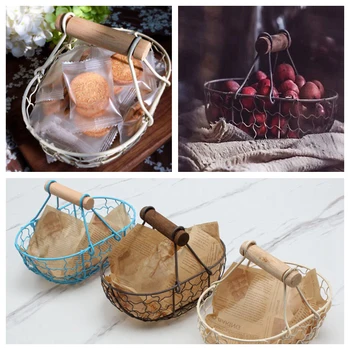
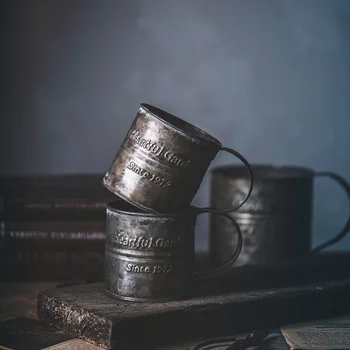
Best vintage Food Photography Props from Aliexpress
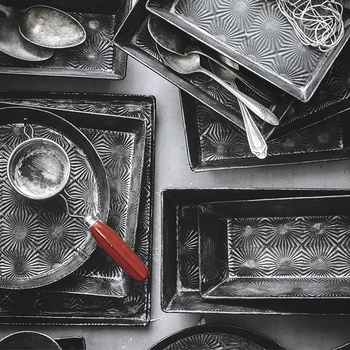
Cutlery
Best vintage Food Photography Props from Aliexpress
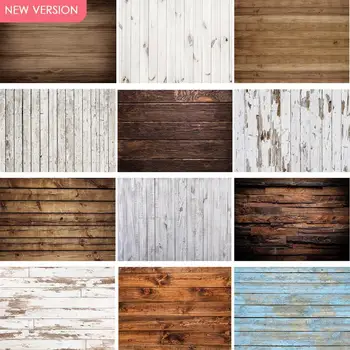
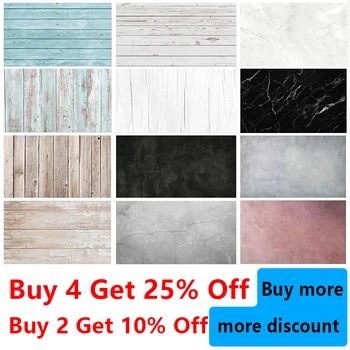
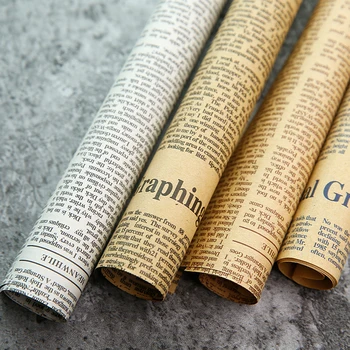
Backdrops
Vintage Food Photography Backdrops from Aliexpress. Keep in mind that Backdrops from Aliexpress are usually very thin vinyl oder thicker paper. Absolutely not great quality for sure.
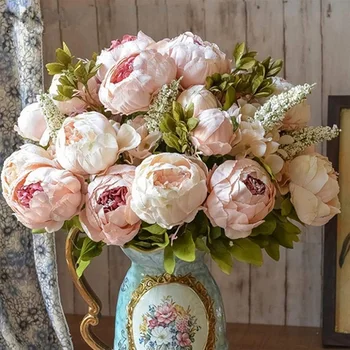
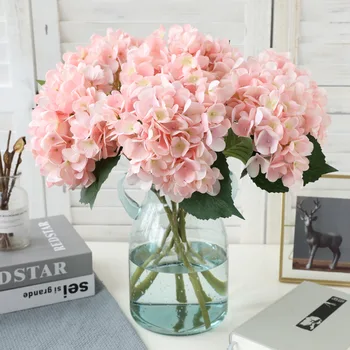
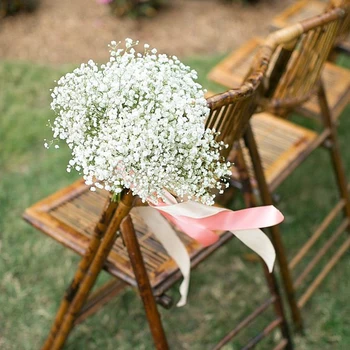
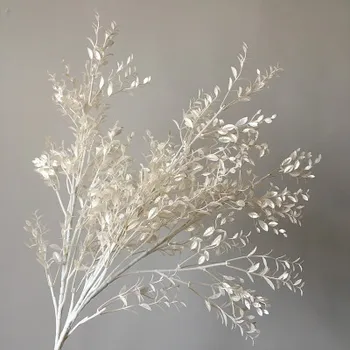
Flowers
Best vintage Food Photography Props from Aliexpress
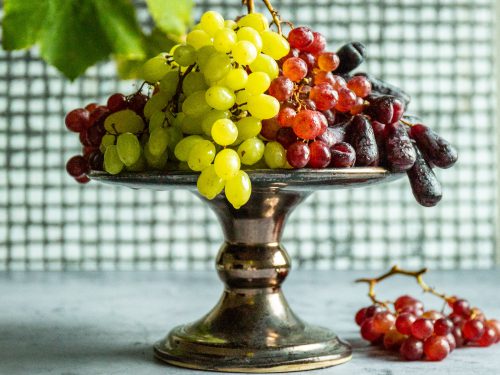
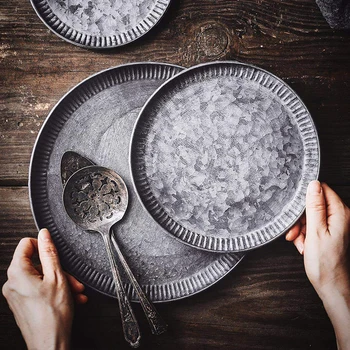
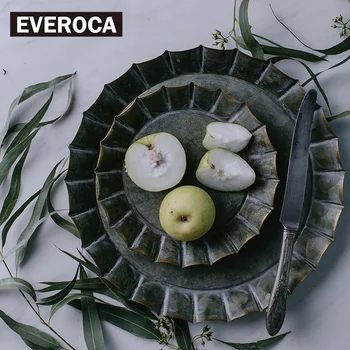
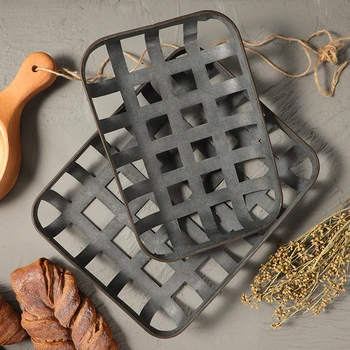
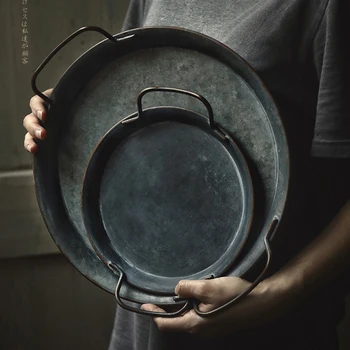
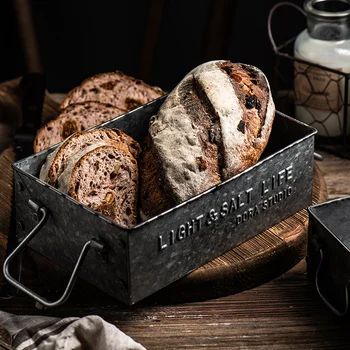
Trays
Best vintageTrays for Food Photography Props from Aliexpress
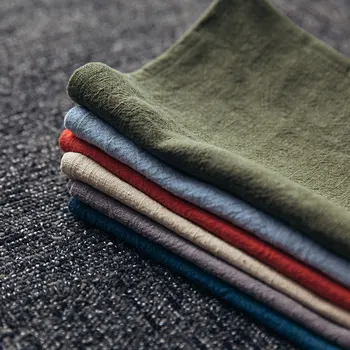
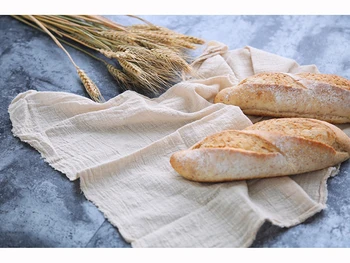
Fabrics
Best vintage Fabrics for Food Photography Props from Aliexpress
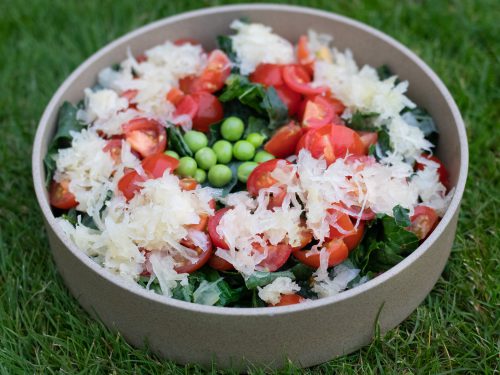
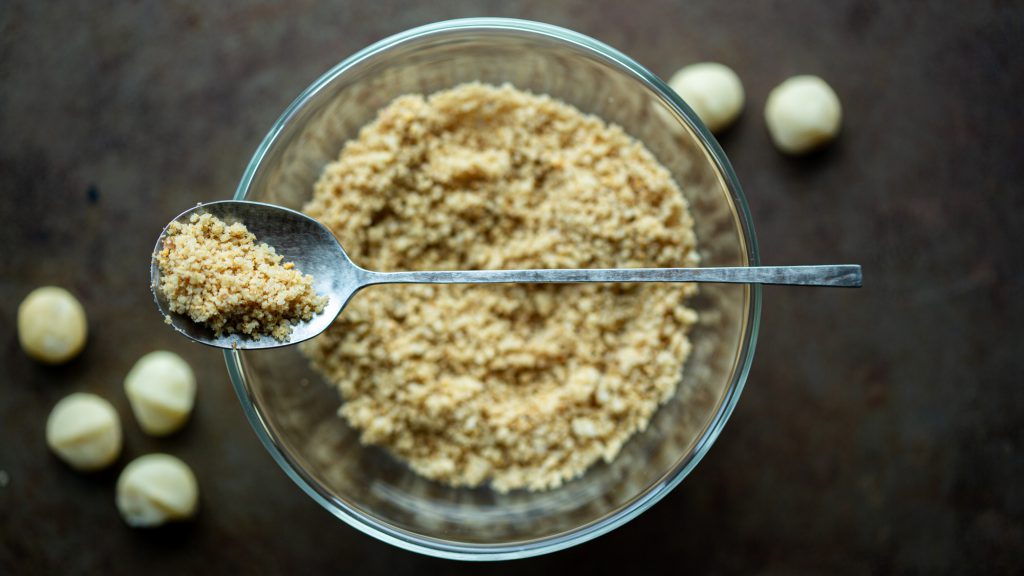
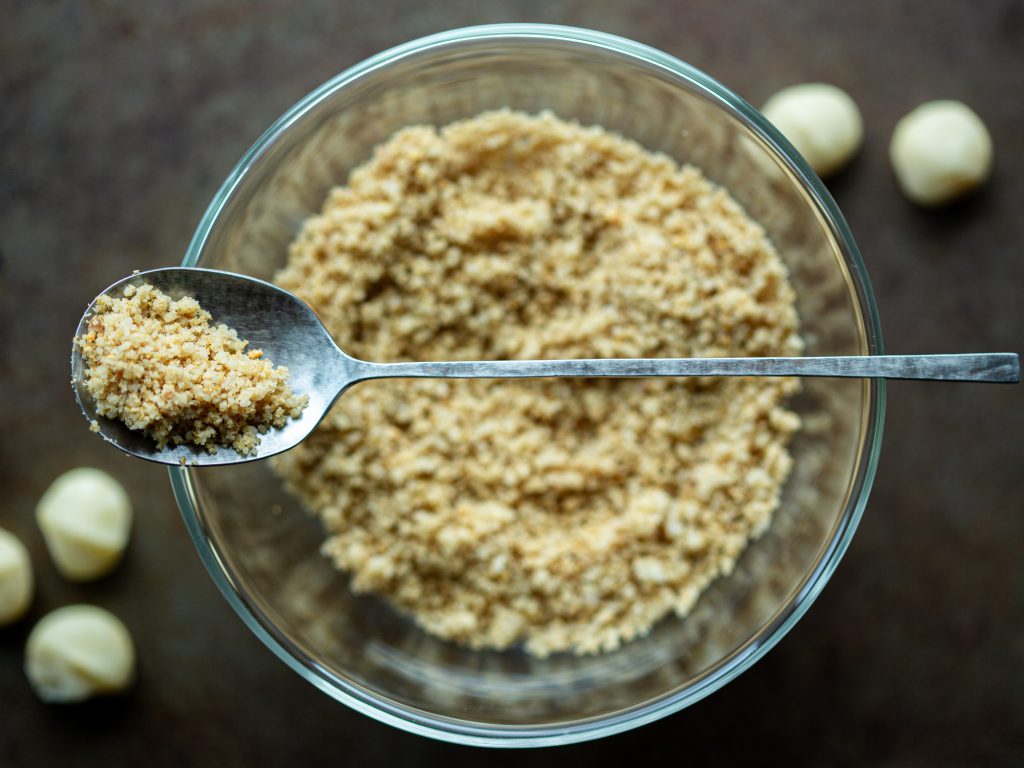
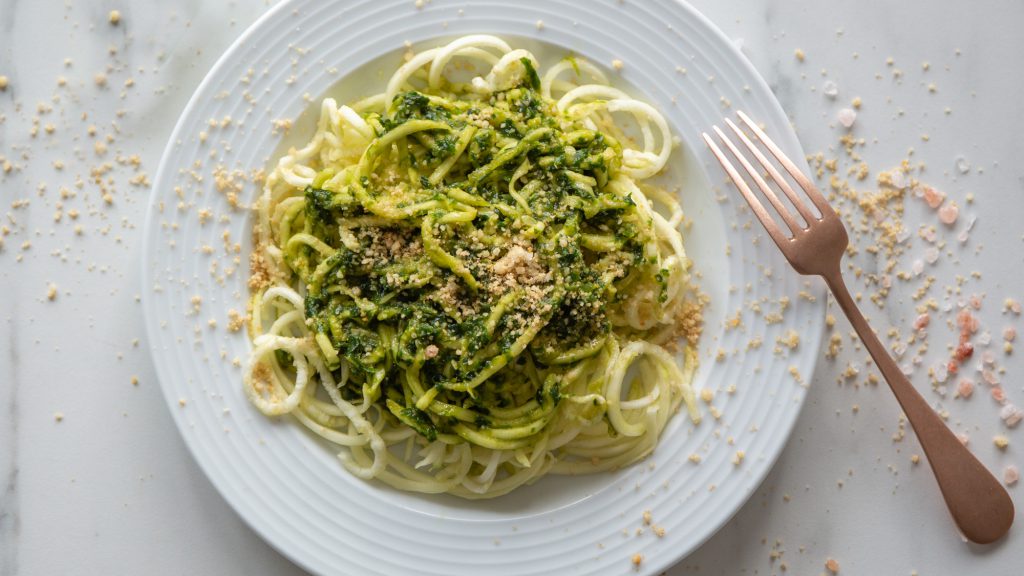
This vegan Parmesan tastes better than any cheese and smells great too. It’s a very simple recipe made from a few handpicked ingredients. The vegan Parmesan cheese works well on pasta, pizza and is very tasty as a salad topping. You can use this raw vegan parmesan for any dish of your choice.
Throw all ingredients into your food processor and process until desired consistency is achieved.
Share with your friends! They love what you love!
I have been playing with this recipe for a long time until it came together perfectly. It more than lives up to my expectations of Parmesan. I recommend you to make the recipe following my recipe. If you don’t like it, modify it. But this recipe will be a great starting point for your own experimentation. Here are a few more ideas for substitutions, if necessary.
Replacing macadamia nuts
If you don’t have macadamia nuts or don’t want to use them, you can swap them out for cashews or peeled almonds. I always buy all nuts raw or unroasted and peel the almonds by hand after soaking for 12 hours.
I would not recommend using seeds or tart nuts such as walnuts. These don’t work so well in this recipe.
Making the Parmesan without a food processor
Using a small food processor/chopper is truly the easiest way to make this recipe. It’s the fastest way to make a small batch of raw vegan Parmesan.
If you use a regular food processor, you would need to double or better triple or quadruple this recipe.
You can try making it in a blender, but I find it hard to get the right consistency without over blending the nuts into a sticky flour. Please don’t try using an immersion blender for this recipe. The macadamia nuts will be flying around your kitchen. You might hurt yourself. Please don’t.
Less salt
I made the first batch of this raw vegan Parmesan with twice the amount of salt. It was waaaay to salty for my liking. I reduced it a little, but you can further reduce the salt to your liking.
If you pass on the salt completely, the Parmesan will lose the cheesy taste. If I absolutely need to skip on the salt, I replace it with my homemade lemon powder. Sorry, I don’t have the recipe in German yet.
Alternatively, use celery (dehydrated celery, ground up) salt or onion powder (dehydrated onion, ground up). Ground seaweed or white pepper are also great salt alternatives, I think. However, algae can also contain a lot of salt. So, depending on why I want to leave out the salt, I choose the appropriate alternative.
Garlic, no garlic
Garlic works so so well in this recipe. However, I would never eat garlic before meeting fellow humans. I only eat garlic if I am going to be hanging out in the office all by myself for the next 3+ days. Accordingly, I think careful before using garlic.
This raw vegan Parmesan is a recipe I make in bulk for later use. If I’m not sure, I make if garlic-free and have the option to add some garlic to my dish directly when serving Parmesan.
Nutritional yeast substitutes
Yeast can be omitted, but it is quite an important flavor provider for this raw vegan Parmesan. If you don’t have any noosh at home, get your spices out. Grind up some white pepper, salt, onion and season the Parmesan everything you find fitting. An alternative to yeast flakes for the cheesy flavor is noni, dried and ground. But unfortunately, noni is not that easy to come by.
Subscribe to the newsletter!
Awesome!
Shelf life of this parmesan
This raw vegan Parmesan can stored unrefrigerated, but only if the nuts you are using are absolutely dry. I like to wash all the nuts before using. But I always make sure to dry them well in the dehydrator. Our parmesan is best stored in an airtight container. Always smell it after opening the jar/container so you don’t miss out on the amazing cheezy smell. This raw Parmesan smells so incredibly delicious.
This vegan parmesan recipe is:
• vegan • cruelty free • dairy free • lactose free • oil-free • paleo (but vegan of course) • sugar free • gluten free • delicious • salty • storable • easy to make • quick to make • organic (if you choose organic ingredients like me)
Why not just buying Parmesan
Store bought raw vegan Parmesan is quite expensive and not easy to find. Vegan Parmesan (not raw) is most likely also delicious, but doesn’t always fulfill my requirements for the very best ingredients. My homemade Parmesan is made in minutes, and consists only of a few simple ingredients, which I am really excited to eat.
I did quick calculation and the store bought raw Parmesan would cost me at least twice as much as my homemade parmesan. Plus, I save plastic packaging as I buy all the ingredients in bulk. And if possible, unpackaged.
If you’ve been looking for a vegan Parmesan recipe for a while already, this quick and easy but delicious recipe will win you over. Let me know in the comments what recipe you will use this raw vegan Parmesan for.
I'm in love with the raw vegan recipes. For me, it's the freshness of the ingredients and the ease of the food prep. And the recipes turn out so yummy (most of the time;), especially the desserts. Try some of my simple recipes here.
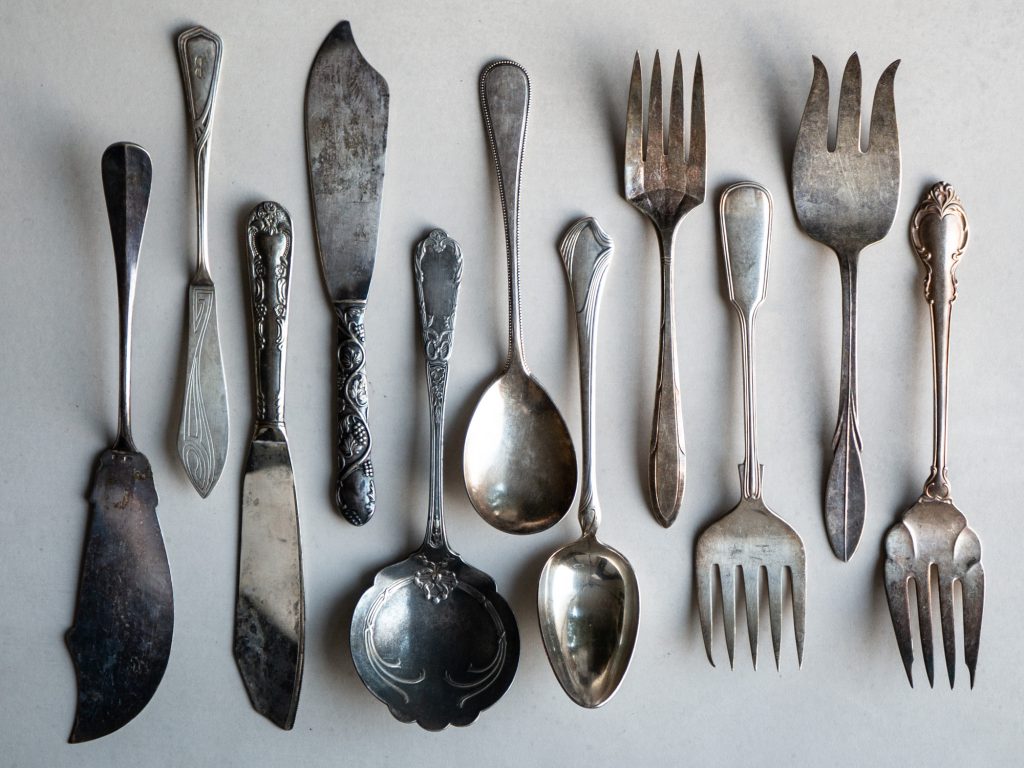
I have been collecting props for more than 10 years and cutlery has been my favorite to look for at the flea markets. There are so many different kinds. And the best thing is: old cutlery is pretty cheap. This is how it works: The older cutlery gets and the uglier it looks, the cheaper I can get it. But for food photography, old non-shiny cutlery is actually amazing. I would not eat with it, but as a prop old cutlery is amazing.
Ever though I have a pretty decent collection, I end up using the few small spoons from the box, which is the easiest to access. And it’s all because my cutlery was never properly organised. Even though I sorted my cutlery by theme, I had no idea what I actually had and where.
When it comes to food photography, on the daily basis, I usually photography the food we eat and with everything else in my life and the food prep and the chasing the lat ray of the natural light, I don’t take the time to look through all my props every single time to find the perfect spoon I did not use yet.
So today, I took the time to organize, to photograph and to label all the places I keep my cutler so I can find it easier the next time I might need it. Here are some of the find on my organizing spree:
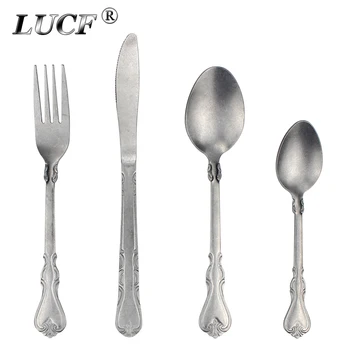
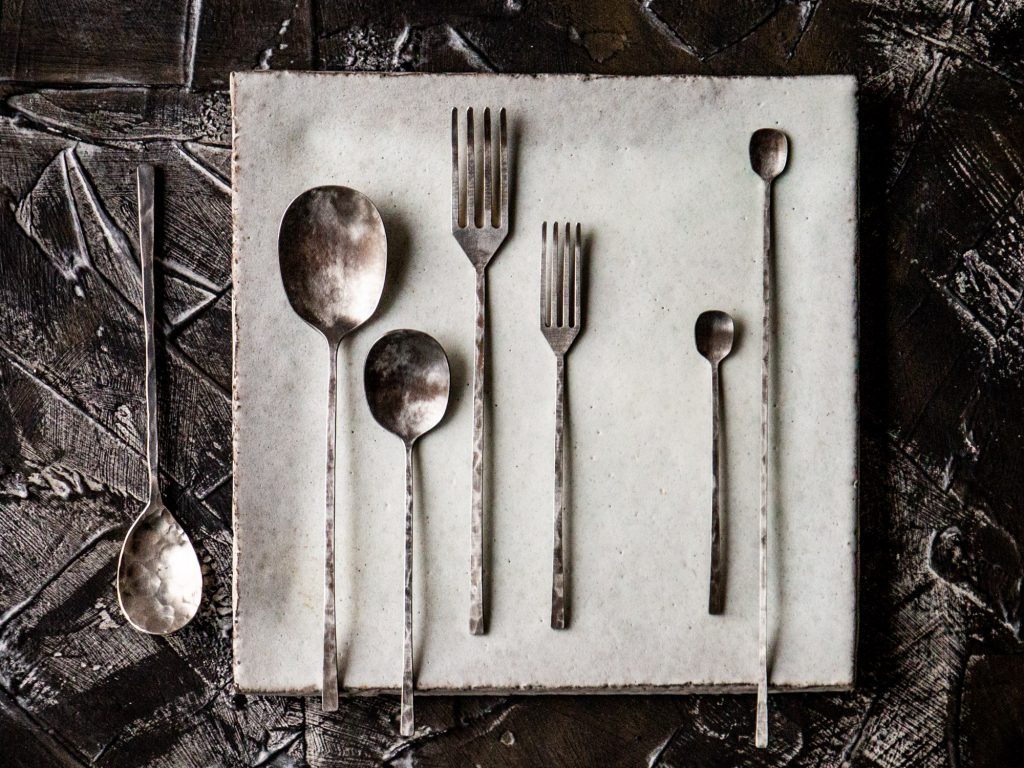
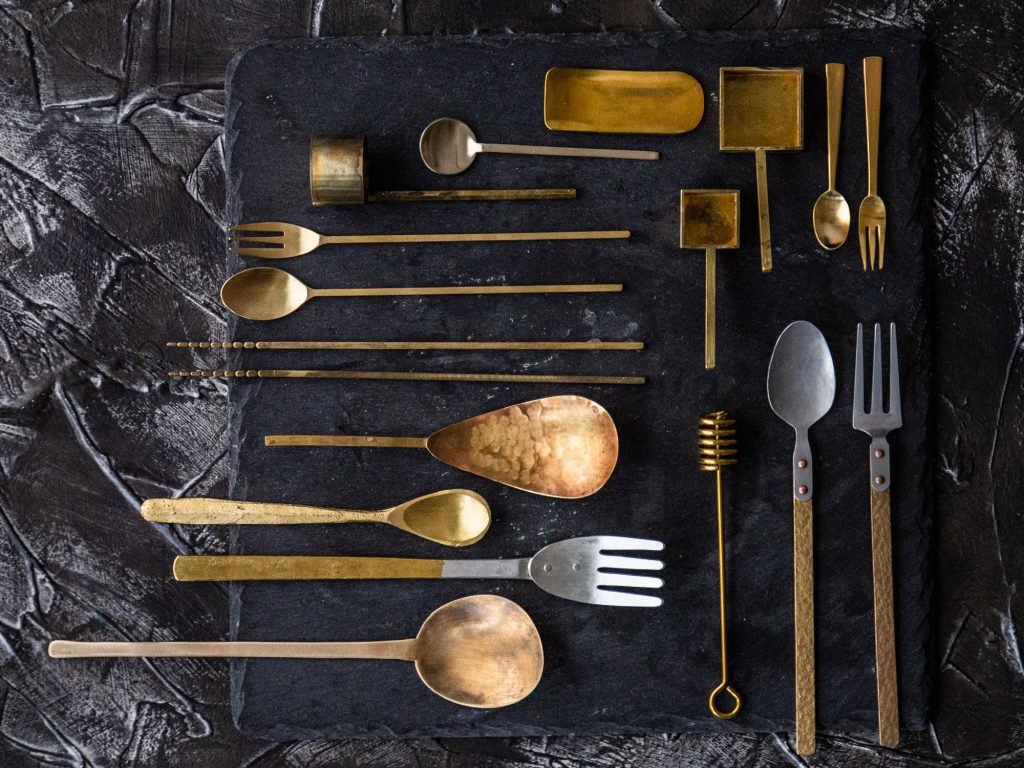
Copper cutlery
Not really copper, I believe, but copper look. On the left are the cheapest I got from Muy Mucho in Spain. Followed by a set from Zara. And on the right side of the photo are some really nice pieces from Japan.
The backdrop is a vinyl coated laminate tile.
Here is a set from Japan I regret getting. I don’t see what I can use it for yet. The backdrop is a hand painted one I made a week ago.
Another set from Japan. I will find out what brand it was and will probably let you know in another post. The plate is from a local German artist who studied in Japan. The backdrop is hand painted by moi.
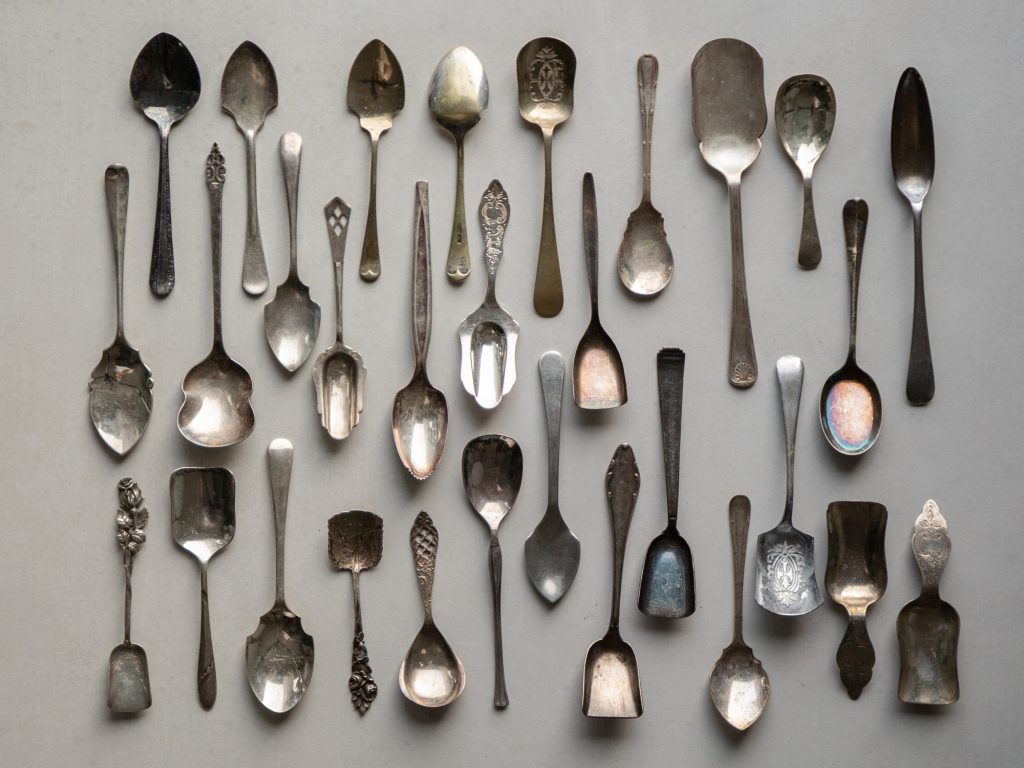
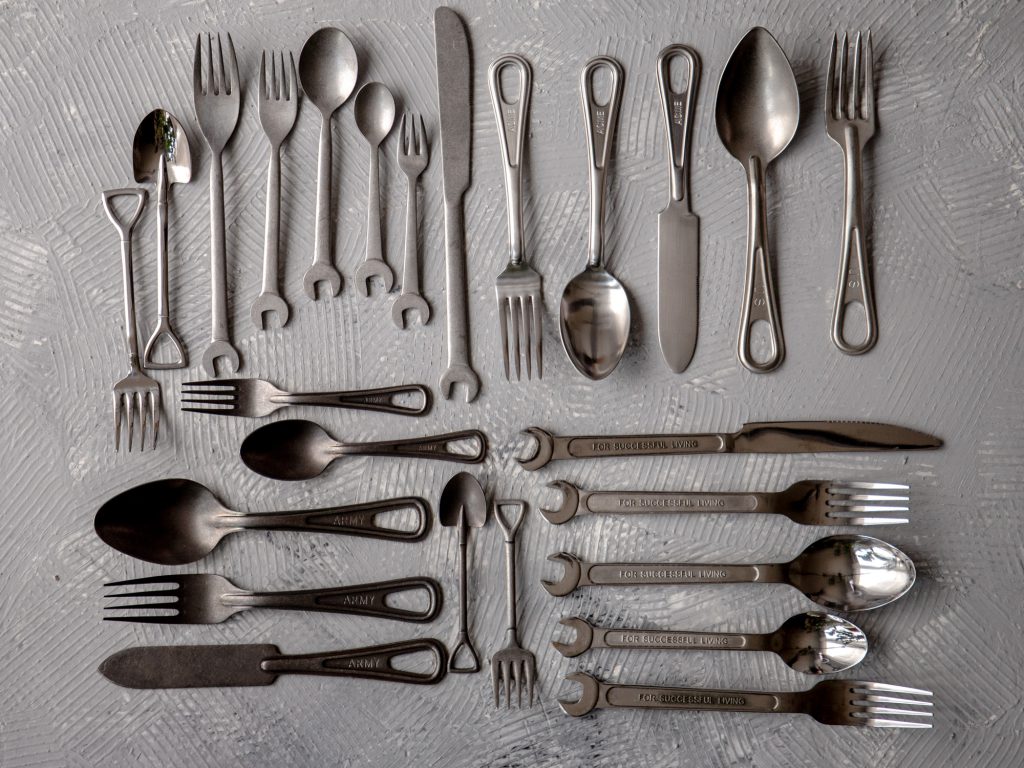
Here are some older huge spoons. All from the flea markets. Found mostly in Germany and France. Backdrop is a light gray tile 60 x 60 cm.
A small sugar spoon / sugar spoon collection. I found those mostly in Europe, sone in the US.
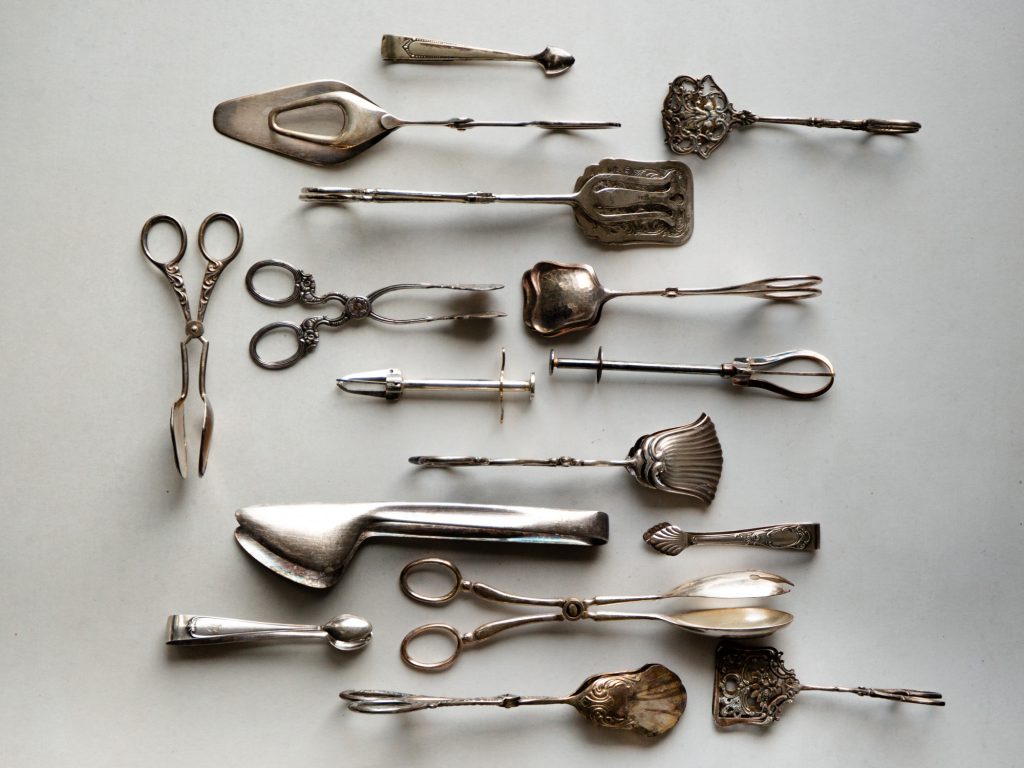
Tongs. Don’t use those much (yet).
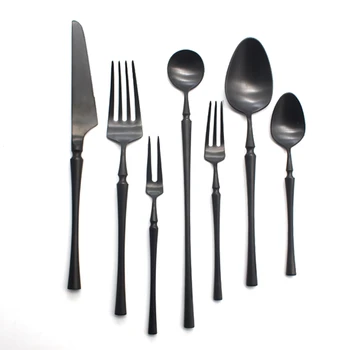
Beautiful Japanese cutlers. Very special. Found the pics on pinterest years ago and could not come back from Tokyo without getting those.
These are newer designs by the same artist.
Almost all of these golden pieces are from Japan, one is from Ikea.
I don’t know about those. All of them felt like a good Idea. Now my husband uses them for his food pics.
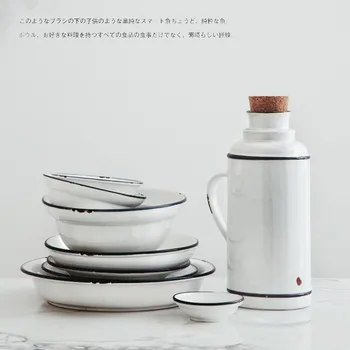
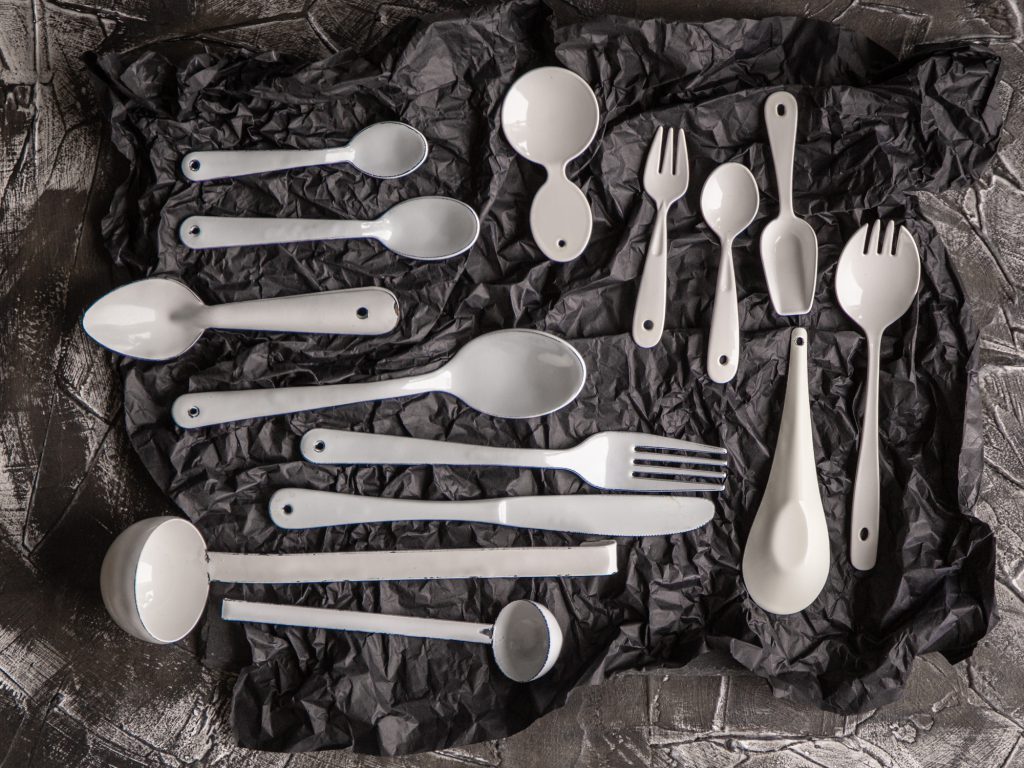
White enamel pieces. Love them. Half from Europe, half from Japan.
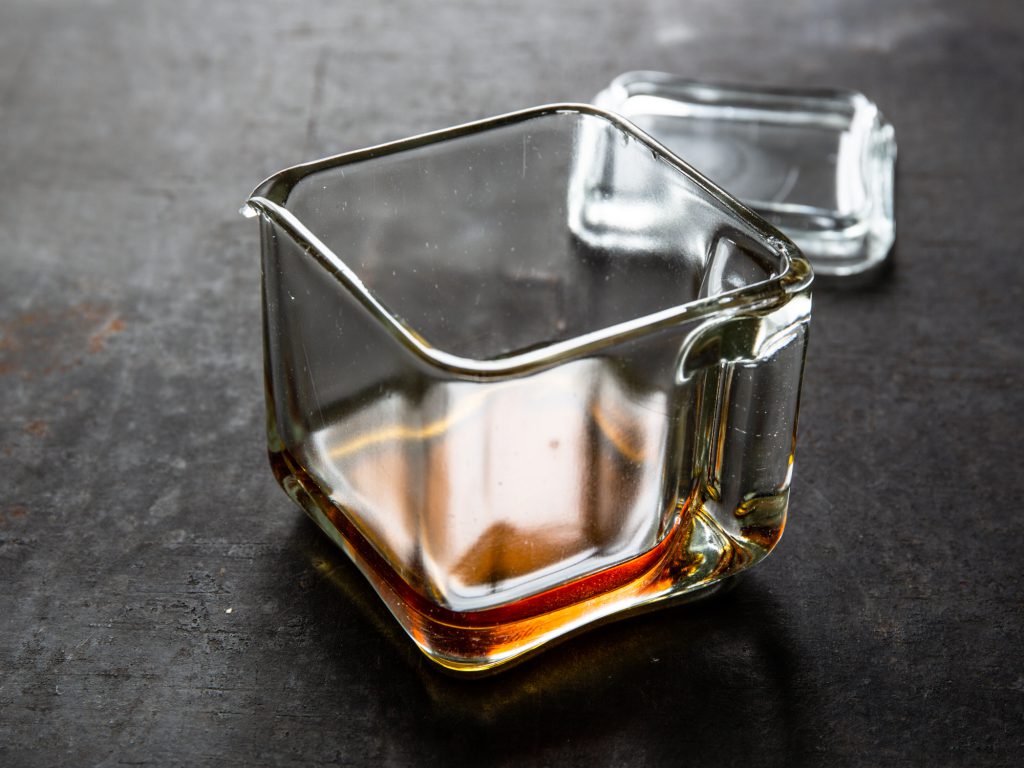
Part of the Kubus Stacking Container Series 193-1950
Produced by Vereinigte Lausitzer Glaswerke German
Designed by Wilhelm Wagenfeld
Wilhelm Wagenfeld studied at the Bauhaus between 1923 and 1925.
Later he went on designing consumer products. At that time, the market screamed for affordable functional factory-made products. The Kubus series turned out to be very popular.
Wagenfeld’s Kubus system was mass produced, widely available, and affordable.
The Kubus series consists of modular glass storage containers. Those are made of heat-resistant industrial glass. The containers were mainly used for storing food in the fridge.
The Kubus series consists of seven separate, stackable units of variable sizes and interchangeable lids. The containers can be used either together as a unit or individually as needed.
This work by Wagenfeld exemplifies the Bauhaus idea of utilizing industrial production to deliver well-designed standardized products at affordable prices to the masses.
My collection
I own the small jug you see in the picture above and the biggest container. The jug I found at the flea market for unter 10 € sold by one of the guys who gets whole boxes form “Haushaltsauflösungen”. Haushaltsauflösungen ist a German word for selling off everything an elderly person owned after their passing.
Not in production anymore
Unfortunately, the Kubus collection is not produced anymore, which is such a shame. Especially as the Jenaglas, a glassware production company in Germany, still produces some not so amazing products by wagenfeld to this day. They should pick up the production of the Kubus series instead.
The complete Kubus series can still be acquired on ebay for between 700€ and 1500€ in varying quality. Some of the jars or lids are usually chipped as the glassware ist almost 100 years old by now.
Best time saving Lightroom shortcuts for smooth workflow in lightroom Develop Module for Mac
Saving time while working with Lightroom gives me more time to spend on more footage. Productivity is key and a fast workflow is a true moneymaker. These Lightroom Develop Shortcuts help me to save time, be more productive and make more money with my pics.
Lightroom Develop Shortcuts also help to avoid annoying steps and search for the right panels, tabs and buttons. Learn a Lightroom develop shortcut a day and get much more productive in just a week.
Write the one shortcut you want to learn today on a postit and try using it as much as possible.
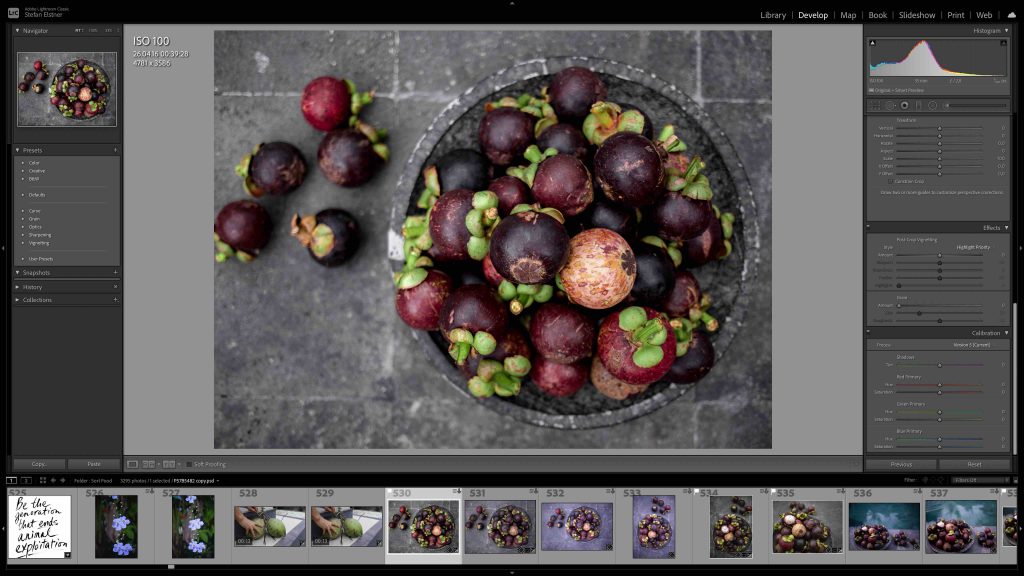
D : From library to develop
After importing and screening photos in Library mode I quickly move on to the Develop Module to work on the Photos. The fastest way to switch from Library to Develop is by pressing the D key.
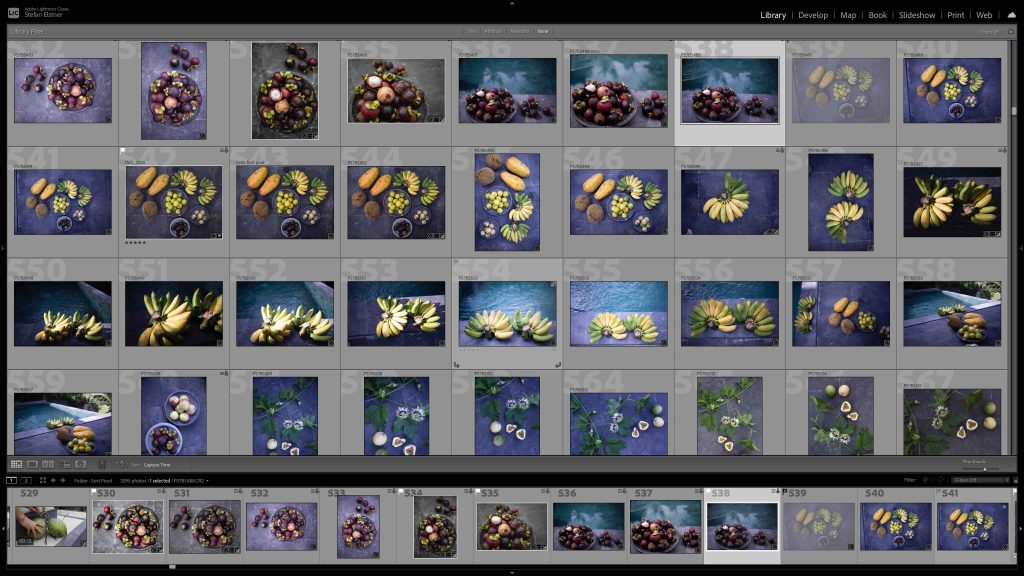
G : Back to library
To change back to Library press G. Now you are in the Gridview.
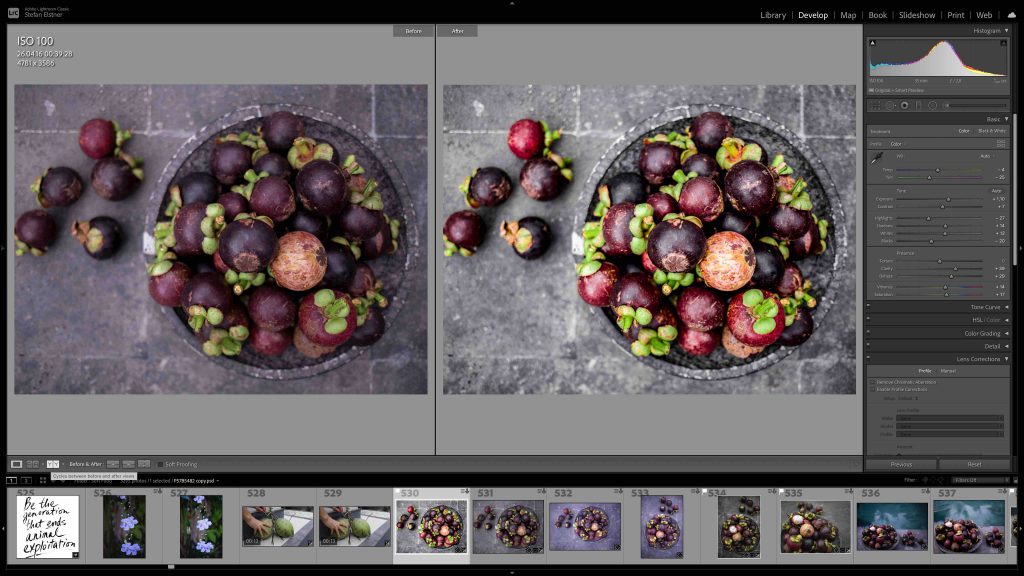
Y : before and after
I use the before and after views to check on my editing progress. To keep my images as natural as possible I have to make sure I don’t overexpose or make my images too cool.
To switch to the before and after views, press Y. To exit the compare mode press Y.
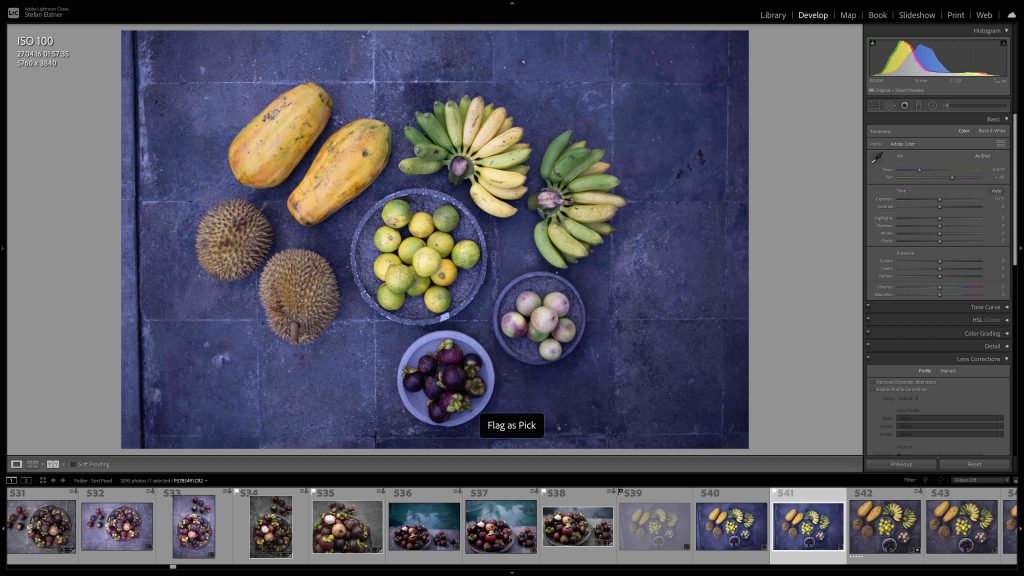
P : Flag the favorite in the Develop Module
While editing in the Develop Module, I usually mark my fav images, which will be exported to be used on the blog here. Press P to pick the best images.
⌘ +/ – : Zoom in and out in the Develop Module
If I don’t have a trackpad or don’t work on my laptop, there is a shortcut for the zooming in and out ⌘ +/ –. Usually, I just use the Pinch Zoom Gestures.
K : Brush tool in the Develop Module
For the fine tuning the brush tool is super useful. To activate is quickly, press K.
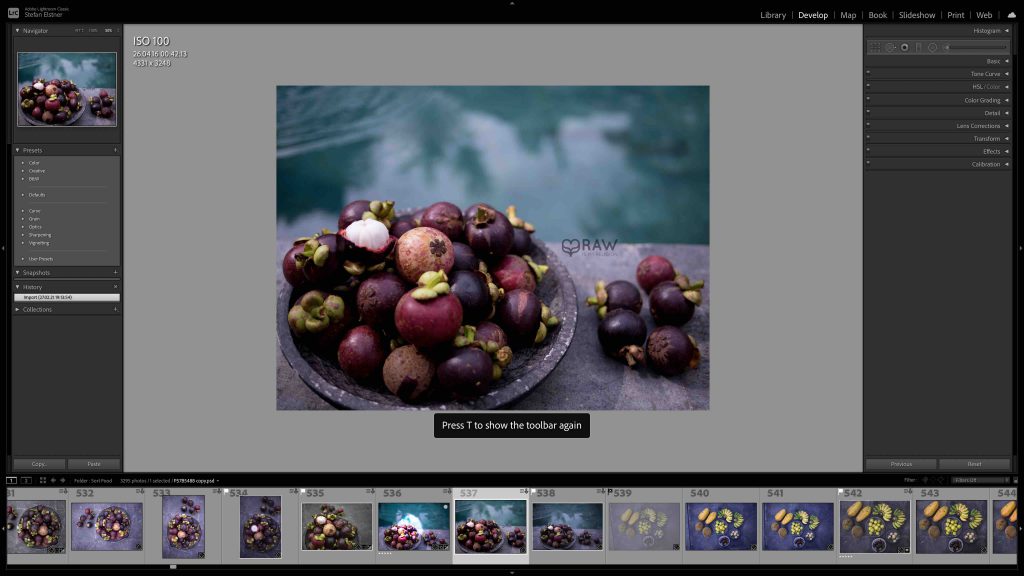
T: Show Toolbar in the Develop Module
Especially while using the Brush Tool I want to highlight the area I worked on. Also the pins of the brushes, when using multiple brushes can be shown or hidden here. Press T to show the Toolbar or to hide it.
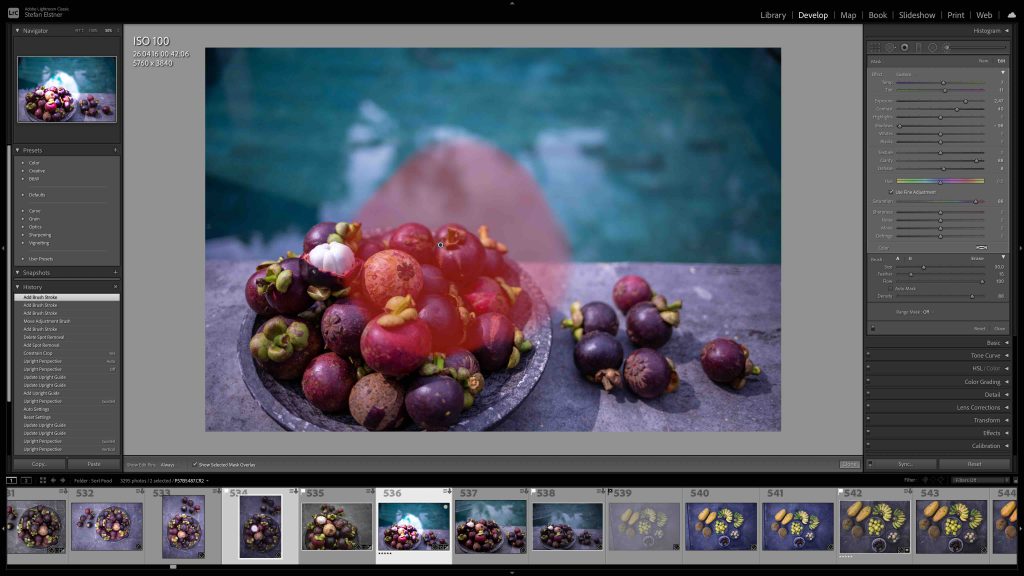
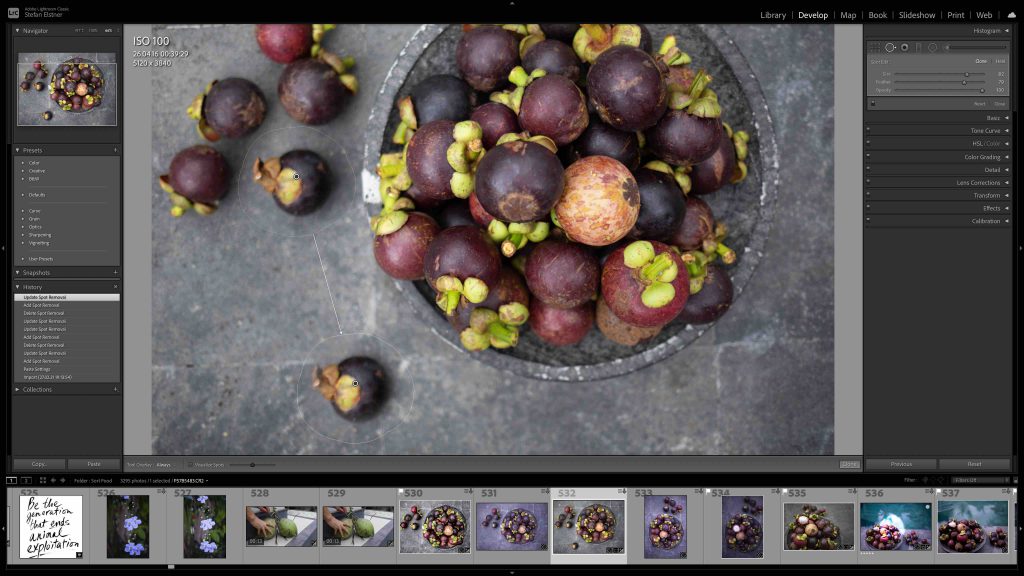
Q : Spot Removal in the Develop Module
Remove the ugly spots, hide object, or ad objects by pressing Q. I use this Spot Removal Tool shortcode especially when editing human skin in photos. Here, I added a mangosteen to the image by using the Spot Removal Tool.
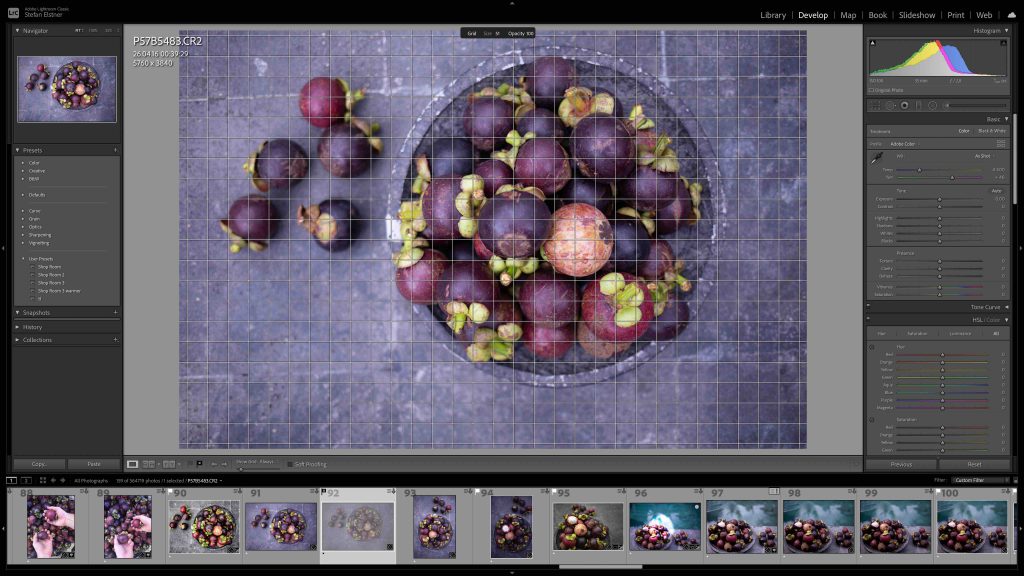
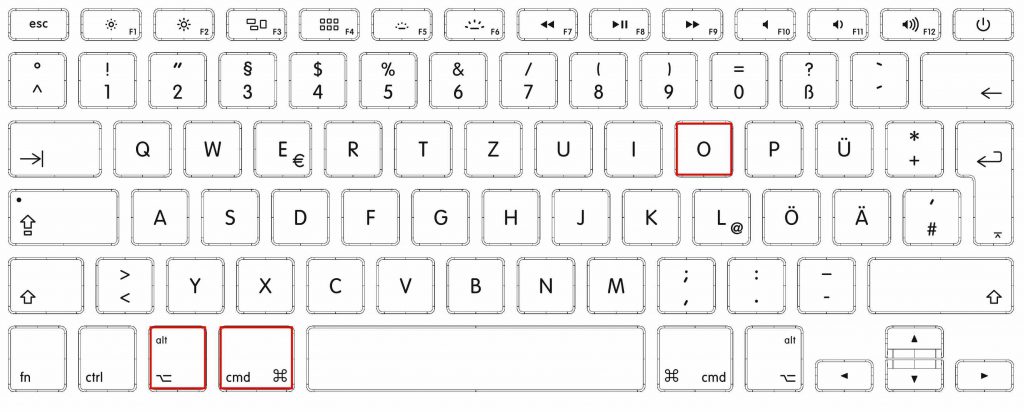
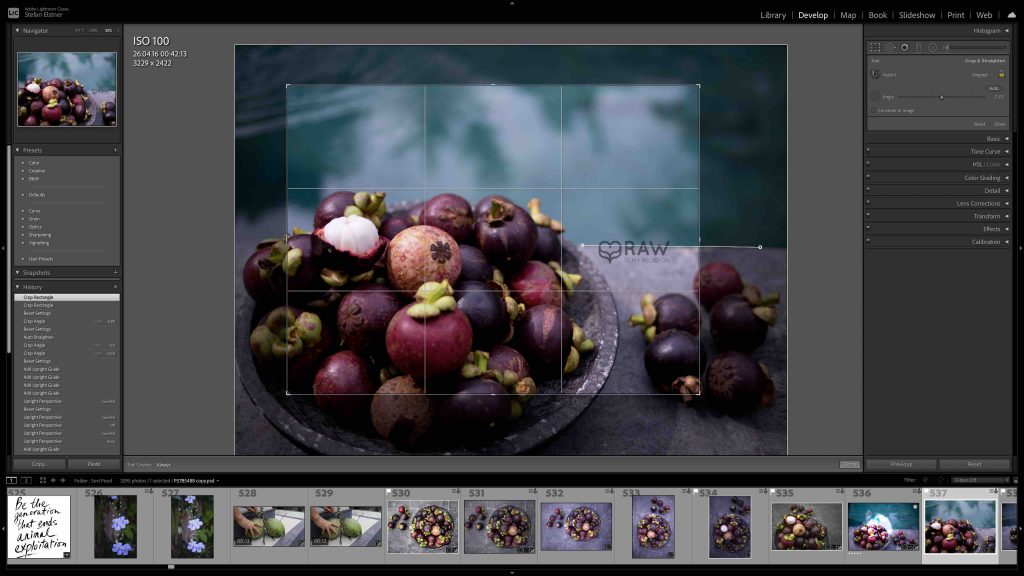
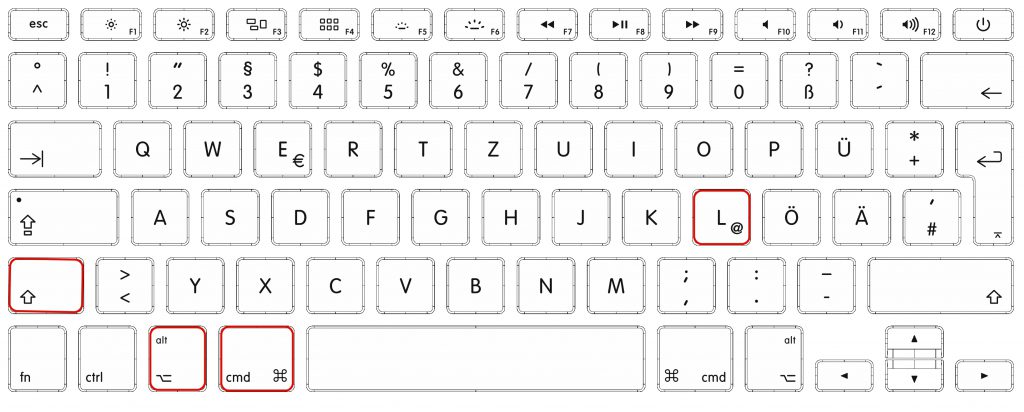
⌥⌘O : Grid Overlay
Helpful visual adjustment guide for straightening the image.
Press ⌥⌘O to ad the grid. Press ⌘ for more options and hold it. A small popup window will appear at the top. You can adjust “Size” or “Opacity” here. Click the number besides one of those, hold and drag left or right.
Press ⌥⌘O to disable the grid.
⌘[ : 90º-Rotate in the Develop Module
If I want to rotate the image by 90º left or right and change the orientation from horizontal to vertical or vertical to horizontal press ⌘[.
Unfortunately, this shortcut will not work with my german keyboard. I I have to take the time consuming Right-Click > Transform>CCW/CW.
It might be the fastest to switch to the Library Module by pressing the G and the E (for the Loupe View = single image). On the bottom toolbar there are rotations symbols. You can enable them by pressing the arrow-down on this toolbar on the right.
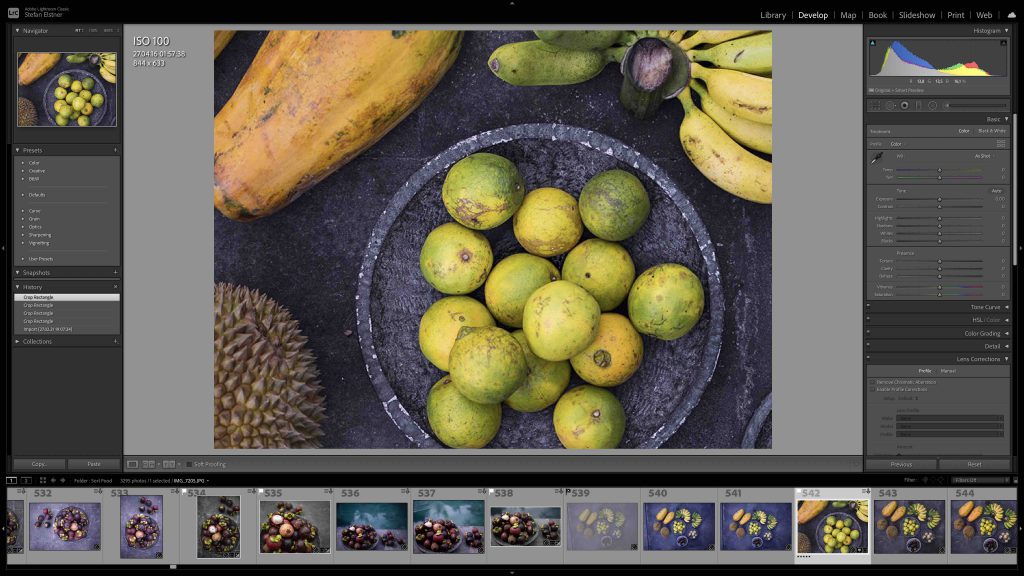
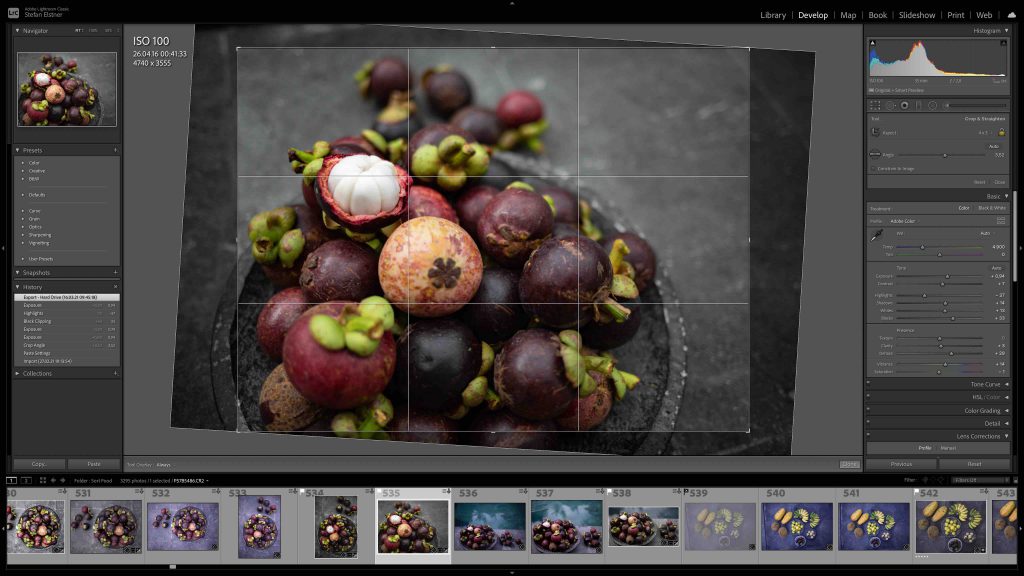
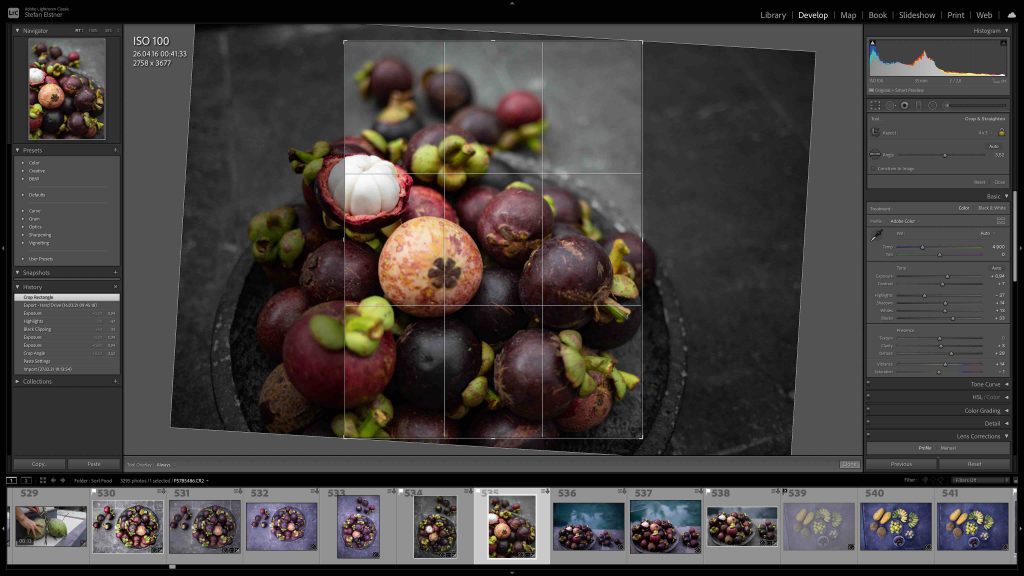
R : Crop in the Develop Module
The shortcode for the Crop Tool is R.
R,⌘: Straighten in the Develop Module
In the Crop Tool, press ⌘ and drag a line to straighten the photo. Really nice shortcode if you take crooked photos sometimes just like me.
R;X : Crop orientation in the Develop Module
In the Crop Tool, press X to change the orientation of the crop selection. Be careful with the X, you could accidentally flag your image as rejected and bulk-delete it later. If it happens, press U to unflag the image.
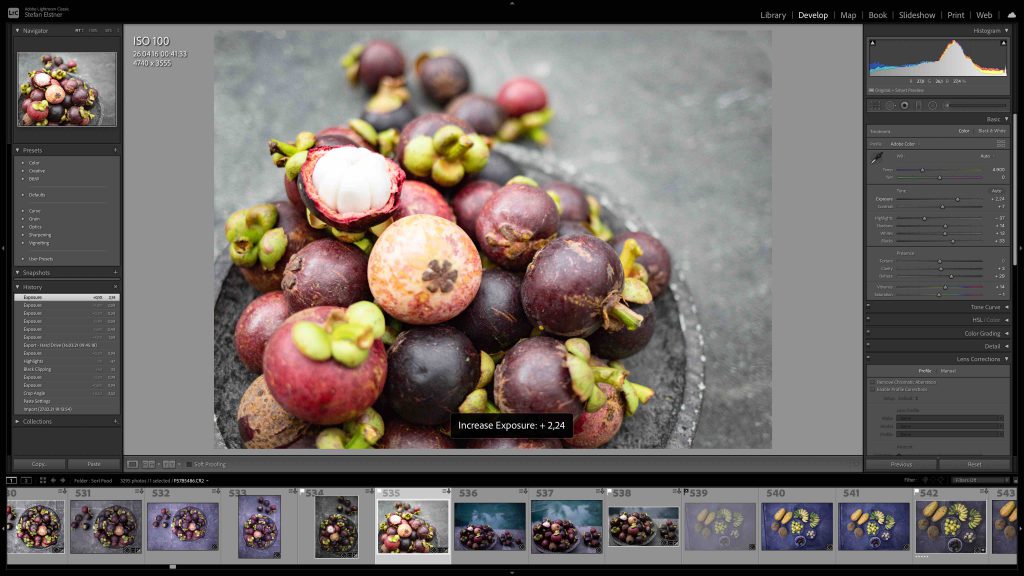
+/- : Exposure in the Develop Module
Quickly change the exposure by pressing + or –.
⌥+/- : Exposure in the Develop Module
Press ⌥ additionally for smaller increments and finer exposure adjustment.
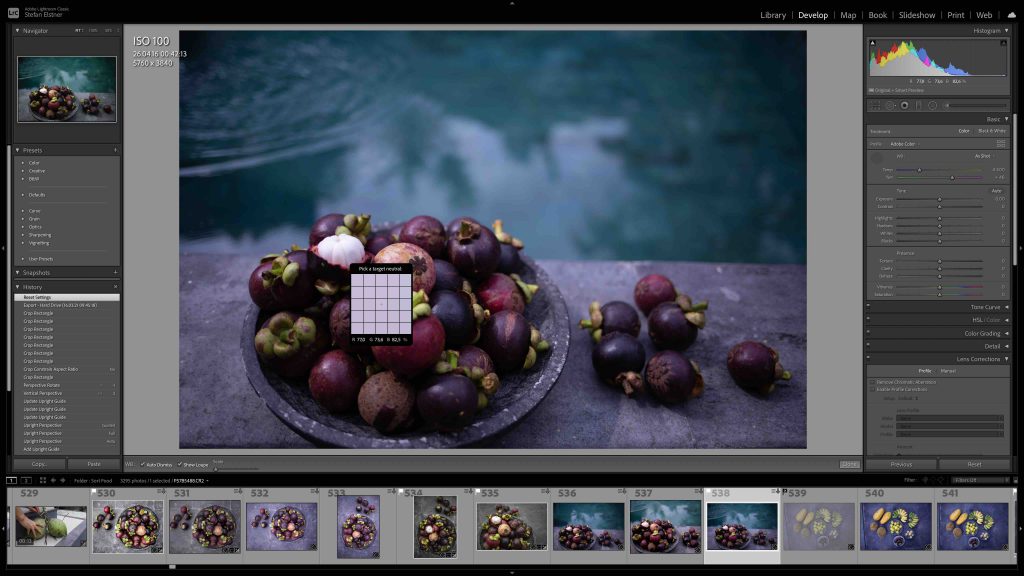
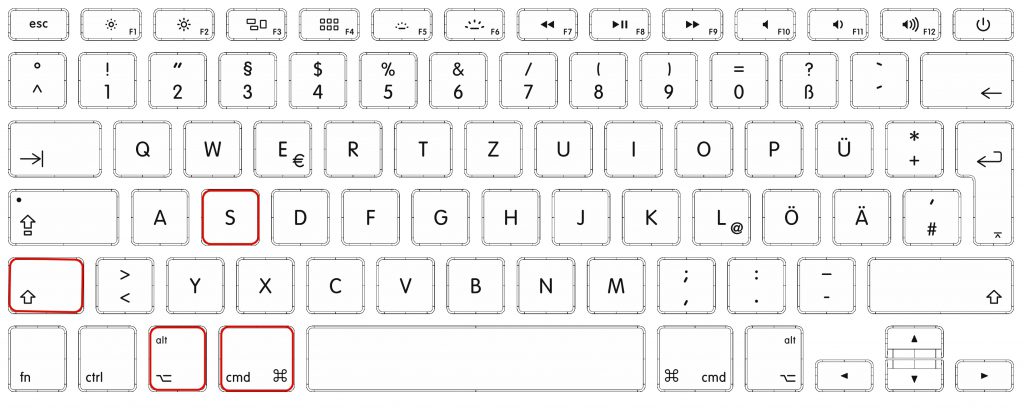
W: White balance Selector in the Develop Module
To activate the white balance eyedropper Selector Tool the eyedropper press W.
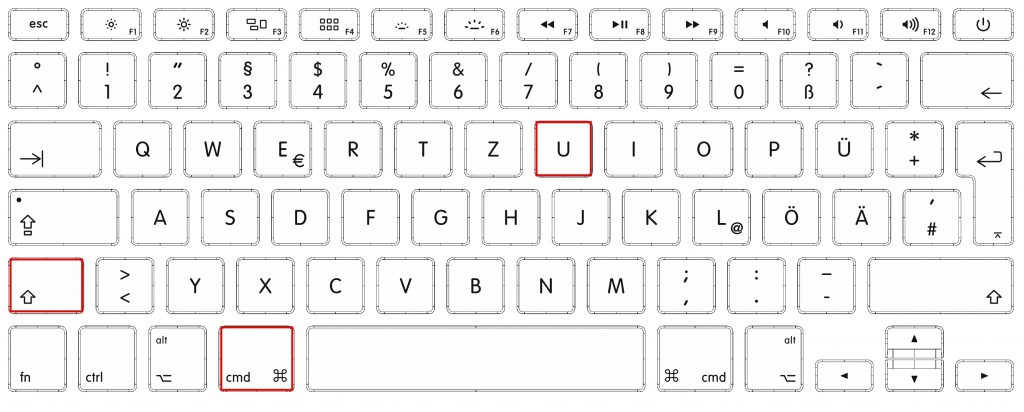
↑⌘U: Auto White Balance in the Develop Module
For auto white balance press ↑⌘U.
⌘Z : Undo in the Develop Module
Undo works in the Develop Module as usual.
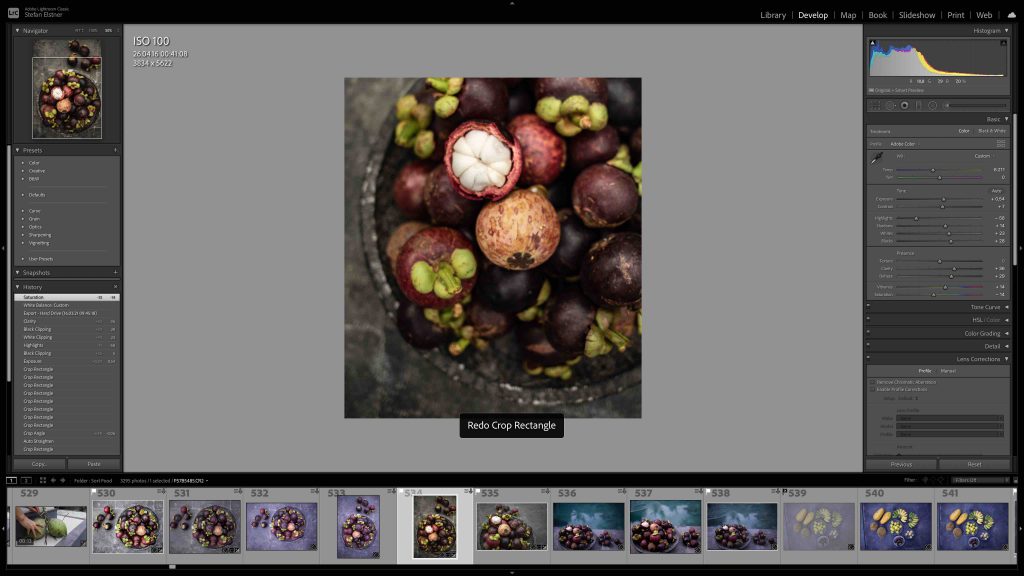
↑⌘Z : Redo
Redo works in the Develop Module as usual.
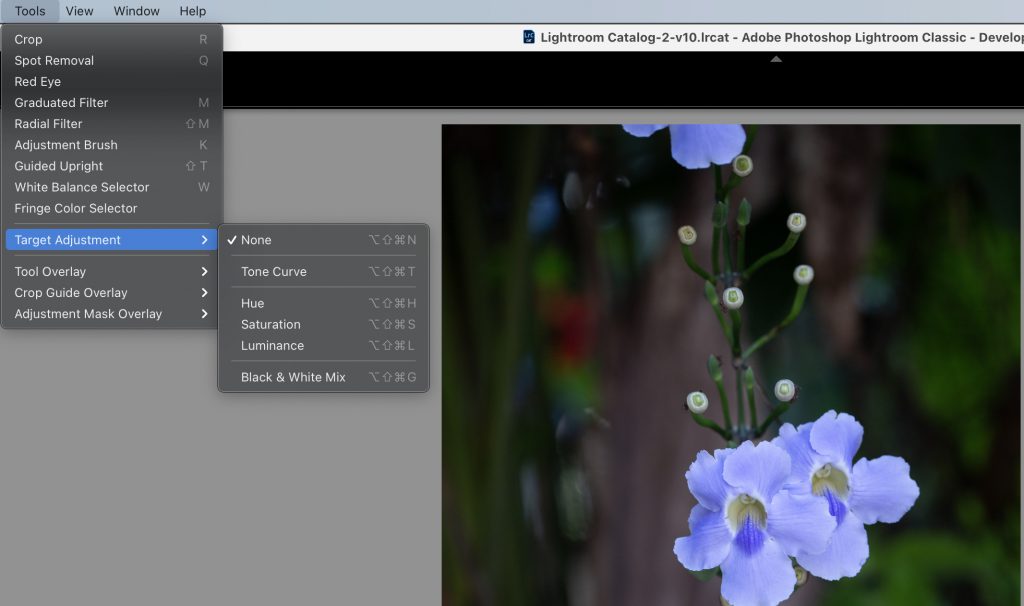
Adjustments in the Develop Module
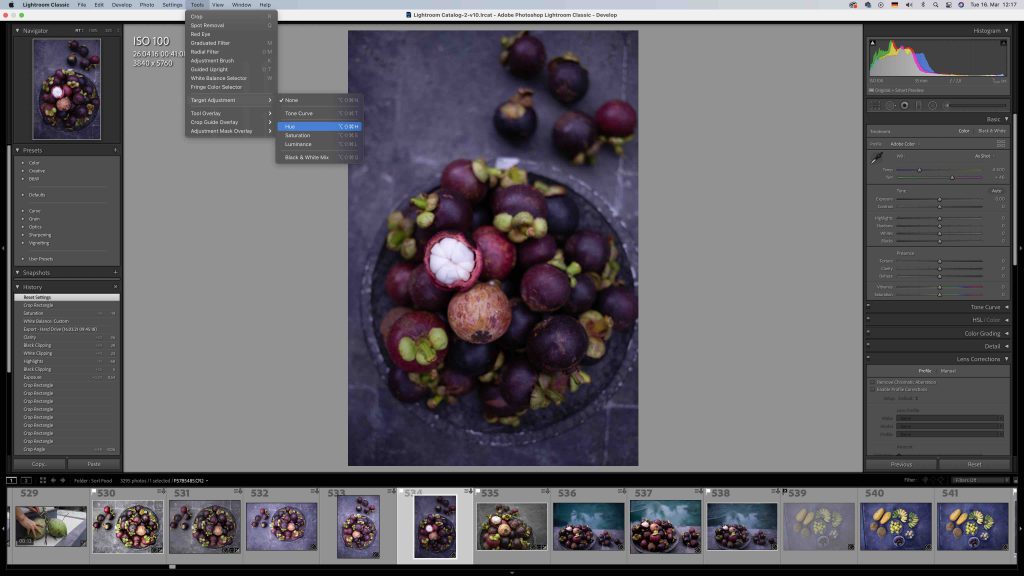
If you like me use the HSL Adjustment Panels all the time, memorise the shortcodes for a faster editing workflow. You will be able to instantly adjust the hue, luminance and the saturation without going back and forth to the panel.
This is the step I would normally spend the most time on, as I like to adjust all 3 for one color before moving on to the next. Went back and forth millions of times before I memorised the shortcodes.
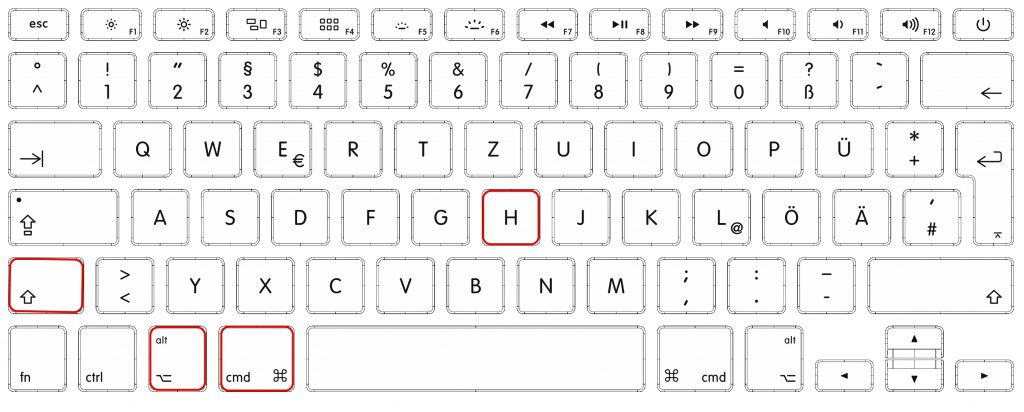
↑⌘⌥H : Hue
↑⌘⌥L : Luminance
↑⌘⌥S : Saturation
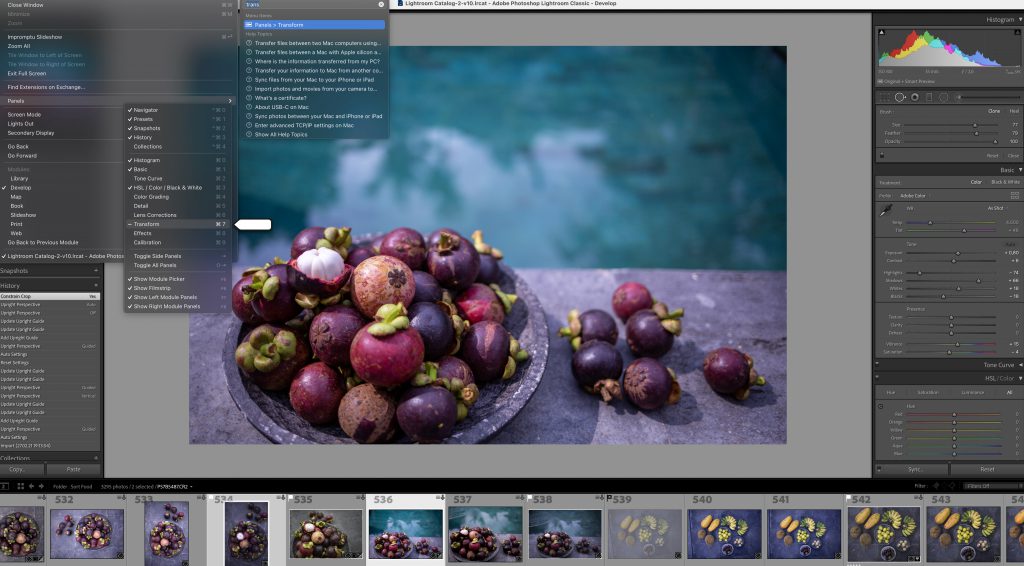
⌘0 – ⌘9: Editing Panels
I don’t use all the editing panels all the time, but I use some of them on every image. The panels can be opened by pressing ⌘0 – ⌘9.
I use ⌘6 for lens correction, ⌘7 opens the transform panel.
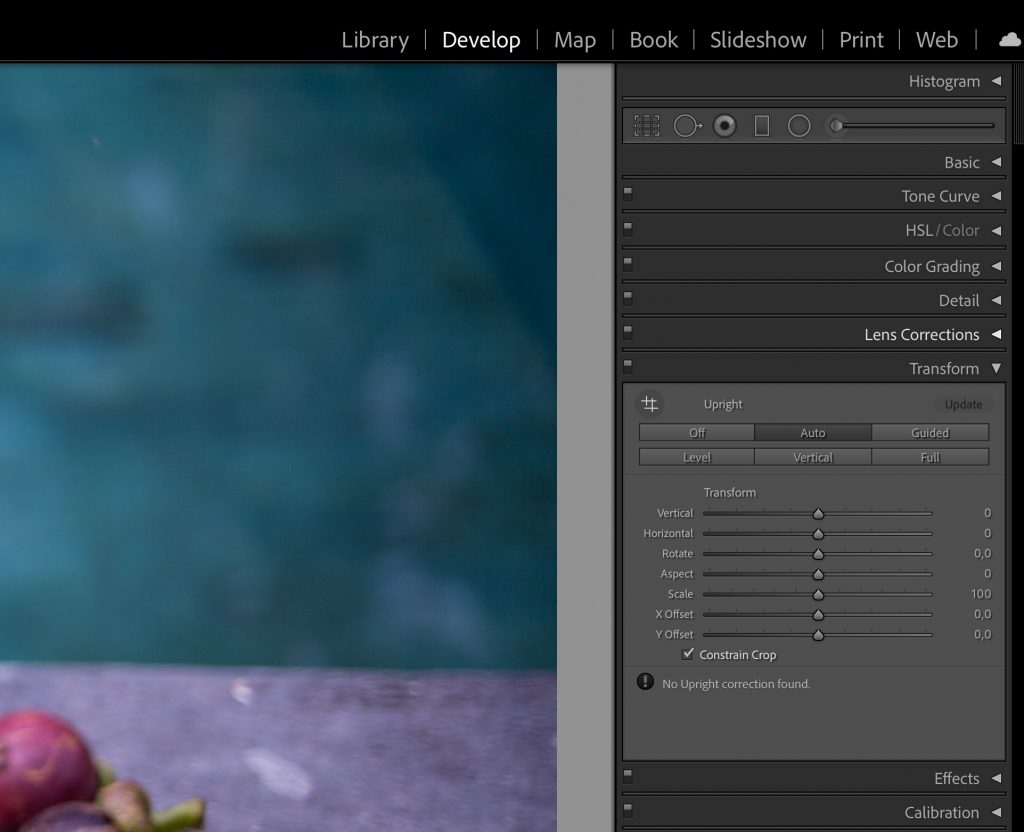
Transform
⌘7: Transform Panel
If my image needs more work than just the auto straightening, I will jump to the transform panel by pressing ⌘7.
↑⌘ E : Export shortcut in Lightroom Develop
Press ↑⌘ E to open the export dialog box.
⌘D: Deselect images before exporting
I sometimes end up exporting 30+ images instead of the one I worked on. The multiple images might have been selected while importing or bulk editing. To prevent annoying bulk export, just press ⌘D to deselect all images and select the one you want to export.
↑⌘ I : Import shortcut in Lightroom Develop
Press ↑⌘ I to bring up the Import Dialogue Box.
Hi lovely people
Welcome to Rawismyreligion! I'm Ina. I love having you here, sharing my lifestyle with you, getting to know you better. You can get in touch with me here on my blog by leaving comments under the posts and on all my social media.
This website uses cookies to improve your experience while you navigate through the website. Out of these, the cookies that are categorized as necessary are stored on your browser as they are essential for the working of basic functionalities of the website. We also use third-party cookies that help us analyze and understand how you use this website. These cookies will be stored in your browser only with your consent. You also have the option to opt-out of these cookies. But opting out of some of these cookies may affect your browsing experience.